2026-04-03
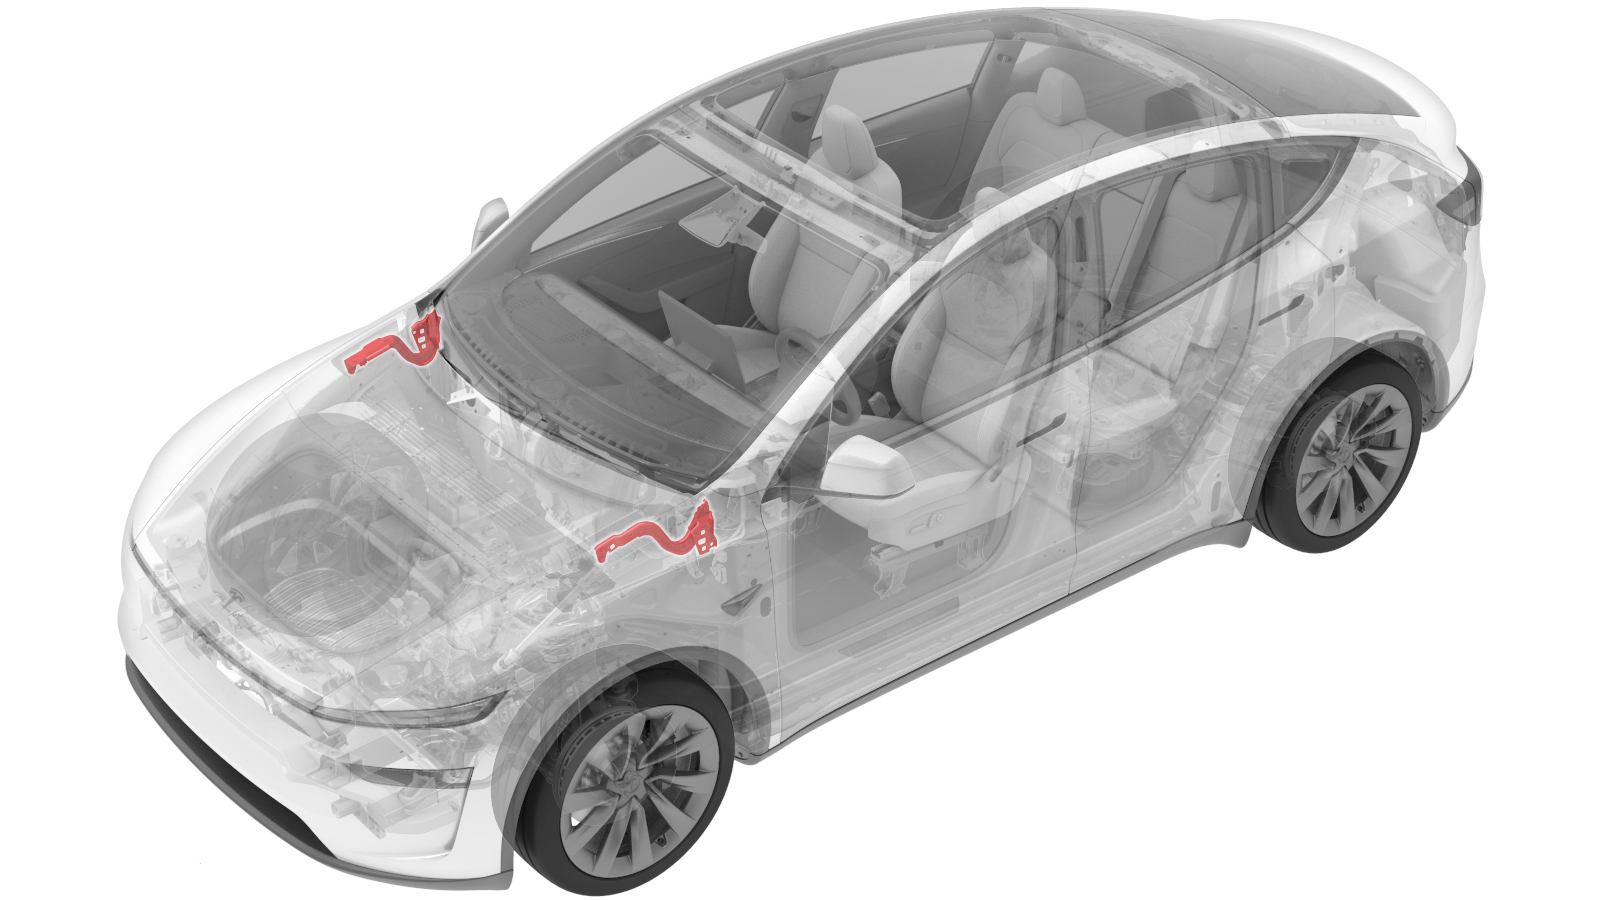
Hood Hinge - LH (Remove and Replace)
 Correction code
1133030102
FRT
0.60
NOTE: Unless otherwise explicitly stated in the procedure, the correction code and FRT listed above reflect all of the work required to perform this procedure, including the linked procedures. Do not stack correction codes unless explicitly told to do so.
NOTE: See Flat Rate Times to learn more about FRTs and how they are created.
NOTE: See Personal Protection to make sure you
are wearing proper PPE when performing the procedure below.
NOTE: See Ergonomic Precautions for safe and healthy working practices.
Correction code
1133030102
FRT
0.60
NOTE: Unless otherwise explicitly stated in the procedure, the correction code and FRT listed above reflect all of the work required to perform this procedure, including the linked procedures. Do not stack correction codes unless explicitly told to do so.
NOTE: See Flat Rate Times to learn more about FRTs and how they are created.
NOTE: See Personal Protection to make sure you
are wearing proper PPE when performing the procedure below.
NOTE: See Ergonomic Precautions for safe and healthy working practices.
Torque Specifications
| Description | Torque Value | Recommended Tools | Reuse/Replace | Notes |
|---|---|---|---|---|
| Nuts (x4) that attach the hood to the LH and RH hood hinges |
 27 Nm (19.9 lbs-ft) |
|
Reuse | |
| Bolts (x2) that attach the LH hood hinge to the body |
25 Nm (18.4 lbs-ft) |
|
Reuse |
Remove
- Remove the HEPA filter assembly. See HEPA Filter Assembly (Remove and Replace).
- Remove the wiper module. See Wiper Module - LHD (Remove and Replace).
-
Apply tape surrounding the hood hinge to keep accurate alignment.
-
With assistance, remove the nuts (x4)
that attach the hood to the LH and RH hood hinges.
TIpUse of the following tool(s) is recommended:
- 13 mm deep socket
-
With assistance, remove the hood
assembly from the vehicle, and then place it on a padded surface.
-
Use a small screwdriver or a long pick tool to release the clip that attaches the LH
gas strut to the hood hinge.
-
Apply masking tape to the LH hinge location to aid in alignment during
installation.
-
Remove the bolts (x2) that attach the LH hood hinge to the body.
TIpUse of the following tool(s) is recommended:
- 13 mm socket
-
Remove the LH hood hinge from the vehicle.
Install
- Position the LH hood hinge according to the tape.
-
Install the bolts (x2) that attach the LH hood hinge to the body.25 Nm (18.4 lbs-ft)TIpUse of the following tool(s) is recommended:
- 13 mm socket
- Remove the masking tape around the hinge mount.
-
Install the gas strut onto the LH hood hinge mount.
NoteInstall the rod end of the hood strut to the hood hinge. Make sure the retaining clips are closed before installing.
- Install the wiper module. See Wiper Module - LHD (Remove and Replace).
- Install the HEPA filter assembly. See HEPA Filter Assembly (Remove and Replace).
-
With assistance, hand-tighten the nuts (x4) that attach the hood to the LH and RH
hood hinges.
-
Close the hood and verify the hood fitment is within specification.
Note
- Open the hood and make adjustments if necessary.
-
Torque the nuts (x4) that attach the hood to the LH and RH hood hinges.27 Nm (19.9 lbs-ft)TIpUse of the following tool(s) is recommended:
- 13 mm deep socket
- Use IPA wipes to clean all the 4 nuts that attach the hood to the hood hinges, the washer, and the surrounding area, and wait for 1-minute dry time.
- Shake the touch up paint, and then apply the paint to the LH hood hinge nuts and bolts. Wait for some time to dry.
- Remove the masking tape from the hood-hinge-to-hood nuts area.
- Close the hood.
- Raise the LH front window and close the LH front door.