2026-03-05
Hose - Coolant Bundle - HV Battery (Long Range) (Remove and Install)
 Correction code
18302600501,
18302600502
2.04
NOTE: Unless otherwise explicitly stated in the procedure, the correction code and FRT listed above reflect all of the work required to perform this procedure, including the linked procedures. Do not stack correction codes unless explicitly told to do so.
NOTE: See Flat Rate Times to learn more about FRTs and how they are created.
NOTE: See Personal Protection to make sure you
are wearing proper PPE when performing the procedure below.
NOTE: See Ergonomic Precautions for safe and healthy working practices.
Correction code
18302600501,
18302600502
2.04
NOTE: Unless otherwise explicitly stated in the procedure, the correction code and FRT listed above reflect all of the work required to perform this procedure, including the linked procedures. Do not stack correction codes unless explicitly told to do so.
NOTE: See Flat Rate Times to learn more about FRTs and how they are created.
NOTE: See Personal Protection to make sure you
are wearing proper PPE when performing the procedure below.
NOTE: See Ergonomic Precautions for safe and healthy working practices.
Warning
This procedure is a DRAFT.
Although it has been validated, Warnings and Cautions might be missing. Follow safety
requirements and use extreme caution when working on or near High Voltage systems and
components.
Warning
Cybertruck electronics are powered by a
48V "mid voltage" or "MV" architecture that is designed to improve efficiency. Servicing
MV components requires extra knowledge and care in order to avoid personal and/or
vehicular harm. Read and understand MV precautions in Electrical Precautions and make sure any required
MV-related training courses have been completed, as applicable.
- 2025-06-21: Released new procedure.
- This procedure requires Refrigerant evacuation and recharge, please add specific evacuation and recharge correction code as needed
-
Set up AC machine
NoteTouch time only, Connect to power, Turn power switch on
-
Raise and support vehicle
NoteSet air suspension to "Jack Mode"
-
Open LH front door
NotePush LH B-pillar door trigger to release
-
Lower LH front window
-
Open RH front door
NotePush RH B-pillar door trigger to release
-
Lower RH front window
- Run ODIN routine PROC_ICE_X_ENTER-SERVICE-MODEvia Toolbox:(link)
-
Unlock vehicle gateway
NoteAfter vehicle has been put into "Service Mode", place keycard on center console to turn on drive rails, hold down the brake pedal, while keep pressing right hand signal button simultaneously for at least 10 seconds, "GTW UNLOCKING" should pop up on the UI right next to the VIN during these 10 seconds, once gateway is unlocked "GTW UNLOCKED 5400" will be displayed on the UI next to the VIN, the gateway will remain unlocked for 90 minutes, follow steps on Toolbox article #5582900 for any additional information
-
Navigate to Refrigerant System through UI
NoteSelect Service Mode > Thermal > Refrigerant System
-
Select "Start Thermal Fill Drain (Coolant and Refrigerant)" through UI
NoteAllow routine to complete, ensure routine is successful
-
Open powered front trunk
NoteVia exterior switch or UI
-
Power down vehicle via UI
NoteVerify EPBs are engaged, Select charge port icon to ensure drive state is disengaged then power down vehicle via Controls > Safety > Power Off
-
Remove rear underhood apron
Note9x clips
-
Disconnect FRL connector then disconnect MV battery connector
Note2x connectors, Release locking tab then disconnect FRL connector, Slide eCPA to left then lift lever to release MV battery connector, Early production trucks may have black FRL connector, Release eCPA by pushing down to unlock and slide red locking tab, Wait 2 minutes for electrical circuits to discharge before disconnecting modules
-
Raise vehicle fully
NoteSet to a comfortable working height, Lower to locks, Ensure locks engage on both sides to prevent tilting
-
Remove lower valence fasteners
Note2x clips, 2x covers, 6x bolts, 10mm, 6 Nm, Release covers to expose bolts
-
Remove front aero shield
Note11x bolts, 10mm, 6 Nm
-
Disconnect CFM connectors
Note2x connectors, 2x clips
-
Remove fore crossmember fasteners
Note2x bolts, 18mm, 90 Nm
-
Place coolant catcher below RH front of vehicle
-
Disconnect battery coolant supply and return hoses
Note2x edge clips, 2x spring clips, Use caution with pick near HV harness, Release edge clips from casting, Plug Hoses, Position coolant drain as needed
-
Lower vehicle until tires are touching the ground
NoteRaise lift off locks, then hold lock release lever to keep locks free while vehicle is lowered
-
Remove caps from low side and high side AC ports
Note2x caps
-
Connect A/C hoses to ports
NotePull back frunk wall if installed to access low side port
-
Perform refrigerant system recovery
NoteNote or print the amount of refrigerant and oil recovered, If drained oil level increased more than 1.01 oz (30 mL) refer to drained oil loss chart https://toolbox.teslamotors.com/articles/353700
-
Remove frunk assembly
Note6x bolts, 10mm, 12 Nm, 2x bolt caps, 2x bumpstops, 1x connector, Remove bolt covers from frunk floor, Remove washer fluid cap by gently prying upwards, Rotate bumpstops counter clockwise to release, the 25mm socket from PT Sensor kit can be used, Avoid straining emergency frunk release connector
-
Remove front center applique
Note8x tabs, 1x connector, Release upper 4 tabs by pushing down then gently pull away, Release frunk release trigger connector
-
Remove front fascia fasteners
Note2x covers, 6x bolts, 10mm, 4 Nm, Remove tow hook covers to expose bolts
-
Release clips securing front portion of the LH front wheel house liner
Note4x clips
-
Remove front fascia LH side fastener
Note1x bolt, 10mm, 6 Nm, Pull wheel liner back for access
-
Release clips securing front portion of the RH front wheel house liner
Note4x clips
-
Remove front fascia RH side fastener and connectors
Note1x bolt, 10mm, 6 Nm, 1x clip, 3x connectors, Pull wheel liner back for access, Pull red locking tab to release, Do not push down on locking tab
-
Remove front lower fascia assembly
NotePlace on suitable protective surface
-
Disconnect the powertrain bypass hose, radiator outlet hose, radiator inlet hose from the Supermanifold
Note3x spring clips, This will drain the coolant reservoir
-
Disconnect radiator to manifold hose from radiator and plug connections
Note1x spring clip, Remove from vehicle, Plug hoses
-
Disconnect manifold to radiator hose from radiator and plug connections
Note1x spring clips, Plug hoses
-
Release harness from CFM
Note1x grommet, 2x connectors, 5x harness clips, Pull red locking tab to disengage louver connector, Release temperature sensor then disconnect, Release grommet and pull harness through from frunk area
-
Remove upper CFM fasteners
Note2x bolts, 10mm, 10 Nm
-
Remove fore crossmember
NoteLift CFM up as required for additional clearance, Use of a dead blow hammer can aid removal
-
Remove CFM
NoteRecommend assistance, Remove from below impact beam, Ensure harness is not pinched during removal
-
Disconnect supermanifold harness
Note1x connector
-
Remove bolts securing supermanifold
Note2x bolts, 15mm, 33 Nm, Break free then remove by hand to avoid tool jamming, Support manifold from underneath, Lower Supermanifold until resting on HVAC case
-
Disconnect battery supply hose, powertrain supply hose, and battery return hose from supermanifold
Note3x spring clip, 2x connectors, Do not push down on red tab, Pull red tab to disengage lock, Pull again to release connector, Pull supermanifold forward to access clips and connectors
-
Remove LH mid A-pillar trim
Note1x clip, 3x tabs, Release tabs then slightly bend live hinge and release clip
-
Remove LH lower A-pillar trim
Note7x clips, 3x datums, 2x tabs, Release sill plate, Pull rearward then upward
-
Remove footwell cover
Note3x clips, 3x magnets, 1x bolt, 10mm, 3 Nm, Bolt is captive to tether
-
Remove RH mid A-pillar trim
Note1x clip, 3x tabs, Release tabs then slightly bend live hinge and release clip
-
Remove RH lower A-pillar trim
Note7x clips, 3x datums, 2x tabs, Release sill plate, Pull rearward then upward
-
Remove Mid IP panel
Note19x clips
-
Remove lower IP panel
Note4x patch bolts, 10mm, 7 Nm, 4x screws, T20, 2 Nm, 15x panel clips, 1x push clip, 4x connectors, Discard patch bolts after removal, Release LH/RH knee air bag harness from the main IP harness buddy clips, Remove blue tape to allow service slack & prevent stress to knee air bag connectors, Release connector locking tabs, Release OBD port from lower IP
-
Remove RH EPP clip
Note1x clip, Pull back for access to car computer
-
Disconnect glovebox USB connector
Note1x connector, Release locking tab
-
Remove glovebox
Note1x connectors, 1x clip, 5x screws, T20, 2 Nm, 2x datums
-
Place absorbant mats under car computer
NoteEnsure coolant will not spill onto electrical components
-
Disconnect car computer coolant hoses
Note2x spring clips, Remove lower hose first then upper hose, Plug hoses, Use a coolant jug to catch as much coolant as possible, Tuck hoses out of way once plugged
-
Remove car computer hose grommet from bulkhead
NotePush grommet outwards into frunk area, Pull hoses through to frunk area
-
Remove AC hoses from vehicle
-
Remove nut securing Penta HVAC line assembly to the Supermanifold plate
Note1x nut, 13mm, 36 Nm
-
Remove AC line from Supermanifold
Note1x bolt, 13mm, 22 Nm, 1x bolt, 10mm, 8 Nm, Remove bolt at supermanifold then mounting bracket bolt near LV battery, Remove AC line assembly from supermanifold, Ensure no washers remain on supermanifold
-
Remove the Supermanifold from the vehicle
NoteRecommend assistance, Rotate the Supermanifold counter clockwise under the Megabeam, Support from underneath and at reservoir
-
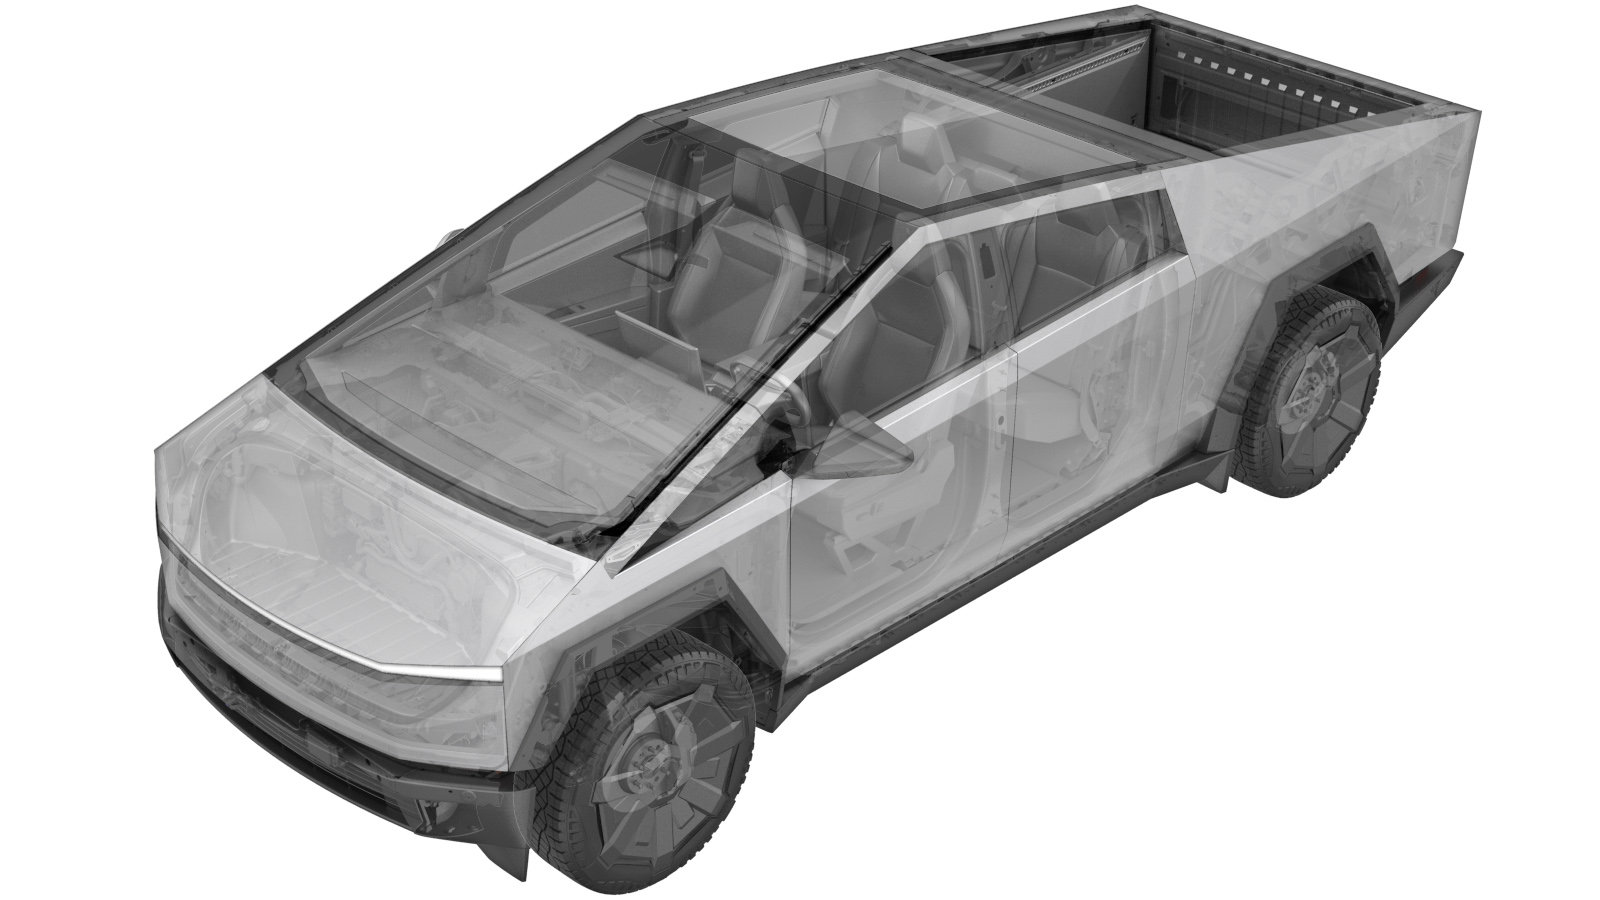
Remove coolant hose bundle
Note1x breather fitting, 2x clips, Release breather from front drive unit, Release clips then remove coolant hose bundle, Pull HV battery coolant hoses upwards from behind front drive unit, Manipulate as required, Vehicle shown further disassembled for clarity
-
Install coolant hose bundle
Note1x breather fitting, 2x clips, Manipulate hoses as required to place in position, Secure edge clips to HVAC case, Secure front drive unit breather, Vehicle shown further disassembled for clarity
-
Replace the seal washers to the Penta HVAC line on the AC manifold side
Note5x seal washers, Lube seal washers with RB100EV POE oil
-
Install the Supermanifold to the vehicle
NoteRecommend assistance, Rotate the Supermanifold counter clockwise under the Megabeam, Support from underneath and at reservoir, Align penta HVAC line
-
Secure chiller to battery hose, powertrain supply hose, chiller to battery hose to supermanifold
Note3x spring clip, 2x connectors, Engage locking tabs, Ensure all hoses are fully engaged with a push-pull-push test
-
Install pentaline to Supermanifold
Note1x nut, 13mm, 36 Nm, Ensure good alignment of pipes before tightening nut
-
Install bolts securing supermanifold
Note2x bolts, 15mm, 33 Nm, Start by hand
-
Install CFM
NoteInstall from bottom, Assistance recommend Manipulate as required, Ensure harness is not pinched during install
-
Install fore crossmember
NoteInstall fasteners at a later step, Lift CFM upwards as required for clearance, Tap into position with dead blow hammer if required
-
Install upper CFM fasteners
Note2x bolts, 10mm, 10 Nm
-
Secure harness to CFM
Note1x grommet, 2x connector, 1x harness clip, Secure grommet then connect temperature sensor, Engage locking tab on louver connector
-
Connect radiator inlet coolant hose
Note1x spring clips,Ensure hose is fully engaged with a push-pull-push test
-
Connect radiator to manifold hose to radiator
Note1x spring clip, Ensure hose is fully engaged with a push-pull-push test
-
Secure powertrain bypass hose, radiator outlet hose, and radiator inlet hose to Supermanifold
Note3x spring clips, Ensure all hoses are fully engaged with a push-pull-push test
-
Connect supermanifold electrical connector
Note1x connector
-
Replace seal washers for supermanifold to compressor AC line on supermanifold side
Note2x seal washers, Lube seal washers with RB100EV POE oil
-
Install AC manifold line assembly to Supermanifold
Note1x bolt, 13mm, 22 Nm, 1x bolt, 10mm, 8 Nm, Install manifold to Supermanifold then secure bracket near LV battery
-
Raise vehicle fully
NoteSet to a comfortable working height, Lower to locks, Ensure locks engage on both sides to prevent tilting
-
Connect battery supply and return coolant hoses
Note2x edge clips, 2x spring clips, Remove plugs, Secure edge clips to casting, Perform a push-pull-push test to ensure hose is engaged
-
Connect CFM connectors
Note2x connectors, Engage locking tab
-
Install fore crossmember fasteners
Note2x bolts, 18mm, 90 Nm, Shift crossmember as required to align bolt holes
-
Install front aero shield
Note11x bolts, 10mm, 6 Nm, Apply loctite 222 to aeroshield fasteners
-
Install lower valence fasteners
Note2x clips, 2x covers, 6x bolts, 10mm, 6 Nm, Secure covers
-
Lower vehicle until tires are touching the ground
NoteRaise lift off locks, then hold lock release lever to keep locks free while vehicle is lowered
-
Reconnect AC hoses to vehicle
-
Perform system vacuum and refrigerant refill
NoteSelect 20 mins of Vacuum, Recharge refrigerant to car's specs, add oil quantity as needed, select both HP and LP for charging
-
Remove AC hoses from vehicle
-
Remove coolant bottle cap
-
Install vacuum refill cap onto coolant bottle assembly
-
Place empty coolant container into front storage area
NoteIf frunk is not installed take caution, CFM fan shroud assembly cannot support a full coolant container, Ensure overflow container is empty, Place fender cover over FEM and front fascia
-
Fill container with at least 15L of coolant
-
Place filled coolant container onto coolant drain & fill cart
NoteDo not place container with 15L of coolant on top of CFM fan shroud, Position cart as close as possible to front of vehicle
-
Setup coolant refill tool
NoteVerify all valves on refill tool are in the closed position, See image for clarity
-
Install vacuum refill hose to refill cap on coolant bottle
NotePerform push-pull-push test to verify hose is fully installed
-
Position overflow hose into empty container
-
Place refill hose inside filled coolant container
NoteMake sure hose end is fully submerged into coolant
-
Connect shop air supply to coolant refill tool
NoteIf not already done, Verify refill valve is set to off
-
Open air inlet valve to draw a vacuum, Once gauge stabilizes, Fully close valve
NoteGauge stabilizes roughly (60-70 cmHg), Vacuum should not drop after the valves are closed
-
Slowly open the refill valve to allow coolant to be drawn into the system
NoteMake sure hose end of refill hose is fully submerged during entire process
-
Once the gauge reads zero, close the coolant refill valve
-
Remove shop air supply to coolant refill tool
NoteIf not already done, Verify refill valve is set to off
-
Remove coolant refill hose from coolant container
-
Remove coolant overflow hose from coolant container
-
Remove vacuum refill hose from refill cap on coolant bottle
-
Remove vacuum refill cap from coolant bottle assembly
-
Remove coolant refill tool from vehicle
NoteMove coolant drain & fill cart away from vehicle
-
Remove coolant container from inside underhood area
-
Inspect coolant level and top off as necessary
NoteEnsure that the fluid level is at the Max line, Top off fluid as required
-
Install front lower fascia assembly
NoteEnsure no harnesses are pinched
-
Install RH fascia fastener and connectors
Note1x bolt, 10mm, 6 Nm, 1x clip, 3x connectors, Pull wheel liner back for access, Engage locking tab
-
Secure RH wheel liner
Note4x clips
-
Install LH fascia fastener
Note1x bolt, 10mm, 6 Nm, Pull wheel liner back for access
-
Secure LH wheel liner
Note4x clips
-
Install front fascia fasteners and covers
Note2x covers, 6x bolts, 10mm, 4 Nm, Install tow hook covers
-
Install front center applique
Note8x tabs, 1x connector, Ensure all tabs engage, Secure frunk release trigger connector
-
Connect FRL connector then connect MV battery connector
Note2x connectors, Connect FRL connector then secure locking tab, Position lever to secure MV battery connector then slide eCPA to right, Early production trucks may have black FRL connector, If power cycling vehicle then ensure at least 60 seconds has passed since powering down
-
Access thermal system routines using the UI
NoteSelect quick controls > Service mode > Thermal > Actions
-
Run ODIN routine
PROC_EGGRIGHT3_X_THERMAL-FILL-DRAIN-STOPvia Service Mode:
- Thermal ➜ Actions ➜ Stop Thermal Fill/Drain
- Thermal ➜ Coolant System ➜ Stop Coolant Fill/Drain
- Thermal ➜ Refrigerant System ➜ Stop Refrigerant Fill/Drain
- Drive Inverter ➜ Front Drive Inverter Replacement ➜ Stop Fluid Fill/Drain
- Drive Inverter ➜ Rear Drive Inverter Replacement ➜ Stop Fluid Fill/Drain
- Drive Inverter ➜ Rear Left Drive Inverter Replacement ➜ Stop Fluid Fill/Drain
- Drive Inverter ➜ Rear Right Drive Inverter Replacement ➜ Stop Fluid Fill/Drain
- Drive Unit ➜ Front Drive Unit Replacement ➜ Stop Coolant Fill/Drain
- Drive Unit ➜ Rear Drive Unit Replacement ➜ Stop Coolant Fill/Drain
-
Perform Heat Pump Commissioning through UI
NoteSelect Thermal > Sensors and Valves > Run Heat Pump Commissioning, click Run, close once routine is passed
-
Install caps onto AC ports
Note2x caps
-
Select "Start Coolant Air Purge" using the UI
NoteTouch time only, wait until coolant pumps stop running (audible noise), Routine Passed will appear, but pumps will run for 10 minutes, If you start next another routine during this time it will fail, Make sure vehicle is not in "Drive", Routine is still running despite the completed message, Speeds can be monitored in garage under PT Thermal tab, Idle speed = ~1500 RPM, Test will vary speeds from 3500-6500 RPM and actuate valves between SERIES and PARALLEL, Putting vehicle into "Drive" will stop this routine, If speeds hover at 7000 RPM, this indicates the pumps are air locked, perform a vacuum fill, Continue to add coolant and purge until the coolant level reaches between the NOM and MAX Lines on the bottle
-
Inspect coolant level and top off as necessary
NoteEnsure that the fluid level is at the Max line, Top off fluid as required
-
Install coolant bottle cap
-
Perform Thermal Performance through the UI
NoteSelect Thermal > Actions > Test Thermal Performance, click Run, close once routine is completed, if thermal test fails follow https://toolbox.teslamotors.com/articles/206000
-
Install frunk assembly
Note6x bolts, 10mm, 12 Nm, 2x bolt caps, 2x bumpstops, 1x connector, Install bolt covers to frunk floor, Install washer fluid cap, Install bumpstops by aligning tabs then turning clockwise, Ensure emergency frunk release functions
-
Install rear underhood apron
Note9x clips, Adjust windshield seal as required
-
Close powered front trunk
NoteVia exterior switch or UI
-
Raise RH front window
-
Close RH front door
-
Remove vehicle from lift
NoteLower rack arms fully and remove them from under vehicle, Remove air suspension from "Jack Mode"
- Run ODIN routine PROC_ICE_X_EXIT-SERVICE-MODEvia Toolbox:(link)
-
Raise LH front window
-
Close LH front door
-
This procedure requires Refrigerant evacuation and recharge, please add specific evacuation and recharge correction code as needed
Note18200102,18033302,18033305,18200122**Always use this Step ID**