Brake Lines - Master Cylinder to ABS (Non-Structural Pack) LHD) (Remove and Replace)
 Correction code
33034002
1.62
NOTE: Unless otherwise explicitly
stated in the procedure, the above correction code and FRT reflect all of the work
required to perform this procedure, including the linked procedures. Do not stack correction codes unless
explicitly told to do so.
NOTE: See Flat Rate
Times to learn more about FRTs and how they are created.
NOTE: See Personal Protection to make sure wearing proper PPE when
performing the below procedure. NOTE: See Ergonomic Precautions for safe and healthy working
practices.
Correction code
33034002
1.62
NOTE: Unless otherwise explicitly
stated in the procedure, the above correction code and FRT reflect all of the work
required to perform this procedure, including the linked procedures. Do not stack correction codes unless
explicitly told to do so.
NOTE: See Flat Rate
Times to learn more about FRTs and how they are created.
NOTE: See Personal Protection to make sure wearing proper PPE when
performing the below procedure. NOTE: See Ergonomic Precautions for safe and healthy working
practices.
- 2025-06-26: Modified brake bleeding method to bleed through inner valves only.
Remove
- Open the LH front door and lower the LH front window.
- Remove the rear underhood apron. See Underhood Apron - Rear (Remove and Replace).
- Remove the underhood storage unit. See Underhood Storage Unit (Remove and Replace).
- Disconnect 12V power. See 12V/LV Power (Disconnect and Connect).
- Remove the 12V battery. See 12V/LV Battery (Remove and Replace).
- Remove the front aero shield. See Panel - Aero Shield - Front (Non-Structural Pack) (Remove and Replace).
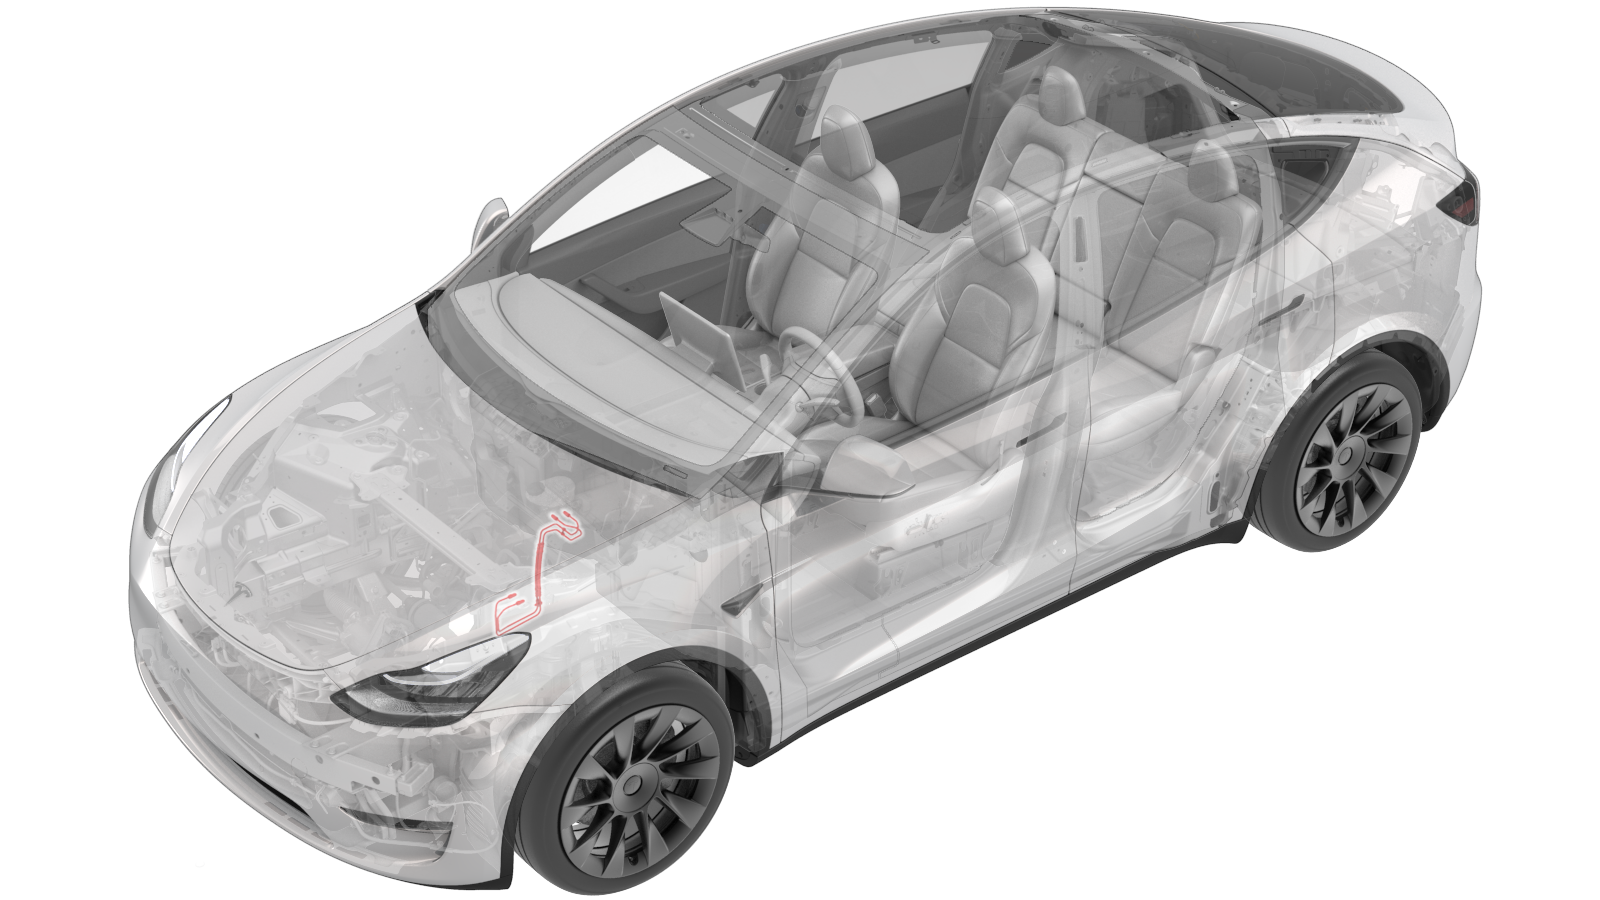
-
Remove the LH and RH bolts that attach
the shock tower brace to the body.
 55 Nm (40.6 lbs-ft)55 Nm (40.6 lbs-ft)
 -
Remove the LH and RH outer bolts that
attach the shock tower brace to the body, and then slide the LH side of the brace
forward to allow access to the ABS unit fittings.62 Nm (45.7 lbs-ft)
- Disconnect the electrical connector from the ABS unit.
- Position the oil drain under the ABS unit.
-
Loosen the nut that attaches the
master cylinder secondary brake line to the ABS unit.
16 Nm (11.8 lbs-ft)
-
Loosen the nut that attaches the primary cylinder secondary brake line to the ABS
unit.
16 Nm (11.8 lbs-ft)
- Place an absorbent material beneath the brake booster and reservoir area.
- Using a brake fluid syringe, remove the brake fluid from the reservoir.
-
Loosen the nut that attaches the secondary brake line to the master cylinder, and
then remove the secondary brake line.
16 Nm (11.8 lbs-ft)
-
Loosen the nut that attaches the
primary brake line to the master cylinder, and then remove the primary brake line.
16 Nm (11.8 lbs-ft)
-
Release the primary and secondary
brake lines from the brake line bundle clip.
-
Loosen the harness clip that attaches
the master cylinder brake lines to the rear of the hydraulic control unit bracket.
-
Route the master cylinder brake lines
towards the front controller, and then remove the master cylinder brake line bundle from
the vehicle.
Install
- Place the master cylinder brake line bundle into position for installation
-
Install the secondary brake line to the master cylinder, and then fasten the nut that
attaches the secondary brake line.
16 Nm (11.8 lbs-ft)
-
Install the primary brake line to the master cylinder, and then fasten the nut that
attaches the primary brake line.
16 Nm (11.8 lbs-ft)
- Remove the absorbent material from underneath the brake booster and brake fluid reservoir area.
-
Install the harness clip that attaches the master cylinder brake lines to the rear of
the hydraulic control unit bracket.
-
Attach the primary and secondary brake lines to the brake line bundle clip.
-
Fasten the nut that attaches the master cylinder secondary brake line to the ABS
unit.
16 Nm (11.8 lbs-ft)
-
Fasten the nut that attaches the primary cylinder secondary brake line to the ABS
unit.
16 Nm (11.8 lbs-ft)
- Clean the ABS unit surface of residual brake fluid.
- Remove the oil drain container from underneath vehicle
- Connect the electrical connector to the ABS unit.
-
Install the LH and RH bolts that attach the shock tower brace to the body.55 Nm (40.6 lbs-ft)55 Nm (40.6 lbs-ft)
-
Install the LH and RH outer bolts that attach the shock tower brace to the body.62 Nm (45.7 lbs-ft)
- Install the 12V battery. See 12V/LV Battery (Remove and Replace).
- Reconnect 12V power. See 12V/LV Power (Disconnect and Connect).
-
Bleed the LH and RH front brake
calipers through the brake calipers' inner bleed valves until clean fluid without air bubbles flows out of the
caliper.
NoteIt is not necessary to bleed the brake calipers through the outer bleed valves.
- Flush the LH front caliper using the inner bleed valve until a noticeable reduction in air bubbles is observed.
- Flush the RH front caliper using the inner bleed valve until a noticeable reduction in air bubbles is observed.
- Bleed the LH front caliper using the inner bleed valve. See Brake Fluid Bleed/Flush for details.
- Bleed the RH front caliper using the inner bleed valve. See Brake Fluid Bleed/Flush for details.
- Make sure to perform the brake stiffness test. See Brake Fluid Bleed/Flush for details.
- Install the front aero shield. See Panel - Aero Shield - Front (Structural Pack) (Remove and Replace).
- Install the underhood storage unit. See Underhood Storage Unit (Remove and Replace).
- Install the rear underhood apron. See Underhood Apron - Rear (Remove and Replace).
-
Perform a road test using a
series of aggressive stops to make sure there is proper pedal feel and brake
performance.
NoteAdd test drive correction code 00040100 as a separate activity to the Service Visit.