29/05/2024 18:11:26

Actuator - Intake (Remove and Replace)
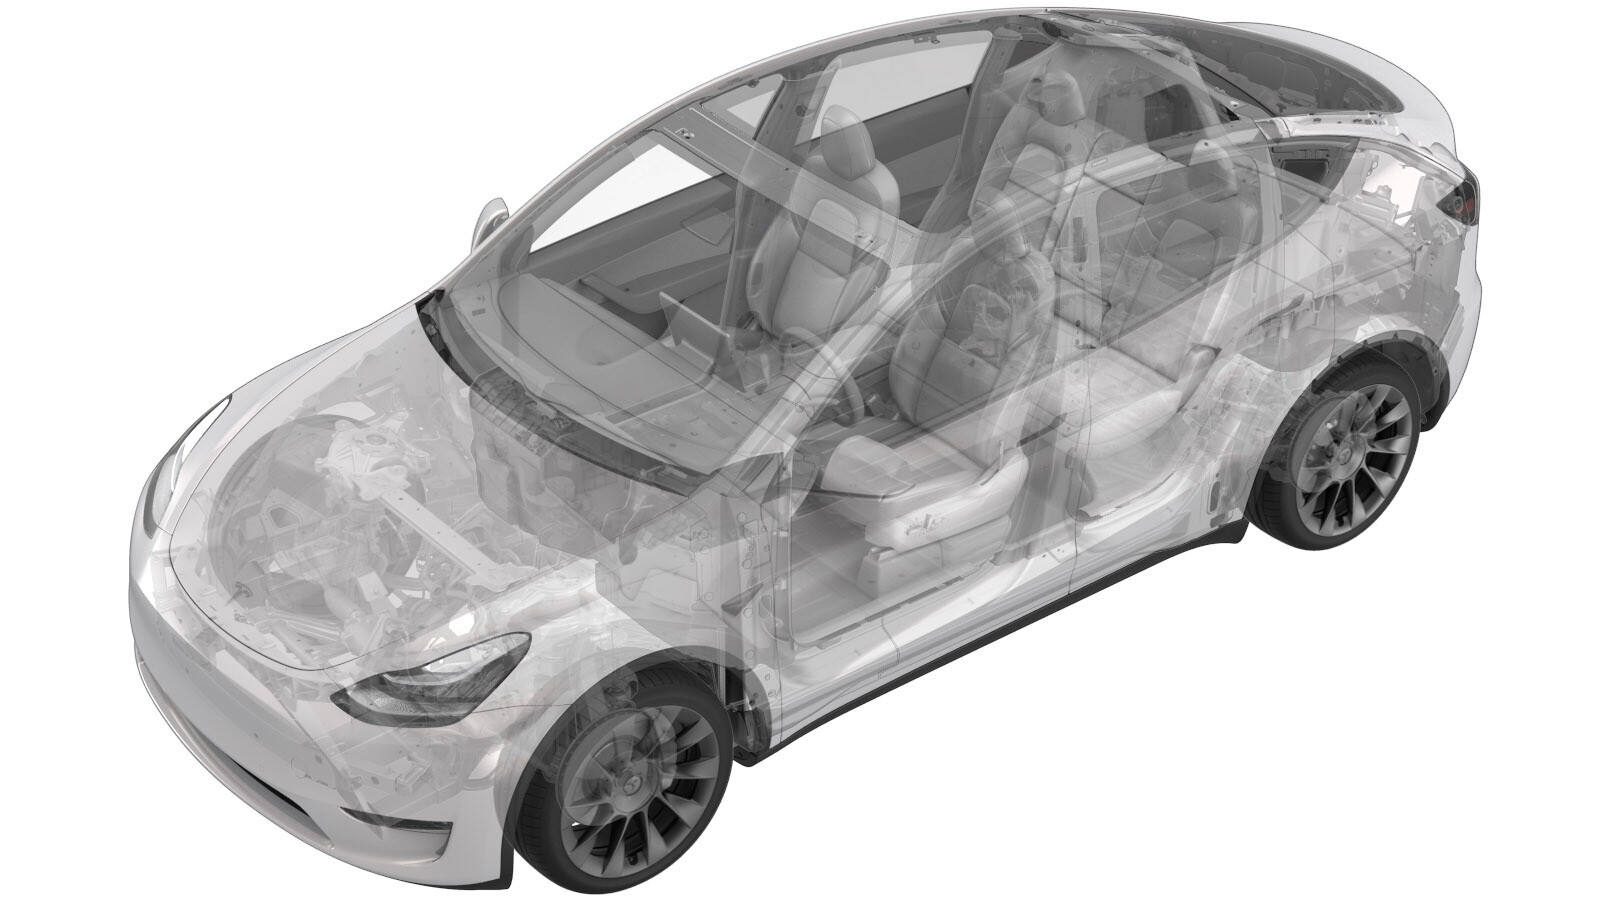
Correction code 18102002 2.88 NOTE: Unless otherwise explicitly stated in the procedure, the above correction code and FRT reflect all of the work required to perform this procedure, including the linked procedures. Do not stack correction codes unless explicitly told to do so.NOTE: See Flat Rate Times to learn more about FRTs and how they are created. To provide feedback on FRT values, email LaborTimeFeedback@tesla.com. NOTE: See Personal Protection to make sure wearing proper PPE when performing the below procedure.

  • 2023-04-05: Updated A/C oil type to be used with reference to Fluids and Capacities for A/C oil specifications.
Warning IconA warning icon, calling your attention to a possibly risky situation
Warning
This procedure is a DRAFT, although it has been validated. Warnings and Cautions might be missing. Follow safety requirements and use extreme caution when working on or near high voltage systems and components. Provide corrections and feedback to ServiceDevelopment@teslamotors.com.
  1. Set up AC machine
    Informational PurposesAn informational icon, calling your attention
    Note
    Touch time only
  2. Open all four doors
    Informational PurposesAn informational icon, calling your attention
    Note
    Latch rear doors to prevent accidental closing when vehicle is powered down
  3. Lower all windows
  4. Move LH front seat forward
  5. Raise LH front seat cushion to maximum height
    Informational PurposesAn informational icon, calling your attention
    Note
    Adjust seat back if needed to avoid contacting headliner
  6. Remove console lower rear panel
    Informational PurposesAn informational icon, calling your attention
    Note
    5x clips
  7. Remove LH rear exterior hardware from center console
    Informational PurposesAn informational icon, calling your attention
    Note
    1x bolt, 10mm, 7 Nm
  8. Move LH front seat backward
  9. Move RH front seat forward
  10. Raise RH front seat cushion to maximum height
    Informational PurposesAn informational icon, calling your attention
    Note
    Adjust seat back if needed to avoid contacting headliner
  11. Remove RH rear exterior hardware from center console
    Informational PurposesAn informational icon, calling your attention
    Note
    1x bolt, 10mm, 7 Nm
  12. Move RH front seat backward
  13. Open hood
  14. Remove rear apron
    Informational PurposesAn informational icon, calling your attention
    Note
    14x clips
  15. Remove access panel
    Informational PurposesAn informational icon, calling your attention
    Note
    3x clips, 1x connector
  16. Remove fasteners securing the frunk assembly
    Informational PurposesAn informational icon, calling your attention
    Note
    5x bolts, 10mm, 5 Nm, Newer vehicles may be equipped with 1x push clip securing frunk to reservoir neck
  17. Remove frunk assembly from vehicle
    Informational PurposesAn informational icon, calling your attention
    Note
    6x clips, Replace any clips if broken or missing
  18. Connect to vehicle using Toolbox 3.0
  19. Select ‘Actions/Autodiag’ and search for ‘Thermal’
  20. Select "Thermal Fluid Fill/Drain", click Run and allow routine to complete
    Informational PurposesAn informational icon, calling your attention
    Note
    Select ‘X’ at top right of window to close once complete, For AC related repairs verify all EXV's are in proper position, For all coolant related repairs verify vehicle is in Series, Thermal Fluid Fill/Drain routine has a 5 hour timeout, Routine will continuously run and not end
  21. Remove HSD cable from Ethernet port to disconnect Toolbox 3.0 from vehicle
  22. Power off vehicle from center display
    Informational PurposesAn informational icon, calling your attention
    Note
    Via Controls > Safety & Security > Vehicle Power > Power Off
  23. Disconnect 12V negative terminal and first responders loop
    Informational PurposesAn informational icon, calling your attention
    Note
    1x nut, 10mm, 6 Nm, 1x connector, Ensure vehicle is in park, climate control system is off, and vehicle is not charging before disconnecting 12V, Negative terminal should be disconnected before FRL, Allow 2 minutes for all electrical circuits to fully discharge
  24. Remove caps from low side and high side AC ports
    Informational PurposesAn informational icon, calling your attention
    Note
    2x caps
  25. Connect hoses to vehicle and perform AC recovery
    Informational PurposesAn informational icon, calling your attention
    Note
    Touch time only, Connect couplers to vehicle, Open couplers by turning clockwise, Open Machine valves, Note the amount of refrigerant and oil recovered, If drained oil level increased more than 30 ml, refer to the drained oil loss chart.
  26. Remove fresh air intake duct
    Informational PurposesAn informational icon, calling your attention
    Note
    1x bolt, 10mm, 4 Nm, 2x clips, 1x pin, Remove bolt, Gently pry pin out from thermal beam, then remove from bulkhead studs
  27. Remove LH IP end cap
    Informational PurposesAn informational icon, calling your attention
    Note
    3x clips
  28. Remove LH mid A-pillar assembly
    Informational PurposesAn informational icon, calling your attention
    Note
    1x clip, 1x tab, Release the upper clip then pull mid A-pillar upward to remove
  29. Remove LH upper A-pillar trim
    Informational PurposesAn informational icon, calling your attention
    Note
    3x clips, Pull inside of the upper portion of upper A-pillar, Depress 2x tabs to remove tether from body side, Then pull upper A-pillar upward to remove
  30. Remove clip securing LH lower A-pillar trim
    Informational PurposesAn informational icon, calling your attention
    Note
    1x push clip
  31. Remove LH lower A-pillar trim
    Informational PurposesAn informational icon, calling your attention
    Note
    6x clips, 2 guide tabs, Pull rear of lower A-pillar upward to release clip then pull rearward to release trim panel
  32. Remove LH front floormat
  33. Remove LH console side panel carpet
    Informational PurposesAn informational icon, calling your attention
    Note
    11x clips, 2x guide pins, Use trim tool starting at top edge to release upper clips, then pull bottom to release remaining clips, Use caution and pull panel straight away from console, if panel is peeled off it could be damaged
  34. Remove LH front exterior hardware from center console
    Informational PurposesAn informational icon, calling your attention
    Note
    2x bolts, 10mm, 7 Nm
  35. Remove screw and clips securing LH footwell cover
    Informational PurposesAn informational icon, calling your attention
    Note
    2x push clips, 1x screw, T20, 2.5 Nm
  36. Remove connectors from LH footwell cover and remove from vehicle
    Informational PurposesAn informational icon, calling your attention
    Note
    3x tabs, 1x Ethernet connector, 1x puddle light connector
  37. Remove fasteners securing driver knee air bag to vehicle
    Informational PurposesAn informational icon, calling your attention
    Note
    2x push clips, 2x screws, T20, 2 Nm, 4x patch bolts, E10, 8 Nm, Discard after removal, Support the knee air bag while lowering, The connector / harness length is very short
  38. Disconnect the driver knee air bag and remove from vehicle
    Informational PurposesAn informational icon, calling your attention
    Note
    1x connector, Release locking tab, Then release squib from air bag, Support air bag while disconnecting, Connector release may vary
  39. Remove the LH footwell duct from HVAC module
    Informational PurposesAn informational icon, calling your attention
    Note
    Pull LH footwell duct towards LH side of vehicle to remove
  40. Remove clip securing LH front cabin carpet to body
    Informational PurposesAn informational icon, calling your attention
    Note
    1x clip
  41. Remove RH IP end cap
    Informational PurposesAn informational icon, calling your attention
    Note
    3x clips
  42. Remove RH mid A-pillar assembly
    Informational PurposesAn informational icon, calling your attention
    Note
    1x clip, 1x tab, Release the upper clip then pull mid A-pillar upward to remove
  43. Remove RH upper A-pillar trim
    Informational PurposesAn informational icon, calling your attention
    Note
    3x clips, Pull inside of the upper portion of upper A-pillar, Remove 3x tether hooks by twisting and pulling away from housing, Then pull upper A-pillar upward to remove
  44. Remove clip securing RH lower A-pillar trim
    Informational PurposesAn informational icon, calling your attention
    Note
    1x push clip
  45. Remove RH lower A-pillar trim
    Informational PurposesAn informational icon, calling your attention
    Note
    6x clips, 2 guide tabs, Pull rear of lower A-pillar upward to release clip then pull rearward to release trim panel
  46. Remove RH front floormat
  47. Remove RH console side panel carpet
    Informational PurposesAn informational icon, calling your attention
    Note
    12x clips, 2x locating pins, Use trim tool starting at top edge to release upper clips, Pull bottom to release remaining clips, Use caution and pull panel straight away from console, if panel is peeled off it could be damaged
  48. Remove RH front exterior hardware from center console
    Informational PurposesAn informational icon, calling your attention
    Note
    2x bolts, 10mm, 7 Nm
  49. Disconnect USB harness at right front of center console
    Informational PurposesAn informational icon, calling your attention
    Note
    1x USB connector
  50. Disconnect harness from rear of center console
    Informational PurposesAn informational icon, calling your attention
    Note
    1x connector
  51. Remove center console from vehicle
    Informational PurposesAn informational icon, calling your attention
    Note
    Verify rotating lids are in closed position, Recommend assistance, Tilt rear of console upward, Pull assembly towards rear of vehicle
  52. Remove clips securing RH footwell assembly
    Informational PurposesAn informational icon, calling your attention
    Note
    4x push clips
  53. Disconnect RH footwell assembly connectors and remove from vehicle
    Informational PurposesAn informational icon, calling your attention
    Note
    2x connectors
  54. Remove fasteners securing passenger knee air bag to vehicle
    Informational PurposesAn informational icon, calling your attention
    Note
    2x screws, T20, 2 Nm, 1x push clip, 4x patch bolts, E10, 8 Nm, Discard patch bolts after removal, Support the knee air bag while lowering, The connector / harness length is very short
  55. Remove the passenger knee air bag from vehicle
    Informational PurposesAn informational icon, calling your attention
    Note
    1x connector, Release locking tab
  56. Remove clip securing RH front cabin carpet to body
    Informational PurposesAn informational icon, calling your attention
    Note
    1x clip
  57. Release spring clip securing driver air bag assembly to steering wheel and pull driver air bag assembly away from steering wheel
    Informational PurposesAn informational icon, calling your attention
    Note
    1x spring clip, 3x datums, Press spring simultaneously from two access holes to release, Access holes located at 4 and 8 o’clock position
  58. Disconnect driver air bag connector and remove driver air bag assembly
    Informational PurposesAn informational icon, calling your attention
    Note
    1x connector, 2x tabs
  59. Disconnect steering wheel connector
    Informational PurposesAn informational icon, calling your attention
    Note
    1x connector, 2x tabs
  60. Remove bolt securing steering wheel to steering column
    Informational PurposesAn informational icon, calling your attention
    Note
    1x patch bolt, 10mm hex, 80 Nm, Discard after removal
  61. Remove steering wheel from steering column
    Informational PurposesAn informational icon, calling your attention
    Note
    Mark splines to install into same position
  62. Pull upward to release steering column upper shroud from lower shroud
    Informational PurposesAn informational icon, calling your attention
    Note
    4x clips
  63. Remove upper screws securing lower shroud to steering column
    Informational PurposesAn informational icon, calling your attention
    Note
    2x screws, T20, 1.5 Nm
  64. Remove lower screw securing lower shroud to steering column
    Informational PurposesAn informational icon, calling your attention
    Note
    1x screw, T20, 1.5 Nm
  65. Remove lower shroud from steering column
  66. Disconnect steering column control module assembly connector
    Informational PurposesAn informational icon, calling your attention
    Note
    1x connector, Remove retaining clip on the connector, release connector, then remove the remaining broken clip from connector, Discard retaining clip after removal, Originally installed clip is black, Replacement clip is orange
  67. Remove bolt securing SCCM to steering column
    Informational PurposesAn informational icon, calling your attention
    Note
    1x bolt, 5mm allen, 9 Nm
  68. Remove SCCM from steering column
  69. Release IP service panel from IP and disconnect temperature sensor connector
    Informational PurposesAn informational icon, calling your attention
    Note
    4x clips, 4x tabs, 1x connector
  70. Remove bolts securing center display to IP carrier
    Informational PurposesAn informational icon, calling your attention
    Note
    2x patch bolts, 10mm, 16 Nm, Discard after removal, Slide towards rear of vehicle to remove
  71. Remove bolts securing housing neck to center display and slide away from display
    Informational PurposesAn informational icon, calling your attention
    Note
    2x bolts, T30, 3 Nm
  72. Remove retaining clip from display connector
    Informational PurposesAn informational icon, calling your attention
    Note
    1x clip
  73. Disconnect harness connector from center display
    Informational PurposesAn informational icon, calling your attention
    Note
    1x connector
  74. Remove center display from vehicle
  75. Remove center display neck housing from vehicle
  76. Remove LH air wave bezel cap from main decor assembly
    Informational PurposesAn informational icon, calling your attention
    Note
    2x clips
  77. Remove RH air wave bezel cap from main decor assembly
    Informational PurposesAn informational icon, calling your attention
    Note
    2x clips
  78. Remove main decor assembly
    Informational PurposesAn informational icon, calling your attention
    Note
    15x clips, 1x center clip, Replace securing clips as needed
  79. Remove screws securing glove box assembly to IP carrier
    Informational PurposesAn informational icon, calling your attention
    Note
    6x screws, T20, 2.3 Nm
  80. Disconnect glove box assembly connectors
    Informational PurposesAn informational icon, calling your attention
    Note
    3x connectors
  81. Remove the glove box from IP carrier
    Informational PurposesAn informational icon, calling your attention
    Note
    3x clips
  82. Remove the passenger footwell air duct
    Informational PurposesAn informational icon, calling your attention
    Note
    1x push clip
  83. Remove the RH IP air wave duct
    Informational PurposesAn informational icon, calling your attention
    Note
    2x push clips
  84. Remove screws securing LH side of IP brow finisher
    Informational PurposesAn informational icon, calling your attention
    Note
    4x screws, T20, 2.3 Nm, Fastener count may vary, Older production vehicles may have 5x screws
  85. Remove screws securing RH side of IP brow finisher
    Informational PurposesAn informational icon, calling your attention
    Note
    4x screws, T20, 2.3 Nm, Fastener count may vary, Older production vehicles may have 5x screws
  86. Remove IP brow finisher from vehicle
    Informational PurposesAn informational icon, calling your attention
    Note
    16x clips, Need to lift top pad up slightly to insert trim tool and release clips, Then slide IP brow finisher towards rear of vehicle
  87. Pull RH side of RH air duct out and release from IP
    Informational PurposesAn informational icon, calling your attention
    Note
    1x screw, T20, 2.3 Nm
  88. Disconnect harness connector from RH air duct and remove duct
    Informational PurposesAn informational icon, calling your attention
    Note
    1x connector
  89. Pull LH air duct out and release from IP
    Informational PurposesAn informational icon, calling your attention
    Note
    1x screw, T20, 2.3 Nm
  90. Disconnect harness connector from LH air duct and remove duct
    Informational PurposesAn informational icon, calling your attention
    Note
    1x connector
  91. Release clips securing defroster grill
    Informational PurposesAn informational icon, calling your attention
    Note
    8x clips, Replace any damaged clips
  92. Pivot rear edge of defroster grill up and release tabs from IP
    Informational PurposesAn informational icon, calling your attention
    Note
    6x tabs
  93. Remove screws securing LH speaker to IP and remove speaker
    Informational PurposesAn informational icon, calling your attention
    Note
    3x screws, T20, 2.3 Nm, 1x connector
  94. Remove screws securing center speaker to IP and remove speaker
    Informational PurposesAn informational icon, calling your attention
    Note
    3x screws, T20, 2.3 Nm, 1x connector
  95. Remove screws securing center tweeter to IP and remove speaker
    Informational PurposesAn informational icon, calling your attention
    Note
    2x screws, T20, 2.3 Nm, 1x connector
  96. Remove screws securing RH speaker to IP and remove speaker
    Informational PurposesAn informational icon, calling your attention
    Note
    3x screws, T20, 2.3 Nm, 1x connector
  97. Disconnect connectors for passenger air bag assembly
    Informational PurposesAn informational icon, calling your attention
    Note
    3x connectors, 2x connectors for regions other than North America
  98. Remove bolts securing passenger air bag assembly to cross car beam
    Informational PurposesAn informational icon, calling your attention
    Note
    4x bolts, E10 patch bolts, 8 Nm, Discard after removal
  99. Remove screws securing LH side of IP carrier to cross car beam near passenger air bag
    Informational PurposesAn informational icon, calling your attention
    Note
    2x screws, T20, 2.3 Nm
  100. Remove screws securing IP carrier to cross car beam on lower LH side
    Informational PurposesAn informational icon, calling your attention
    Note
    2x screws, T20, 2.3 Nm
  101. Remove screw securing IP carrier to cross car beam on upper LH side
    Informational PurposesAn informational icon, calling your attention
    Note
    1x screw, T20, 2.3 Nm
  102. Remove screws securing IP carrier to cross car beam at lower center
    Informational PurposesAn informational icon, calling your attention
    Note
    2x screws, T20, 2.3 Nm
  103. Remove screws securing IP carrier to cross car beam at upper center
    Informational PurposesAn informational icon, calling your attention
    Note
    2x screws, T20, 2.3 Nm
  104. Remove screw securing IP carrier to cross car beam on upper RH side
    Informational PurposesAn informational icon, calling your attention
    Note
    1x screw, T20, 2.3 Nm
  105. Remove IP carrier from cross car beam
    Informational PurposesAn informational icon, calling your attention
    Note
    Recommend assistance, Be cautious to clear the harness clipped at top center of HVAC assembly, This will also ease removal
  106. Remove screws securing the drivers air duct to cross car beam
    Informational PurposesAn informational icon, calling your attention
    Note
    2x scews, T20, 2.3 Nm
  107. Remove drivers air duct from the HVAC assembly
  108. Partially remove LH cabin carpet
  109. Disconnect the dash connector from the left body controller
    Informational PurposesAn informational icon, calling your attention
    Note
    1x connector, Release locking tab and gently pull down to release connector
  110. Disconnect the HVAC connector from the left body controller
    Informational PurposesAn informational icon, calling your attention
    Note
    1x connector
  111. Disconnect connector from the electric steering column
    Informational PurposesAn informational icon, calling your attention
    Note
    1x connector
  112. Release the IP harness clip located on the blower motor assembly
    Informational PurposesAn informational icon, calling your attention
    Note
    1x harness clip
  113. Disconnect connector on the blower motor assembly
    Informational PurposesAn informational icon, calling your attention
    Note
    1x connector
  114. Remove center console support bracket
    Informational PurposesAn informational icon, calling your attention
    Note
    1x clip, 4x tabs, Once tabs are free from riser carefully slide towards front of vehicle
  115. Release the clip located next to the RCM
    Informational PurposesAn informational icon, calling your attention
    Note
    1x harness clip
  116. Disconnect connector located on RCM
    Informational PurposesAn informational icon, calling your attention
    Note
    1x connector, Push down on locking tab and release connector
  117. Release the IP harness clip located next to the RCM
    Informational PurposesAn informational icon, calling your attention
    Note
    1x harness clip, Release inner tabs on clip then lift from body
  118. Release the IP harness clip from the body of the vehicle by RH cross car beam bracket
    Informational PurposesAn informational icon, calling your attention
    Note
    1x harness clip
  119. Release the IP harness clip from the cross car beam
    Informational PurposesAn informational icon, calling your attention
    Note
    1x harness clip
  120. Release the IP harness clip next to the RH lower duct thermistor
    Informational PurposesAn informational icon, calling your attention
    Note
    1x harness clip
  121. Release the IP harness clip next to the RH upper mode actuator
    Informational PurposesAn informational icon, calling your attention
    Note
    1x harness clip
  122. Release HVAC harness from the IP harness holding mount on RH side of the IP harness.
    Informational PurposesAn informational icon, calling your attention
    Note
    2x holding mount, 1st holding mount is located on the RH side of the HVAC assembly, 2nd holding mount is located next to the right body controller
  123. Disconnect connectors from car computer
    Informational PurposesAn informational icon, calling your attention
    Note
    2x connectors
  124. Partially remove RH carpet
  125. Disconnect dash harness connector from right body controller
    Informational PurposesAn informational icon, calling your attention
    Note
    1x connector
  126. Release clip from RH side of cross car beam
    Informational PurposesAn informational icon, calling your attention
    Note
    1x harness clip
  127. Release clip from body of vehicle on RH lower A-pillar
    Informational PurposesAn informational icon, calling your attention
    Note
    1x harness clip
  128. Release headliner harness clip from body of vehicle located on LH upper A-pillar
    Informational PurposesAn informational icon, calling your attention
    Note
    1x harness clip
  129. Release headliner harness clips located on LH lower A-pillar
    Informational PurposesAn informational icon, calling your attention
    Note
    2x clips
  130. Disconnect headliner harness connector located on LH lower A-pillar
    Informational PurposesAn informational icon, calling your attention
    Note
    1x connector
  131. Remove LH touchscreen bracket
    Informational PurposesAn informational icon, calling your attention
    Note
    2x bolts, T30, 12 Nm
  132. Remove RH touchscreen bracket
    Informational PurposesAn informational icon, calling your attention
    Note
    2x bolts, T30, 12 Nm
  133. Remove bleeder duct adapter from HVAC assembly
    Informational PurposesAn informational icon, calling your attention
    Note
    4x clips
  134. Remove nuts securing upper steering column to cross car beam
    Informational PurposesAn informational icon, calling your attention
    Note
    2x nuts, 13mm, 15 Nm
  135. Remove nuts securing lower steering column to cross car beam and carefully lower steering column
    Informational PurposesAn informational icon, calling your attention
    Note
    2x nuts, 13mm, 15 Nm
  136. Remove bolts securing cross car beam to LH side of bulkhead
    Informational PurposesAn informational icon, calling your attention
    Note
    2x bolts, 13mm, 25 Nm
  137. Remove clip securing the carpet to LH cross car beam bracket
    Informational PurposesAn informational icon, calling your attention
    Note
    1x clip
  138. Remove the bolt that secures the LH cross car beam bracket to the cross car beam
    Informational PurposesAn informational icon, calling your attention
    Note
    1x bolts, 13mm, 25 Nm
  139. Remove nut securing the LH cross car beam bracket to the body and remove LH cross car beam bracket
    Informational PurposesAn informational icon, calling your attention
    Note
    1x nut, 13mm, 25 Nm, Slightly pull LH carpet towards LH side of vehicle, Take note of direction of cross car beam bracket during removal
  140. Remove clip securing the carpet to RH cross car beam bracket
    Informational PurposesAn informational icon, calling your attention
    Note
    1x clip
  141. Remove bolt securing RH cross car beam bracket to cross car beam
    Informational PurposesAn informational icon, calling your attention
    Note
    1x bolts, 13mm, 25 Nm
  142. Remove nut securing the RH cross car beam bracket to body and remove the RH cross car beam bracket
    Informational PurposesAn informational icon, calling your attention
    Note
    1x nut, 13mm, 25 Nm, Slightly pull the RH carpet towards RH side of vehicle, Take note of direction of cross car beam bracket during removal
  143. Remove bolts securing cross car beam to the HVAC assembly
    Informational PurposesAn informational icon, calling your attention
    Note
    4x bolts, 10mm, 5.5 Nm
  144. Remove bolt securing the cross car beam to HVAC assembly on upper LH side of HVAC assembly
    Informational PurposesAn informational icon, calling your attention
    Note
    1x bolt. 10mm, 5.5 Nm
  145. Remove bolt that secures the cross car beam to the upper cowl
    Informational PurposesAn informational icon, calling your attention
    Note
    1x bolt, 13mm, 25 Nm
  146. Remove bolts securing cross car beam to LH side of body
    Informational PurposesAn informational icon, calling your attention
    Note
    2x bolts, 15mm, 29 Nm
  147. Remove bolts securing cross car beam to RH side of body
    Informational PurposesAn informational icon, calling your attention
    Note
    2x bolts, 15mm, 29 Nm
  148. Remove the cross car beam from the vehicle
    Informational PurposesAn informational icon, calling your attention
    Note
    Recommend assistance
  149. Disconnect HVAC connector from right vehicle controller
    Informational PurposesAn informational icon, calling your attention
    Note
    1x connector
  150. Remove floor duct from stud located in-between LH and RH seat
    Informational PurposesAn informational icon, calling your attention
    Note
    1x stud
  151. Remove floor duct from HVAC assembly and position out of the way
  152. Remove AC manifold to HVAC line from HVAC assembly
    Informational PurposesAn informational icon, calling your attention
    Note
    2x bolts, 13mm, 22 Nm
  153. Remove bolt securing HVAC assembly to RH side of bulkhead
    Informational PurposesAn informational icon, calling your attention
    Note
    1x bolt, 10mm, 5.5 Nm
  154. Remove nut securing HVAC assembly to body located on RH side of HVAC assembly
    Informational PurposesAn informational icon, calling your attention
    Note
    1x nut, 10mm, 5.5 Nm, Slightly move RH carpet and foam towards RH side of vehicle, Recommend assistance to support HVAC assembly
  155. Remove HVAC assembly from vehicle
    Informational PurposesAn informational icon, calling your attention
    Note
    Remove HVAC assembly towards rear of vehicle, Rotate counter clockwise and remove out of passenger front door, Recommend assistance
  156. Disconnect intake actuator connector
    Informational PurposesAn informational icon, calling your attention
    Note
    1x connector
  157. Remove bolts securing intake actuator and remove intake actuator from HVAC assembly
    Informational PurposesAn informational icon, calling your attention
    Note
    2x bolts, 6mm, 2.3 Nm
  158. Position intake actuator to HVAC assembly
    Informational PurposesAn informational icon, calling your attention
    Note
    2x bolts, 6mm, 2.3 Nm,Make sure it's in the right place
  159. Connect intake actuator connector
    Informational PurposesAn informational icon, calling your attention
    Note
    1x connector
  160. Install HVAC assembly into vehicle and position HVAC assembly onto stud
    Informational PurposesAn informational icon, calling your attention
    Note
    Install front of HVAC assembly through passenger front door, Rotate counter clockwise and install towards front of vehicle
  161. Install nut securing HVAC assembly to body
    Informational PurposesAn informational icon, calling your attention
    Note
    1x nut, 10mm, 5.5 Nm, Slightly move RH carpet and foam towards RH side of vehicle
  162. Install bolt securing HVAC assembly to RH side of bulkhead
    Informational PurposesAn informational icon, calling your attention
    Note
    1x bolt, 10mm, 5.5 Nm
  163. Install floor duct to HVAC assembly
  164. Install floor duct onto stud located in-between LH and RH seat
    Informational PurposesAn informational icon, calling your attention
    Note
    1x stud
  165. Connect HVAC connector to right vehicle controller
    Informational PurposesAn informational icon, calling your attention
    Note
    1x connector
  166. Install AC manifold to HVAC line to HVAC assembly
    Informational PurposesAn informational icon, calling your attention
    Note
    2x bolts, 13 mm, 22 Nm, Install new o-rings
  167. Perform AC vacuum
    Informational PurposesAn informational icon, calling your attention
    Note
    Touch time only, 2 minute leak test, 15 minute vacuum
  168. Install the cross car beam into the vehicle
    Informational PurposesAn informational icon, calling your attention
    Note
    Recommend assistance
  169. Loosely install bolts securing cross car beam to RH side of body
    Informational PurposesAn informational icon, calling your attention
    Note
    2x bolts, 15mm, 29 Nm, Torque at later step
  170. Loosely install bolts securing cross car beam to LH side of body
    Informational PurposesAn informational icon, calling your attention
    Note
    2x bolts, 15mm, 29 Nm, Torque at later step
  171. Loosely install bolt securing cross car beam to upper cowl
    Informational PurposesAn informational icon, calling your attention
    Note
    1x bolt, 13mm, 25 Nm
  172. Loosely install bolt securing cross car beam to the HVAC assembly on upper LH side of HVAC assembly
    Informational PurposesAn informational icon, calling your attention
    Note
    1x bolt, 10mm, 5.5 Nm
  173. Loosely install bolts securing the cross car beam to HVAC assembly in front of the HVAC assembly
    Informational PurposesAn informational icon, calling your attention
    Note
    4x bolts, 10mm, 5.5 Nm
  174. Install RH cross car beam bracket and loosely install nut that secures the RH cross car beam bracket to body
    Informational PurposesAn informational icon, calling your attention
    Note
    1x nut, 13mm, 25 Nm
  175. Loosely install bolt securing RH cross car beam bracket to the cross car beam
    Informational PurposesAn informational icon, calling your attention
    Note
    1x bolts, 13mm, 25 Nm
  176. Install LH cross car beam bracket and loosely install nut that secures LH cross beam bracket to body
    Informational PurposesAn informational icon, calling your attention
    Note
    1x nut, 13mm, 25 Nm
  177. Loosely install bolt to secure LH cross car beam bracket to cross car beam
    Informational PurposesAn informational icon, calling your attention
    Note
    1x bolts, 13mm, 25 Nm
  178. Install bolts securing cross car beam to LH side of bulkhead
    Informational PurposesAn informational icon, calling your attention
    Note
    2x bolts, 13mm, 25 Nm
  179. Torque the bolt that secures the LH cross car beam bracket to the cross car beam
    Informational PurposesAn informational icon, calling your attention
    Note
    1x bolts, 13mm, 25 Nm
  180. Torque nut securing LH cross car beam bracket to body
    Informational PurposesAn informational icon, calling your attention
    Note
    1x nut, 13mm, 25 Nm,Slightly pull LH carpet towards LH side of vehicle
  181. Install clip that secures the carpet to LH cross car beam bracket
    Informational PurposesAn informational icon, calling your attention
    Note
    1x clip
  182. Torque bolt securing the RH cross car beam bracket to cross car beam
    Informational PurposesAn informational icon, calling your attention
    Note
    1x bolt, 13mm, 25 Nm
  183. Torque nut securing RH cross car beam bracket to body
    Informational PurposesAn informational icon, calling your attention
    Note
    1x nut, 13mm, 25 Nm
  184. Install clip securing the carpet to RH cross car beam bracket
    Informational PurposesAn informational icon, calling your attention
    Note
    1x clip
  185. Torque the bolts securing the cross car beam to the HVAC assembly
    Informational PurposesAn informational icon, calling your attention
    Note
    4x bolts, 10mm, 5.5 Nm
  186. Torque the bolt that secures the cross car beam to the HVAC assembly
    Informational PurposesAn informational icon, calling your attention
    Note
    1x bolt, 10mm, 5.5 Nm
  187. Torque the bolt that secures the cross car beam to the upper cowl
    Informational PurposesAn informational icon, calling your attention
    Note
    1x bolt, 13mm, 25 Nm
  188. Torque bolts securing cross car beam to LH side of body
    Informational PurposesAn informational icon, calling your attention
    Note
    2x bolts, 15mm, 29 Nm
  189. Torque bolts securing cross car beam to RH side of body
    Informational PurposesAn informational icon, calling your attention
    Note
    2x bolts, 15mm, 29 Nm
  190. Install the nuts securing the lower steering column to the cross car beam
    Informational PurposesAn informational icon, calling your attention
    Note
    2x nuts, 13mm, 15 Nm
  191. Install nuts securing upper steering column to cross car beam
    Informational PurposesAn informational icon, calling your attention
    Note
    2x nuts, 13mm, 15 Nm
  192. Install the bleeder duct adapter to the HVAC assembly
    Informational PurposesAn informational icon, calling your attention
    Note
    4x clips
  193. Install RH touchscreen bracket
    Informational PurposesAn informational icon, calling your attention
    Note
    2x bolts, T30, 12 Nm
  194. Install LH touchscreen bracket
    Informational PurposesAn informational icon, calling your attention
    Note
    2x bolts, T30, 12 Nm
  195. Install the headliner harness clip located on the LH upper A pillar
    Informational PurposesAn informational icon, calling your attention
    Note
    1x clip
  196. Install headliner harness clips to LH lower A-Pillar
    Informational PurposesAn informational icon, calling your attention
    Note
    2x clips
  197. Install headliner harness connector on LH lower A-Pillar
    Informational PurposesAn informational icon, calling your attention
    Note
    1x connector
  198. Install clip located on the RH lower A-pillar
    Informational PurposesAn informational icon, calling your attention
    Note
    1x clip
  199. Install the clip located on the RH side of cross car beam
    Informational PurposesAn informational icon, calling your attention
    Note
    1x clip
  200. Install dash harness connector to right body controller
    Informational PurposesAn informational icon, calling your attention
    Note
    1x connector
  201. Position RH carpet back to the original position
  202. Install connectors to the car computer
    Informational PurposesAn informational icon, calling your attention
    Note
    2x connectors
  203. Install HVAC harness to the IP harness holding mount on RH side of the IP harness
    Informational PurposesAn informational icon, calling your attention
    Note
    2x holding mount, 1st holding mount is located on the RH side of the HVAC assembly, 2nd holding mount is located next to the right body controller
  204. Install IP harness clip to HVAC assembly next to the RH upper mode actuator
    Informational PurposesAn informational icon, calling your attention
    Note
    1x clip
  205. Install IP harness clip to HVAC assembly next to the RH lower duct thermistor
    Informational PurposesAn informational icon, calling your attention
    Note
    1x clip
  206. Install the IP harness clip to the cross car beam
    Informational PurposesAn informational icon, calling your attention
    Note
    1x clip
  207. Install IP harness clip to the body of the vehicle next to RH cross car beam bracket
    Informational PurposesAn informational icon, calling your attention
    Note
    1x clip
  208. Install center console support bracket
    Informational PurposesAn informational icon, calling your attention
    Note
    1x clip, 4x tabs, Slide towards rear of vehicle then engage tabs
  209. Install the IP harness clip to the body located next to the RCM
    Informational PurposesAn informational icon, calling your attention
    Note
    1x clip
  210. Connect the connector located on the RCM
    Informational PurposesAn informational icon, calling your attention
    Note
    1x connector, Fully install connector and pull release tab into locking position
  211. Install the clip located next to the RCM
    Informational PurposesAn informational icon, calling your attention
    Note
    1x clip
  212. Connect connector to blower motor assembly
    Informational PurposesAn informational icon, calling your attention
    Note
    1x connector
  213. Install the IP harness clip located on the blower motor assembly
    Informational PurposesAn informational icon, calling your attention
    Note
    1x clip
  214. Connect the connector to the electric steering column
    Informational PurposesAn informational icon, calling your attention
    Note
    1x connector
  215. Connect the HVAC connector to the left body controller
    Informational PurposesAn informational icon, calling your attention
    Note
    1x connector
  216. Connect the dash connector to the left body controller
    Informational PurposesAn informational icon, calling your attention
    Note
    1x connector, Fully seat connector and pull release tab into locking position
  217. Position the LH cabin carpet back to the original position
  218. Install the drivers air duct to the HVAC assembly
  219. Install the screws securing the drivers air duct to the cross car beam
    Informational PurposesAn informational icon, calling your attention
    Note
    2x scews, T20, 2.3 Nm
  220. Install IP carrier onto cross car beam
    Informational PurposesAn informational icon, calling your attention
    Note
    Recommend assistance, Be cautious to clear the harness clipped at top center of HVAC assembly, This will also ease installation
  221. Install screw securing IP carrier to cross car beam on upper RH side
    Informational PurposesAn informational icon, calling your attention
    Note
    1x screw, T20, 2.3 Nm
  222. Install screws securing IP carrier to cross car beam at upper center
    Informational PurposesAn informational icon, calling your attention
    Note
    2x screws, T20, 2.3 Nm
  223. Install screws securing IP carrier to cross car beam at lower center
    Informational PurposesAn informational icon, calling your attention
    Note
    2x screws, T20, 2.3 Nm
  224. Install screw securing IP carrier to cross car beam on upper LH side
    Informational PurposesAn informational icon, calling your attention
    Note
    1x screw, T20, 2.3 Nm
  225. Install screws securing IP carrier to cross car beam on lower LH side
    Informational PurposesAn informational icon, calling your attention
    Note
    2x screws, T20, 2.3 Nm
  226. Install screws securing RH side of IP carrier to cross car beam near passenger air bag
    Informational PurposesAn informational icon, calling your attention
    Note
    2x screws, T20, 2.3 Nm
  227. Install passenger air bag into IP carrier and secure bolts
    Informational PurposesAn informational icon, calling your attention
    Note
    4x patch bolts, E10, 8 Nm, Install new patch bolts
  228. Install connectors for passenger air bag
    Informational PurposesAn informational icon, calling your attention
    Note
    3x connectors, 2x connectors for regions other than North America
  229. Install RH speaker to IP carrier
    Informational PurposesAn informational icon, calling your attention
    Note
    3x screws, T20, 2.3 Nm, 1x connector
  230. Install center tweeter to IP carrier
    Informational PurposesAn informational icon, calling your attention
    Note
    2x screws, T20, 2.3 Nm, 1x connector
  231. Install center speaker to IP
    Informational PurposesAn informational icon, calling your attention
    Note
    3x screws, T20, 2.3 Nm, 1x connector
  232. Install LH speaker to IP carrier
    Informational PurposesAn informational icon, calling your attention
    Note
    3x screws, T20, 2.3 Nm, 1x connector
  233. Position defroster grill and lower tabs into position on IP
    Informational PurposesAn informational icon, calling your attention
    Note
    6x tabs
  234. Secure clips securing defroster grill
    Informational PurposesAn informational icon, calling your attention
    Note
    8x clips
  235. Position LH air duct into IP and connect harness connector
    Informational PurposesAn informational icon, calling your attention
    Note
    1x connector
  236. Install LH air duct into IP
    Informational PurposesAn informational icon, calling your attention
    Note
    1x screw, T20, 2.3 Nm
  237. Position RH air duct into IP and connect harness connector
    Informational PurposesAn informational icon, calling your attention
    Note
    1x connector
  238. Install RH air duct into IP
    Informational PurposesAn informational icon, calling your attention
    Note
    1x screw, T20, 2.3 Nm
  239. Install IP brow finisher into vehicle
    Informational PurposesAn informational icon, calling your attention
    Note
    16x clips, Need to lift top pad up slightly to slide IP brow finisher into position
  240. Install screws securing RH side of IP brow finisher
    Informational PurposesAn informational icon, calling your attention
    Note
    4x screws, T20, 2.3 Nm, Fastener count may vary, Older production vehicles may have 5x screws
  241. Install screws securing LH side of IP brow finisher
    Informational PurposesAn informational icon, calling your attention
    Note
    4x screws, T20, 2.3 Nm, Fastener count may vary, Older production vehicles may have 5x screws
  242. Install the RH IP air wave duct
    Informational PurposesAn informational icon, calling your attention
    Note
    2x push clips
  243. Install the passenger footwell air duct
    Informational PurposesAn informational icon, calling your attention
    Note
    1x push clip
  244. Connect glove box assembly connectors
    Informational PurposesAn informational icon, calling your attention
    Note
    3x connectors, New puddle lamp harness routing prevent blocking movement of pawls
  245. Install the glove box into IP carrier
    Informational PurposesAn informational icon, calling your attention
    Note
    3x clips
  246. Install screws securing glove box assembly to IP carrier
    Informational PurposesAn informational icon, calling your attention
    Note
    6x screws, T20, 2.3 Nm
  247. Install main decor assembly
    Informational PurposesAn informational icon, calling your attention
    Note
    15x clips, 1x center clip
  248. Install RH air wave bezel cap to main decor assembly
    Informational PurposesAn informational icon, calling your attention
    Note
    2x clips
  249. Install LH air wave bezel cap to main decor assembly
    Informational PurposesAn informational icon, calling your attention
    Note
    2x clips
  250. Position center display neck housing into vehicle
  251. Position center display into vehicle
  252. Connect center display
    Informational PurposesAn informational icon, calling your attention
    Note
    1x connector
  253. Install retaining clip to center display connector
    Informational PurposesAn informational icon, calling your attention
    Note
    1x clip
  254. Slide down neck housing and install bolts securing neck housing to center display
    Informational PurposesAn informational icon, calling your attention
    Note
    2x bolts, T30, 3 Nm,
  255. Install center display to IP carrier
    Informational PurposesAn informational icon, calling your attention
    Note
    2x patch bolts, 10mm, 16 Nm, Install new patch bolts, Slide towards front of vehicle
  256. Connect temperature sensor connector and install IP service panel into IP
    Informational PurposesAn informational icon, calling your attention
    Note
    4x clips, 4x tabs, 1x connector
  257. Install SCCM onto steering column
  258. Install bolt securing SCCM to steering column
    Informational PurposesAn informational icon, calling your attention
    Note
    1x bolt, 5mm allen, 9 Nm
  259. Connect steering column control module (SCCM) assembly connector
    Informational PurposesAn informational icon, calling your attention
    Note
    1x connector, Install new orange retaining clip to connector then install SCCM connector, Perform push-pull-push to make sure connector is seated properly
  260. Install lower shroud onto steering column
  261. Install lower screw securing lower shroud to steering column
    Informational PurposesAn informational icon, calling your attention
    Note
    1x screw, T20, 1.5 Nm
  262. Install upper screws securing lower shroud to steering column
    Informational PurposesAn informational icon, calling your attention
    Note
    2x screws, T20, 1.5 Nm
  263. Align the clips then press downward to install upper shroud onto lower shroud
    Informational PurposesAn informational icon, calling your attention
    Note
    4x clips
  264. Align the steering wheel to steering column then position it for installation
    Informational PurposesAn informational icon, calling your attention
    Note
    The steering wheel and column are keyed
  265. Install bolt securing steering wheel to steering column
    Informational PurposesAn informational icon, calling your attention
    Note
    1x patch bolt, 10mm hex, 80 Nm, Install new patch bolt
  266. Connect steering wheel connector
    Informational PurposesAn informational icon, calling your attention
    Note
    1x connector
  267. Connect driver air bag connector
    Informational PurposesAn informational icon, calling your attention
    Note
    1x connector, Make sure that the driver air bag harness doesn’t get caught between the driver air bag and the horn mechanism
  268. Secure driver air bag assembly to steering wheel and verify it is fully engaged
    Informational PurposesAn informational icon, calling your attention
    Note
    3x datums, 1x spring clip, Inspect to make sure lower horn bracket is properly secured to steering wheel before installing driver air bag
  269. Install the passenger knee air bag into vehicle
    Informational PurposesAn informational icon, calling your attention
    Note
    1x connector, Engage locking tab, Use caution not to damage the connector/harness, Support the knee air bag while connecting the connector
  270. Install fasteners securing passenger knee air bag to vehicle
    Informational PurposesAn informational icon, calling your attention
    Note
    4x patch bolts, E10, 8 Nm, 2x screws, T20, 2 Nm, 1x push clip, Install new patch bolts
  271. Connect the RH footwell assembly connectors
    Informational PurposesAn informational icon, calling your attention
    Note
    2x connectors
  272. Install clips securing RH footwell assembly
    Informational PurposesAn informational icon, calling your attention
    Note
    4x push clips
  273. Install the clip securing RH front cabin carpet to body
    Informational PurposesAn informational icon, calling your attention
    Note
    1x clip
  274. Install the LH footwell duct into HVAC module
  275. Connect the driver knee air bag and install into vehicle
    Informational PurposesAn informational icon, calling your attention
    Note
    1x connector, Use caution not to damage the connector/harness, Support the knee air bag while connecting the connector
  276. Install fasteners securing driver knee air bag to vehicle
    Informational PurposesAn informational icon, calling your attention
    Note
    4x patch bolts, E10, 8 Nm, Install new patch bolts, 2x screws, T20, 2 Nm, 2x push clips
  277. Install connectors to LH footwell cover and position for installation
    Informational PurposesAn informational icon, calling your attention
    Note
    3x tabs, 1x Ethernet connector, 1x puddle light connector
  278. Install screw and clips securing LH footwell cover
    Informational PurposesAn informational icon, calling your attention
    Note
    1x screw, T20, 2.5 Nm, 2x push clips
  279. Install the clip securing LH front cabin carpet to body
    Informational PurposesAn informational icon, calling your attention
    Note
    1x clip
  280. Install center console into vehicle
    Informational PurposesAn informational icon, calling your attention
    Note
    Recommend assistance, Tilt front of console downward, Slide assembly towards front of vehicle and tilt rear of console down into place
  281. Connect harness to rear of center console
    Informational PurposesAn informational icon, calling your attention
    Note
    1x connector
  282. Connect harness at right front of center console
    Informational PurposesAn informational icon, calling your attention
    Note
    1x USB connector
  283. Install RH front exterior hardware to center console
    Informational PurposesAn informational icon, calling your attention
    Note
    2x bolts, 10mm, 7 Nm
  284. Install RH console side panel carpet
    Informational PurposesAn informational icon, calling your attention
    Note
    12x clips, 2x locating pins, Position side panel and align the front locator, then the rear locator, Push side panel towards console to install
  285. Install RH front floor mat
  286. Install LH front exterior hardware to center console
    Informational PurposesAn informational icon, calling your attention
    Note
    2x bolts, 10mm, 7 Nm
  287. Install LH console side panel carpet
    Informational PurposesAn informational icon, calling your attention
    Note
    11x clips, 2x locating pins, Position side panel and align the front into front locator, then the rear locator, Push side panel towards console to install
  288. Install LH front floormat
  289. Install RH upper A-pillar trim
    Informational PurposesAn informational icon, calling your attention
    Note
    3x clips, 1x tether, Slide bottom of trim along IP and speaker grill, attach tether to body side, Set clips starting at the bottom and work up, Pull seal over trim
  290. Install RH lower A-pillar trim
    Informational PurposesAn informational icon, calling your attention
    Note
    1x clip, 2 guide tabs, Align the 2 front tabs then align the slot with harness bracket and then push rear clip to secure to lower B-pillar
  291. Install clip securing RH lower A-pillar trim
    Informational PurposesAn informational icon, calling your attention
    Note
    1x clip
  292. Install RH mid A-pillar assembly
    Informational PurposesAn informational icon, calling your attention
    Note
    1x clip, 1x tab, Align the bottom tab then push the top clip to fully seat mid A-pillar, Make sure the seal seat on top of the trim
  293. Install RH IP end cap
    Informational PurposesAn informational icon, calling your attention
    Note
    3x clips
  294. Install LH upper A-pillar trim
    Informational PurposesAn informational icon, calling your attention
    Note
    3x clips, 1x tether, Replace tether if removed from body side, Slide the lower portion in position, Install tether 3x retainer hooks to housing, Then align the upper 3x clips, Press clip from top to bottom, Make sure double check the middle clips are fully seated
  295. Install LH lower A-pillar trim
    Informational PurposesAn informational icon, calling your attention
    Note
    1x clip, 2 guide tabs, Align the 2 front tabs then align the slot with harness bracket and then push rear clip to secure to lower B-pillar
  296. Install clip securing LH lower A-pillar trim
    Informational PurposesAn informational icon, calling your attention
    Note
    1x push clip
  297. Install LH mid A-pillar assembly
    Informational PurposesAn informational icon, calling your attention
    Note
    1x clip, 1x tab, Align the bottom tab then push the top clip to fully seat mid A-pillar, Pull seal over trim
  298. Install LH IP end cap
    Informational PurposesAn informational icon, calling your attention
    Note
    3x clips
  299. Remove low side AC hose from supermanifold to HVAC AC line assembly
  300. Use oil injector to add measured amount of oil back to the system
    Informational PurposesAn informational icon, calling your attention
    Note
    Use calculated oil lost measurement and add new oil of the appropriate type into the system. See Fluids and Capacities for A/C oil specifications. If more than 30 ml drained out during recovery, refer to the drained oil loss chart.
  301. Install low side AC hose to supermanifold to HVAC AC line assembly
  302. Perform AC refrigerant refill
    Informational PurposesAn informational icon, calling your attention
    Note
    Recharge refrigerant to 1.02 kg (1020g), For Robinair AC machines press ESC to NOT ACCEPT the step to clear out residual oil, Once complete press next to start End of Charge process
  303. Perform step 1 for End of Charge process
    Informational PurposesAn informational icon, calling your attention
    Note
    Close high and low machine valves, Press next to continue
  304. Connect first responder loop and 12V negative terminal
    Informational PurposesAn informational icon, calling your attention
    Note
    1x nut, 10mm, 6 Nm, 1x connector, Engage locking tab, Connect FRL first before connecting 12V to avoid damage to car computer
  305. Connect to vehicle using Toolbox 3.0
  306. Select "Actions/Autodiag" and search for "commissioning"
  307. Select TEST-SELF_VCFRONT_X_HEAT-PUMP-COMMISSIONINGSearch for routine in ToolboxHeat Pump Thermal System CommissioningDrive Inverter ➜ Front Drive Inverter Replacement ➜ Heatpump commissioningThermal ➜ Refrigerant System ➜ Run Heat Pump Commissioning, click Run and allow routine to complete
    Informational PurposesAn informational icon, calling your attention
    Note
    If this routine is not run after entering Thermal Drain/Fill mode, the AC compressor operation will be blocked, Select ‘X’ at top right of window to close once complete
  308. Proceed with steps 2-4 for End of Charge process and follow instructions displayed on AC Machine
    Informational PurposesAn informational icon, calling your attention
    Note
    Turn AC on, Temp setting LO, Panel mode on, Fresh air mode on, Blower speed set to 3, Verify Discharge pressure does not exceed 26 bar and Suction pressure is not below 1.15 bar, Turn AC OFF, allow pressures to stabilize and remove high side hose
  309. Proceed with steps 5-6 for End of Charge process and follow instructions displayed on AC Machine
    Informational PurposesAn informational icon, calling your attention
    Note
    Turn AC on, Temp setting LO, Panel mode on, Fresh air mode on, Blower speed set to 3, Turn machine valves to OPEN, Allow pressures to stabilize, Remove low side hose from vehicle, Continue with AC machine instructions and clear AC hoses
  310. Install caps onto AC ports
    Informational PurposesAn informational icon, calling your attention
    Note
    2x caps
  311. Select ‘Actions/Autodiag’ and search for ‘HVAC’
  312. Select ‘TEST-SELF_VCRIGHT_X_HVAC-PERFORMANCESearch for routine in ToolboxHVAC System Performance TestThermal ➜ Actions ➜ Test HVAC PerformanceThermal ➜ Actions ➜ Test HVAC Performance’, click ‘Run’, and allow routine to complete
    Informational PurposesAn informational icon, calling your attention
    Note
    Select ‘X’ at top right of window to close once complete
  313. Remove HSD cable from Ethernet port to disconnect Toolbox 3.0 from vehicle
  314. Move LH front seat forward
  315. Install LH rear exterior hardware to center console
    Informational PurposesAn informational icon, calling your attention
    Note
    1x bolt, 10mm, 7 Nm
  316. Move RH front seat forward
  317. Install RH rear exterior hardware to center console
    Informational PurposesAn informational icon, calling your attention
    Note
    1x bolt, 10mm, 7 Nm
  318. Install console lower rear panel
    Informational PurposesAn informational icon, calling your attention
    Note
    5x clips
  319. Install fresh air intake duct
    Informational PurposesAn informational icon, calling your attention
    Note
    1x bolt, 10mm bolt, 4 Nm, 2x clips, 1x pin, Set clips on bulkhead studs, Secure to thermal bar
  320. Install frunk assembly into vehicle
    Informational PurposesAn informational icon, calling your attention
    Note
    6x clips, Replace any clips if broken or missing
  321. Install fasteners securing the frunk assembly
    Informational PurposesAn informational icon, calling your attention
    Note
    5x bolts, 10mm, 5 Nm, Newer vehicles may be equipped with 1x push clip securing frunk to washer bottle neck
  322. Install access panel
    Informational PurposesAn informational icon, calling your attention
    Note
    3x clips, 1x connector
  323. Install rear apron
    Informational PurposesAn informational icon, calling your attention
    Note
    14x clips, Hold rear wall of frunk to keep from flexing while engaging front clips
  324. Close hood
  325. Move RH front seat to original position
  326. Move LH front seat to original position
  327. Raise all windows
  328. Close all four doors
    Informational PurposesAn informational icon, calling your attention
    Note
    If 12V is powered up, Unlatch rear doors before closing