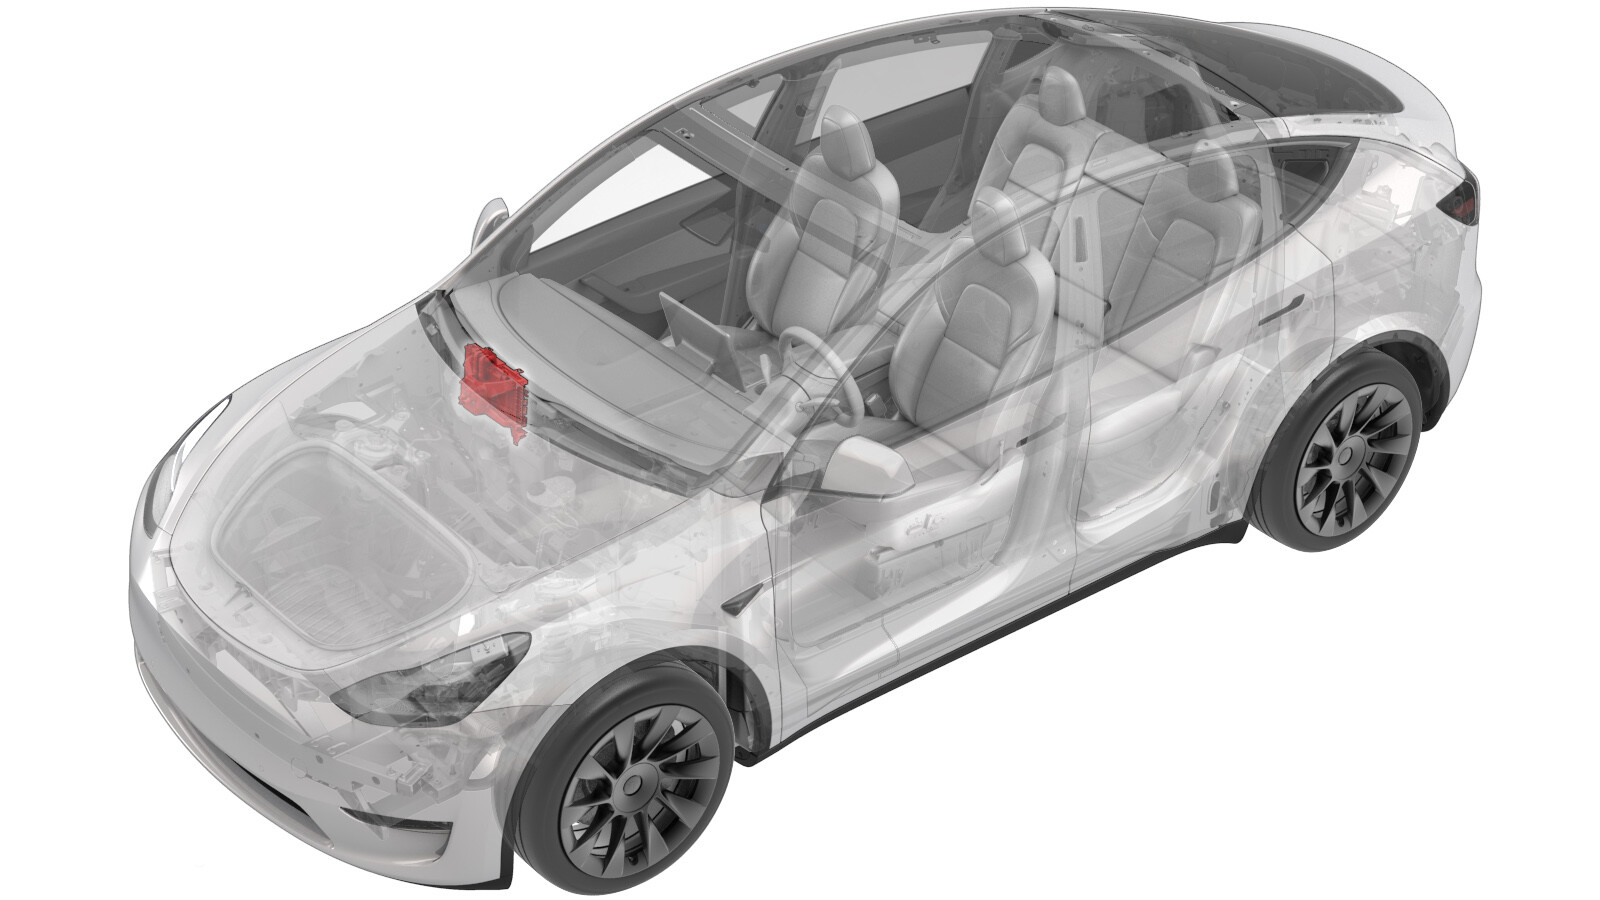
Connectivity Board - Car Computer (Info-Ryzen) (Remove and Replace)
 Correction code
211529120.72
NOTE: Unless otherwise explicitly
stated in the procedure, the above correction code and FRT reflect all of the work
required to perform this procedure, including the linked procedures. Do not stack correction codes unless
explicitly told to do so.
NOTE: See Flat Rate
Times to learn more about FRTs and how they are created.
NOTE: See Personal Protection to make sure wearing proper PPE when
performing the below procedure. NOTE: See Ergonomic Precautions for safe and healthy working
practices.
Correction code
211529120.72
NOTE: Unless otherwise explicitly
stated in the procedure, the above correction code and FRT reflect all of the work
required to perform this procedure, including the linked procedures. Do not stack correction codes unless
explicitly told to do so.
NOTE: See Flat Rate
Times to learn more about FRTs and how they are created.
NOTE: See Personal Protection to make sure wearing proper PPE when
performing the below procedure. NOTE: See Ergonomic Precautions for safe and healthy working
practices.
- 2023-07-10: Software update step now applies to all vehicles.
- 2024-05-21: Add a note to check modem compatibility before installing.
Remove
- Open both front doors and lower both front windows.
- Move the RH front seat backward.
- Disconnect 12V/LV Power. See 12V/LV Power (Disconnect and Connect).
- Remove the glove box. See Glove Box - With Knee Airbags (Remove and Replace) or Glove Box - Without Knee Airbags (Remove and Replace).
- Remove the RH footwell air duct and air wave duct. See Duct - Air Wave - RH (Remove and Replace)
-
Put on an ESD wrist strap, and then
connect the wrist strap to vehicle ground.
-
Release the visor from the car
computer.
Note2x clips, Pull the LH tab outwards to release tab then lift upwards to release visor from car computer
-
Disconnect the bottom connectors (x3)
from the car computer.
-
Remove and discard the screws (x8)
that secure the top cover onto the car computer, and then remove the top cover from the
car computer.
-
Remove and discard the screws (x5)
that secure the connectivity card.
-
Slide the connectivity card down to
separate the connector from the PCB connector, and then remove the connectivity card from
the vehicle.
Install
-
Insert the connectivity card into the
PCB connector.
NoteMake sure the replacement modem is interchangeable with original modem before installing.The Telit/Titan modem cannot replace an Iris modem.
-
Install the screws that secure the
connectivity card.
Note5x screws, T10, 0.7 Nm, Install new patched screws
-
Position the top cover onto the car
computer, and then fasten the screws that secure the top cover.
Note8x screws, T10, 1.4 Nm, Install new screws
-
Connect the bottom connectors (x3)
onto the car computer.
-
Secure the visor onto the car
computer
Note4x clips, Align coolant pipe clips over coolant pipes and lower visor until all clips are secured
-
Disconnect the ESD wrist strap from
the vehicle ground, and then remove the wrist strap.
- Install the RH footwell air duct and air wave duct. See Duct - Air Wave - RH (Remove and Replace)
- Install the glove box. See Glove Box - With Knee Airbags (Remove and Replace) or Glove Box - Without Knee Airbags (Remove and Replace).
- Reconnect 12V/LV Power. See 12V/LV Power (Disconnect and Connect).
- Move the RH front seat to its original position.
-
Update the vehicle to the latest firmware. See Software Update.
NoteMake sure the vehicle is connected to WiFi, as cell service may not be functioning properly.
-
For NA or APAC regions, go to step
13. For the EMEA region, perform these subteps to swap the eSIM profile.
- Connect a laptop with Toolbox 3 to the vehicle. See Toolbox (Connect and Disconnect).
- In Toolbox, select the Actions/Autodiag tab, and then search for "bootstrap".
- Click PROC_ICE_X_DUAL-BOOTSTRAP-E-SIMvia Toolbox:(link), select kpn, and then click Run.
- Disconnect the laptop from the vehicle.
-
Verify BT, WiFi, and LTE are
functioning properly.
- Raise both front windows and close both front doors.