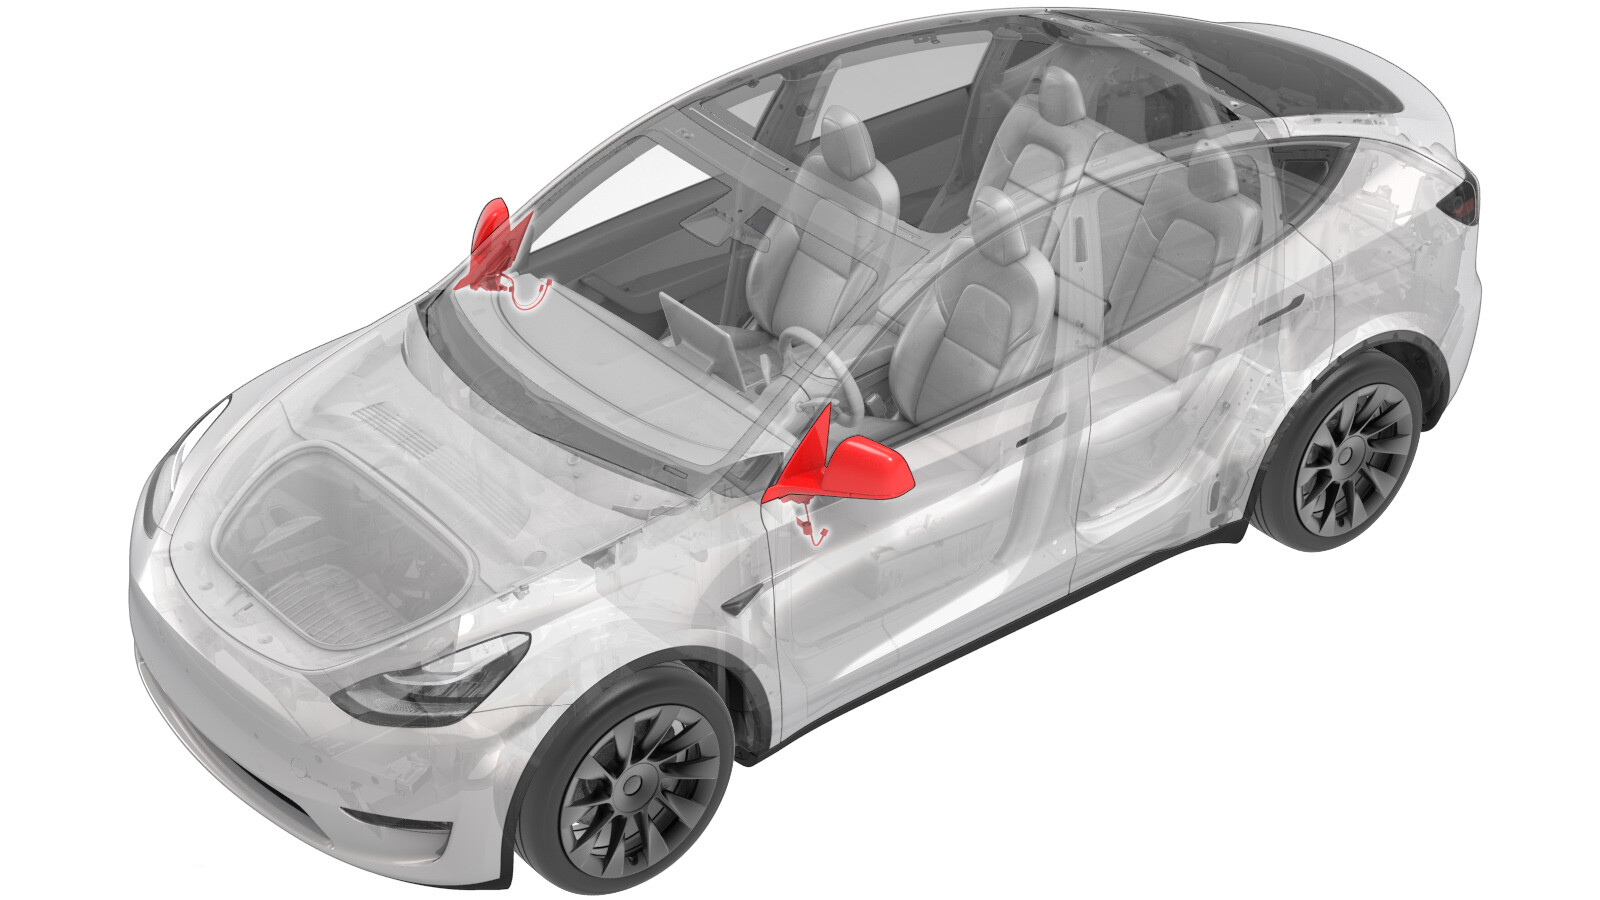
Mirror - Door - LH (Remove and Replace)
 Correction code
12091102
0.24
NOTE: Unless otherwise explicitly
stated in the procedure, the above correction code and FRT reflect all of the work
required to perform this procedure, including the linked procedures. Do not stack correction codes unless
explicitly told to do so.
NOTE: See Flat Rate
Times to learn more about FRTs and how they are created.
NOTE: See Personal Protection to make sure wearing proper PPE when
performing the below procedure. NOTE: See Ergonomic Precautions for safe and healthy working
practices.
Correction code
12091102
0.24
NOTE: Unless otherwise explicitly
stated in the procedure, the above correction code and FRT reflect all of the work
required to perform this procedure, including the linked procedures. Do not stack correction codes unless
explicitly told to do so.
NOTE: See Flat Rate
Times to learn more about FRTs and how they are created.
NOTE: See Personal Protection to make sure wearing proper PPE when
performing the below procedure. NOTE: See Ergonomic Precautions for safe and healthy working
practices.
- 2026-04-29: Added door mirror calibration steps.
- 2025-02-10: Added information on updating firmware for newer type of door mirror.
- 2023-07-20: Added information on resetting the body controller when the mirror is replaced due to an internal short in the adjustment motor.
Torque Specifications
| Description | Torque Value | Recommended Tools | Reuse/Replace | Notes |
|---|---|---|---|---|
| Bolts that attach the LH door mirror to the door |
 15 Nm (11.1 lbs-ft) |
|
Reuse |
Remove
-
Check the firmware version. If firmware version is earlier than 2025.2.3,
update the firmware to version 2025.2.3. or later. See Software Update.
NoteAdd correction code 00020003 as a separate activity to the Service Visit.
- Remove the LH door mirror skull cap. See Skull Cap - Door Mirror - LH (Remove and Replace).
- Remove the LH front door trim panel. See Panel - Door Trim - Front - LH (Remove and Install).
-
Disconnect the LH door mirror electrical connector.
-
Release the clip that attaches the window electrical harness to the door.
-
Release the clips that attach the LH door glass run seal to the door, and then remove the seal from the door.
CAUTIONTo prevent glass run clip damage, gently pry the clips one at a time using a trim removal tool.
-
Remove the bolt cap, and
then remove the bolts (x3) that attach the LH door mirror to the door.
NoteUse only hand tools to remove or install the fasteners. Do not use impact or power tools.TIpUse of the following tool(s) is recommended:
- 10 mm socket
-
Lift up on the LH door mirror assembly to release it from the door.
-
Push the harness grommet through the door, and then route the electrical harness through the door to remove the LH door mirror assembly.
Install
-
Route the mirror harness through the door and secure the grommet, and
position the LH front exterior mirror.
-
Install the bolts (x3) that attach the LH door mirror to the door and
install the bolt cap.15 Nm (11.1 lbs-ft)NoteUse only hand tools to remove or install the fasteners. Do not use impact or power tools.TIpUse of the following tool(s) is recommended:
- 10 mm socket
-
Install the clips that attach the LH door glass run seal to the door.
-
Install the clip that attaches the window electrical harness to the
door.
-
Connect the LH door mirror electrical connector.
- Install the LH front door trim panel. See Panel - Door Trim - Front - LH (Remove and Install).
- Install the LH door mirror skull cap. See Skull Cap - Door Mirror - LH (Remove and Replace).
- Place the vehicle in Service Mode by using the touchscreen. See Service Mode.
- On the touchscreen, tap , and allow the routine to complete.
- Exit Service Mode. See Service Mode.