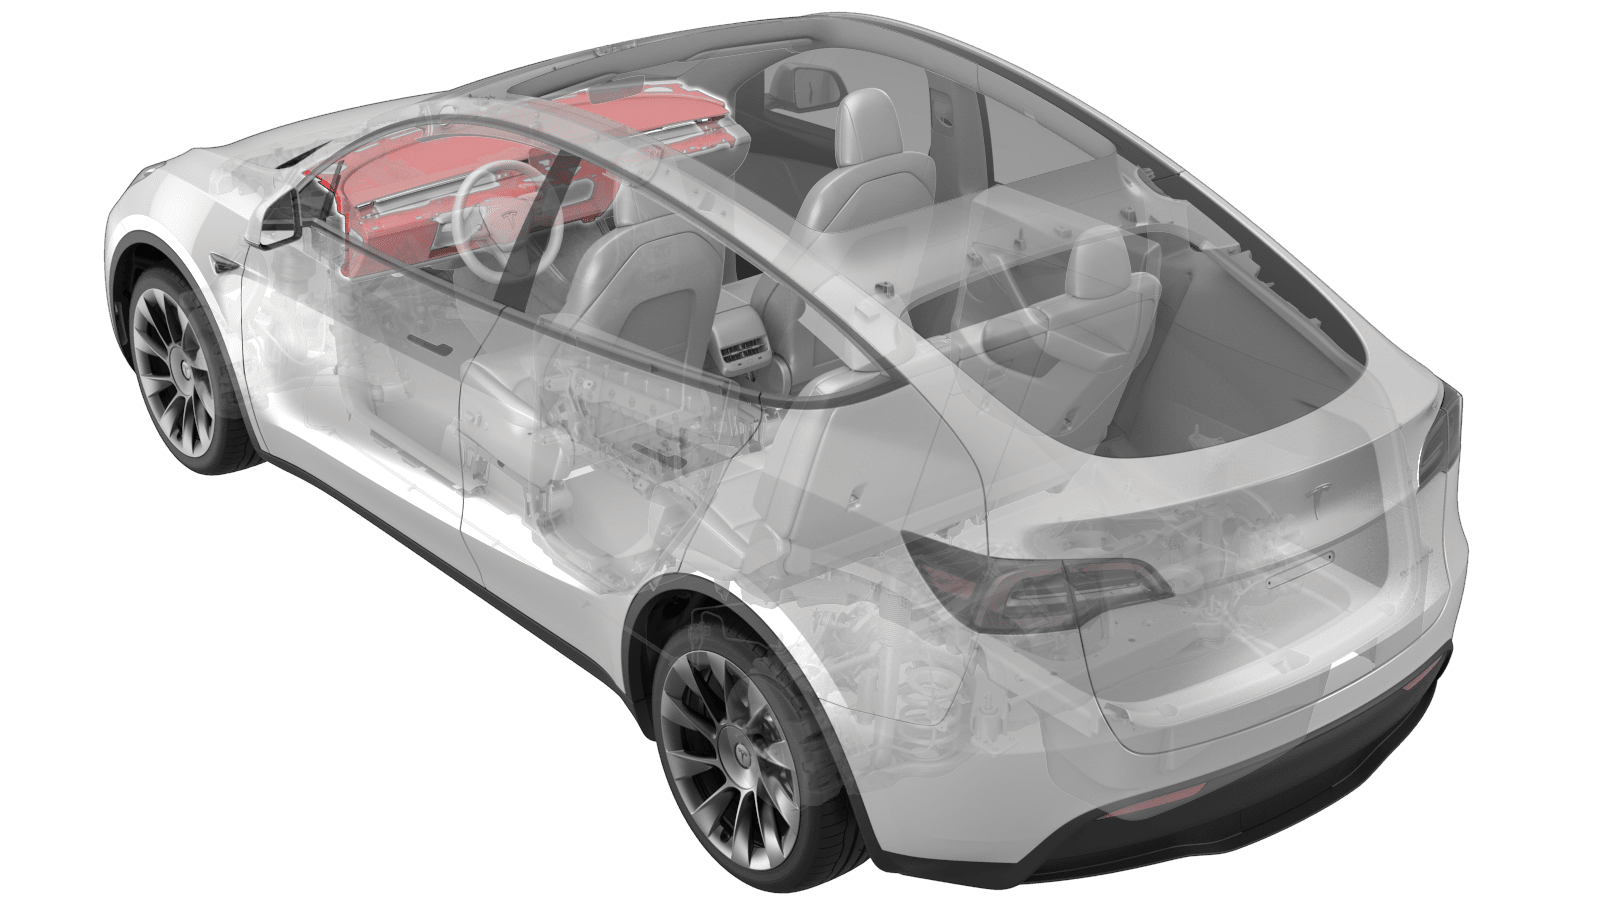
IP Carrier (Remove and Install)
 Correction code
14052101
1.98
NOTE: Unless otherwise explicitly
stated in the procedure, the above correction code and FRT reflect all of the work
required to perform this procedure, including the linked procedures. Do not stack correction codes unless
explicitly told to do so.
NOTE: See Flat Rate
Times to learn more about FRTs and how they are created.
NOTE: See Personal Protection to make sure wearing proper PPE when
performing the below procedure. NOTE: See Ergonomic Precautions for safe and healthy working
practices.
Correction code
14052101
1.98
NOTE: Unless otherwise explicitly
stated in the procedure, the above correction code and FRT reflect all of the work
required to perform this procedure, including the linked procedures. Do not stack correction codes unless
explicitly told to do so.
NOTE: See Flat Rate
Times to learn more about FRTs and how they are created.
NOTE: See Personal Protection to make sure wearing proper PPE when
performing the below procedure. NOTE: See Ergonomic Precautions for safe and healthy working
practices.
- 2025-02-26: Added missing step to remove/install driver knee airbag.
- 2023-3-29: Revised procedure.
- 2024-01-29: Re-structured the procedure.
Torque Specifications
| Description | Torque Value | Recommended Tools | Reuse/Replace | Notes |
|---|---|---|---|---|
| Front passenger airbag to cross car beam bolt |
 8 Nm (5.9 lbs-ft) |
|
Replace | |
| IP carrier to cross car beam screws |
 2.3 Nm (1.7 lbs-ft) |
|
Reuse |
Remove
- Open all doors and lower all windows.
- Remove the center console. See Center Console (Remove and Install)
- Remove the LH and RH lower A-pillar trim. See Trim - A-Pillar - Lower - LH (Remove and Replace).
- Remove the LH and RH upper A-pillar trims. See Trim - A-Pillar - Upper - LH (Remove and Replace).
- Disconnect LV power. See 12V/LV Power (Disconnect and Connect).
- Remove the driver knee airbag. See Airbag - Knee - Driver (Remove and Install).
- Remove the touchscreen. See Touchscreen (Remove and Replace).
- Remove the passenger footwell duct. See Duct - Footwell - RH (Remove and Replace).
- Remove the RH air wave duct. See Duct - Air Wave - RH (Remove and Replace).
- Remove the steering column control module. See Module - Steering Column Control (Remove and Replace).
- Remove the LH front vent. See Vent - Front - LH (Remove and Replace).
- Remove the RH front vent. See Vent - Front - RH (Remove and Replace).
- Remove the LH and RH dash speakers. See Speaker - Dash - LH (Remove and Replace).
- Remove the center dash speaker. See Speaker - Dash - Center (Remove and Replace).
- If equipped, remove the dash tweeter. See Tweeter - Dash (Remove and Replace).
-
Disconnect the electrical
wiring harness from the front passenger airbag connectors (x3).
NoteVehicles in regions other than North America have only 2 connectors.
-
Remove and discard the bolts
(x4) that attach the front passenger airbag to the cross car beam.
TIpUse of the following tool(s) is recommended:
- External Torx E10 or Torx T30 socket
- 4 in extension
- ¼ in std ratchet
- ¼ in torque wrench (installation only)
-
Remove the screws (x2) that
attach the instrument panel carrier to the cross car beam at the front
passenger airbag.
TIpUse of the following tool(s) is recommended:
- Torx T20 socket
- 4 in extension
- ¼ in std ratchet
- ¼ in torque wrench (installation only)
-
Remove the screws (x8) that attach the instrument panel carrier to the
cross car beam.
NoteThere are 2 screws on the lower LH side, 1 on the upper LH side, 4 at the center, and 1 on the upper RH side.TIpUse of the following tool(s) is recommended:
- Torx T20 socket
- 4 in extension
- ¼ in std ratchet
- ¼ in torque wrench (installation only)
-
Remove the instrument panel
carrier from the cross car beam, and then remove the instrument panel
carrier from the vehicle.
Install
-
With assistance, install the
instrument panel carrier onto the cross car beam.
NoteSlide the mounting tabs on the instrument panel carrier into the brackets on the vehicle. Be cautious to clear the harness clipped at top center of HVAC assembly.
-
Install the screws (x8) that attach the instrument panel carrier to the
cross car beam.2.3 Nm (1.7 lbs-ft)NoteThere are 2 screws on the lower LH side, 1 on the upper LH side, 4 at the center, and 1 on the upper RH side.TIpUse of the following tool(s) is recommended:
- Torx T20 socket
- 4 in extension
- ¼ in std ratchet
- ¼ in torque wrench (installation only)
-
Install the screws (x2) that attach the instrument panel carrier to the
cross car beam at the front passenger airbag.2.3 Nm (1.7 lbs-ft)TIpUse of the following tool(s) is recommended:
- Torx T20 socket
- 4 in extension
- ¼ in std ratchet
- ¼ in torque wrench (installation only)
-
Install the bolts (x4) that attach the front passenger airbag to the cross
car beam.8 Nm (5.9 lbs-ft)TIpUse of the following tool(s) is recommended:
- External Torx E10 or Torx T30 socket
- 4 in extension
- ¼ in std ratchet
- ¼ in torque wrench (installation only)
-
Connect the electrical wiring harness to the front passenger airbag
connectors (x3).
NoteVehicles in regions other than North America have only 2 connectors.
- Install the LH and RH dash speakers. See Speaker - Dash - LH (Remove and Replace).
- If equipped, install the dash tweeter. See Tweeter - Dash (Remove and Replace).
- Install the center dash speaker. See Speaker - Dash - Center (Remove and Replace).
- Install the RH front vent. See Vent - Front - RH (Remove and Replace).
- Install the LH front vent. See Vent - Front - LH (Remove and Replace).
- Install the steering column control module. See Module - Steering Column Control (Remove and Replace).
- Install the RH air wave duct. See Duct - Air Wave - RH (Remove and Replace).
- Install the passenger footwell duct. See Duct - Footwell - RH (Remove and Replace).
- Install the touchscreen. See Touchscreen (Remove and Replace).
- Install the LH and RH upper A-pillar trims. See Trim - A-Pillar - Upper - LH (Remove and Replace).
- Install the LH and RH lower A-pillar trims. See Trim - A-Pillar - Lower - LH (Remove and Replace).
- Install the driver knee airbag. See Airbag - Knee - Driver (Remove and Install).
- Connect LV power. See 12V/LV Power (Disconnect and Connect).
- Install the center console. See Center Console (Remove and Install)