Trim - Sill Panel - Rear - LH (Remove and Replace)
 Correction code
15180502
0.18
NOTE: Unless otherwise explicitly
stated in the procedure, the above correction code and FRT reflect all of the work
required to perform this procedure, including the linked procedures. Do not stack correction codes unless
explicitly told to do so.
NOTE: See Flat Rate
Times to learn more about FRTs and how they are created.
NOTE: See Personal Protection to make sure wearing proper PPE when
performing the below procedure. NOTE: See Ergonomic Precautions for safe and healthy working
practices.
Correction code
15180502
0.18
NOTE: Unless otherwise explicitly
stated in the procedure, the above correction code and FRT reflect all of the work
required to perform this procedure, including the linked procedures. Do not stack correction codes unless
explicitly told to do so.
NOTE: See Flat Rate
Times to learn more about FRTs and how they are created.
NOTE: See Personal Protection to make sure wearing proper PPE when
performing the below procedure. NOTE: See Ergonomic Precautions for safe and healthy working
practices.
Remove
- Open all doors.
- Lower all windows.
- Remove the 2nd row lower seat cushion. See Seat Cushion - Lower - 2nd Row (Remove and Replace).
- Place a protective cover, such as a fender cover, on top of the 2nd row lower seat cushion area.
- Remove the LH 2nd row seat side bolster. See Bolster - Side - Seat - 2nd Row - LH (Remove and Replace).
-
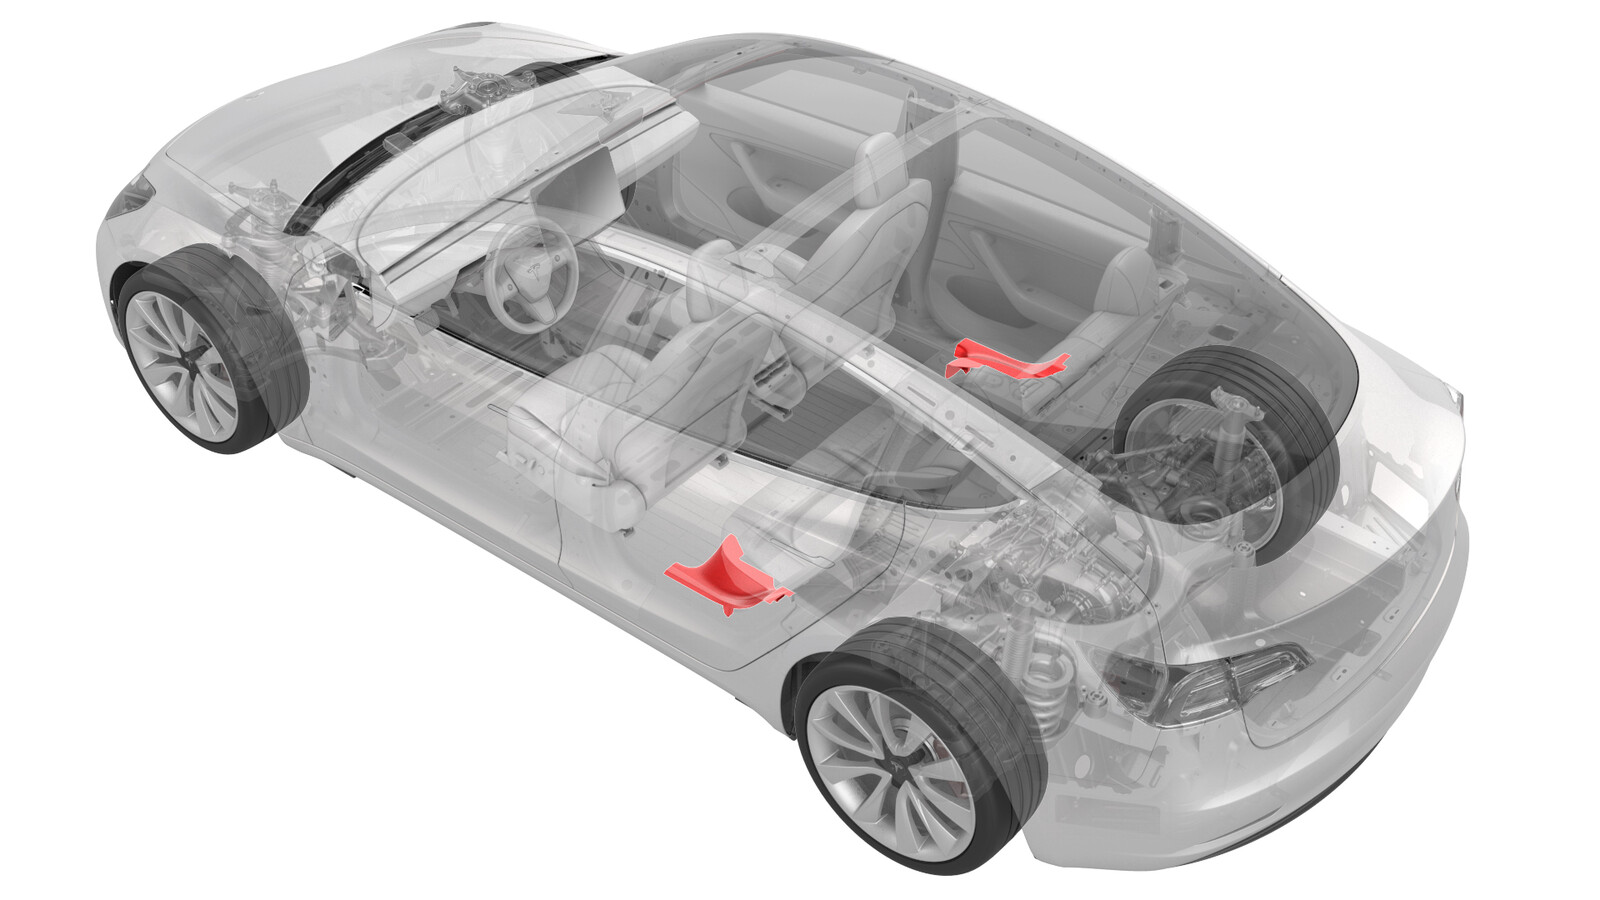
Pull upward at the lower corner of the rear LH sill panel trim to release clips that attach the rear LH sill panel trim to the lower C-pillar, and then remove the sill panel trim from the vehicle.
NoteRemove any remaining rear LH sill panel trim clips from the LH C-pillar, and if the rear LH sill panel trim is to be later installed, remove all clips from the trim.
Install
Installation procedure is the reverse of removal, except for the following:
- If reusing the same rear LH sill panel trim, install new clips onto the trim.
- Align the guiding tab to the slot, and then push downwards to engage the clips.
- Make sure that the seal overlaps the trim.