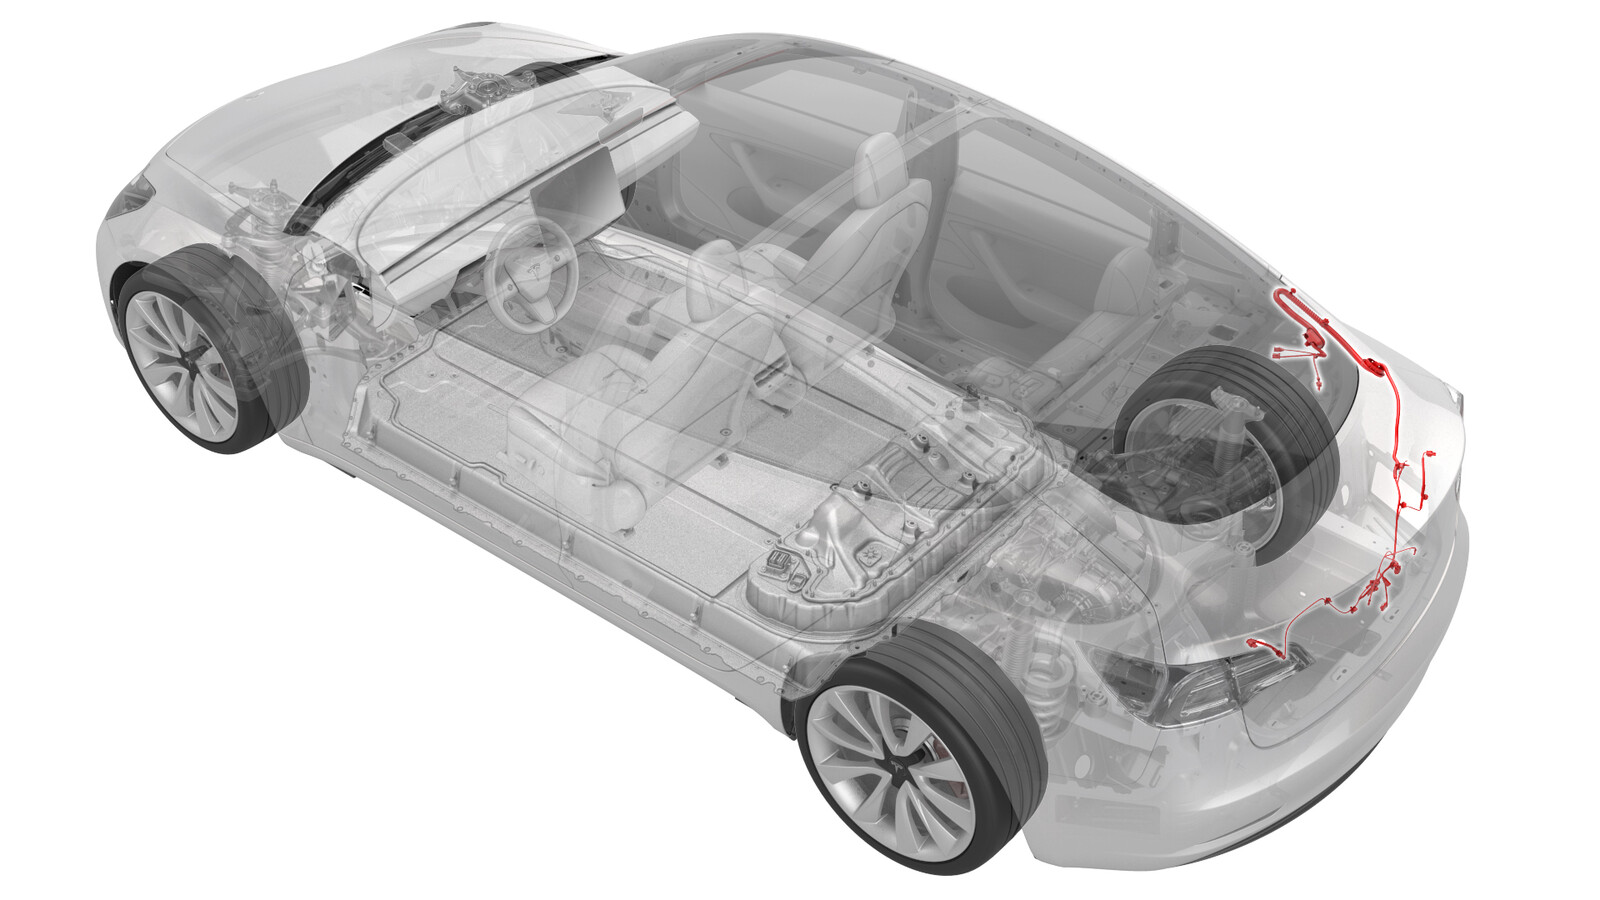
Harness - Trunk (Remove and Replace)
 Correction code
17104502
0.60
NOTE: Unless otherwise explicitly
stated in the procedure, the above correction code and FRT reflect all of the work
required to perform this procedure, including the linked procedures. Do not stack correction codes unless
explicitly told to do so.
NOTE: See Flat Rate
Times to learn more about FRTs and how they are created.
NOTE: See Personal Protection to make sure wearing proper PPE when
performing the below procedure. NOTE: See Ergonomic Precautions for safe and healthy working
practices.
Correction code
17104502
0.60
NOTE: Unless otherwise explicitly
stated in the procedure, the above correction code and FRT reflect all of the work
required to perform this procedure, including the linked procedures. Do not stack correction codes unless
explicitly told to do so.
NOTE: See Flat Rate
Times to learn more about FRTs and how they are created.
NOTE: See Personal Protection to make sure wearing proper PPE when
performing the below procedure. NOTE: See Ergonomic Precautions for safe and healthy working
practices.
- 2023-09-20: Added DAS reset to the procedure.
Remove
- Open all 4 doors and lower all 4 windows.
- Move both front seats forward.
- Open the liftgate.
- Remove the RH 2nd row seat side bolster. See Bolster - Side - Seat - 2nd Row - LH (Remove and Replace).
- Release the clips that attach the RH side rail trim to the vehicle, and then let the side rail hang from the tethers. See Trim - Side Rail - LH (Remove and Install).
- Remove the RH upper C-pillar trim. See Trim - C-Pillar - Upper - LH (Remove and Replace).
-
Release the clip and tabs
that attach the RH rear C-pillar trim to the body, and then set the trim
aside.
NoteThe seatbelt will still be attached to the rear C-pillar trim.
Figure 1. LH shown; RH similar -
Release the clips that
attach the package tray trim to the body.
-
Carefully position inflatable air bags (x2) in between the deck lid and
package tray to gain access to the deck lid harness.
-
Disconnect the trunk
electrical harness connectors (x2).
NoteMove and adjust the package tray as needed to gain access to the connectors.
-
Remove the bolt that
attaches the ground strap to the body.
CAUTIONTake care when using hand tools near the backlight glass and defroster grid.
-
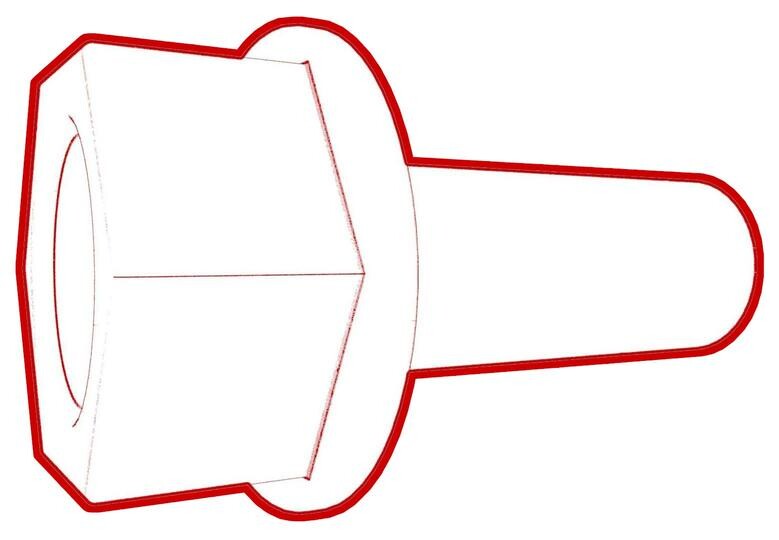
Inspect the ground strap
bolt cross section:
Figure 2. Tri-lobular bolt shaft - If the bolt cross section is tri-lobular, discard and use a regular bolt (1447438-00-A) for installation.
- If the bolt cross section is circular, set the bolt aside for reuse.
-
Push the trunk electrical
wiring harness through the bulkhead.
- Remove the trunk trim panel. See Trim - Lid - Trunk (Remove and Replace).
-
Disconnect the LH and RH trunk light connectors.
Figure 3. LH Figure 4. RH -
Disconnect the backup camera connector, the trunk handle connector, and the LH and RH license plate light connectors.
-
Disconnect the trunk latch connector.
-
Remove the bolts (x2) that
attach the trunk electrical harness ground straps to the trunk lid.
-
Inspect the ground strap bolts cross section:
Figure 5. Tri-lobular bolt shaft - If the bolt cross section is tri-lobular, discard and use a regular bolt (1447438-00-A) for installation.
- If the bolt cross section is circular, set the bolt aside for reuse.
-
Release the clips that
attach the trunk harness to the trunk lid.
-
Release the clips that
attach the grommet to the trunk bulkhead, and then push the harness through
the trunk bulkhead and out of the trunk lid.
Install
-
Move the trunk electrical
harness in through the trunk bulkhead, and then fasten the clips that attach
the grommet to the trunk bulkhead.
-
Fasten the clips that attach the trunk electrical harness to the trunk lid.
NoteWork from the grommet down the main branch, and then to the smaller branches, untwisting and relaxing the harness as the clips are fastened. Then fasten the clips (x2) that attach the rubber armor to the trunk lid exterior.CAUTIONMake sure that there are no twists or binds in the rubber armor between the grommet and between the two clips.
-
Install the bolts (x2) that
attach the trunk electrical harness ground straps to the trunk lid.
 8 Nm (5.9 lbs-ft)
 -
Connect the trunk electrical harness to the trunk latch connector.
-
Connect the trunk electrical harness to the RH and LH license plate light connectors, the trunk handle connector, and the backup camera connector.
-
Connect the trunk electrical harness to the RH and LH trunk light connectors.
Figure 6. RH Figure 7. LH - Install the trunk trim panel. See Trim - Lid - Trunk (Remove and Replace).
-
Move the trunk electrical
wiring harness in through the bulkhead, and then fasten the clips that
attach the grommet to the bulkhead.
-
Verify that the rubber armor of the harness is correctly positioned and
without twists or binds.
Figure 8. Properly installed harness contrasted to a harness that was twisted before it was installed. -
Install the bolt that
attaches the ground strap to the body.8 Nm (5.9 lbs-ft)
-
Connect the trunk electrical harness connectors.
-
If the vehicle experienced rear facing camera alerts, perform these
substeps to reset DAS.
- Enable Service Mode. See Service Mode.
- On the touchscreen, touch , and allow the routine to complete.
- Disable Service Mode. See Service Mode.
-
Remove the inflatable
airbags from the package tray, and then install the clips that attach the
package tray trim to the body.
-
Move the RH rear C-pillar
trim into position, and then install the clip and tabs that attach the rear
C-pillar trim to the vehicle.
NoteSlide the rear tabs into the package tray first.
- Install the RH upper C-pillar trim. See Trim - C-Pillar - Upper - LH (Remove and Replace).
- Install the RH side rail trim. See Trim - Side Rail - LH (Remove and Install).
- Install the RH 2nd row seat side bolster, and then unfold the RH 2nd row seatback. See Bolster - Side - Seat - 2nd Row - LH (Remove and Replace).
- Move both front seats to their original positions.