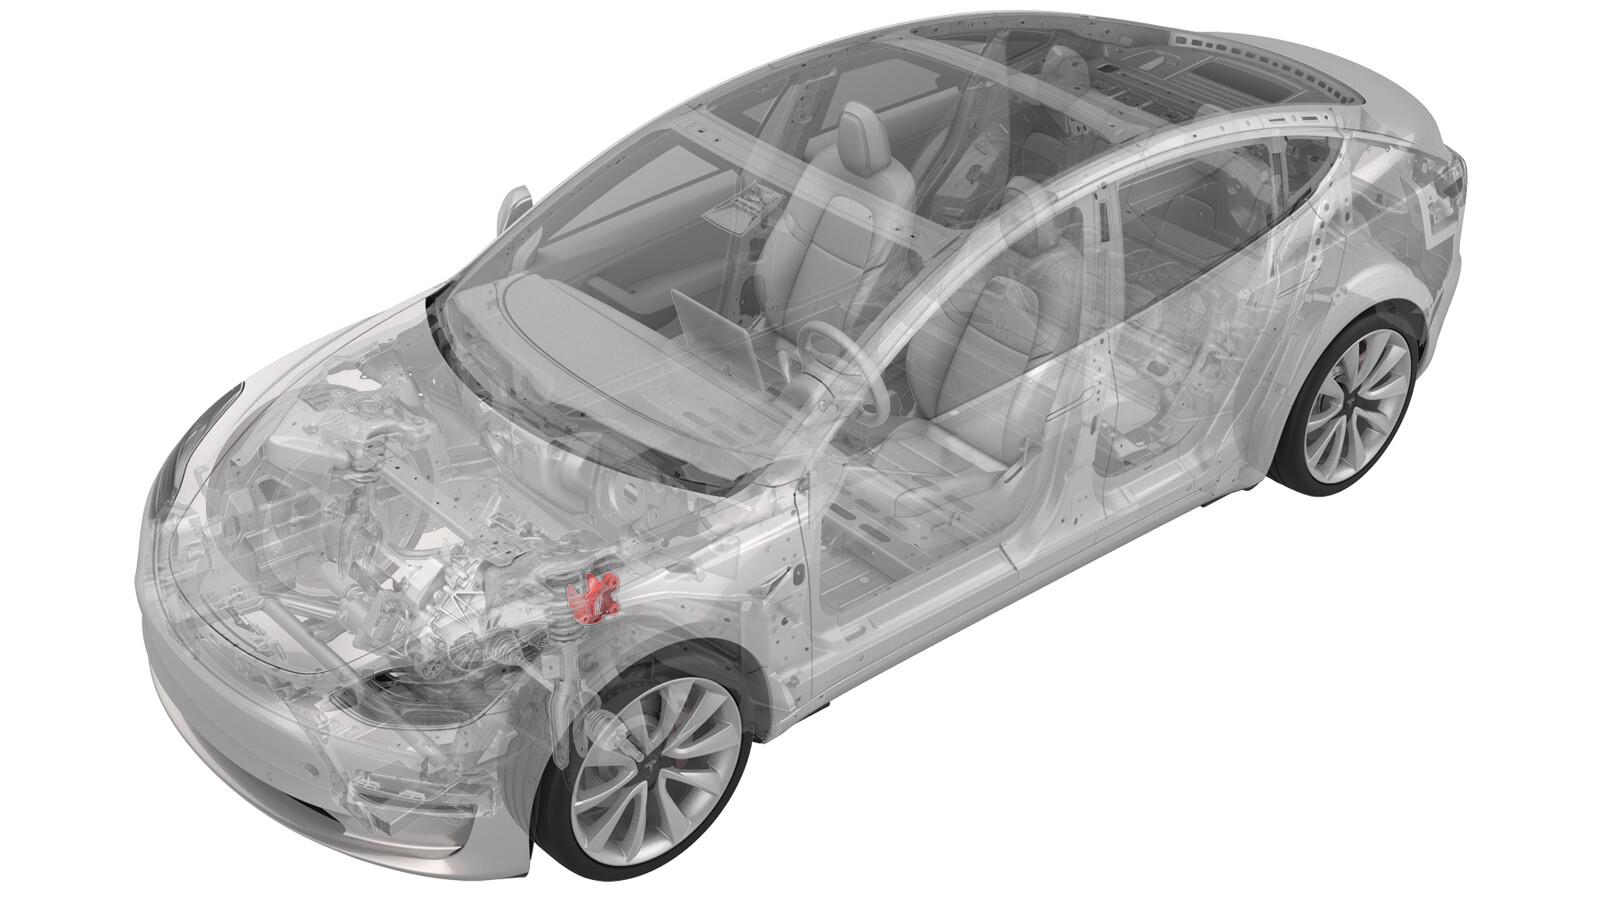
Isolator - Motor Mount - Front - LH (Remove and Replace)
 Correction code
30011022
2.88
NOTE: Unless otherwise explicitly
stated in the procedure, the above correction code and FRT reflect all of the work
required to perform this procedure, including the linked procedures. Do not stack correction codes unless
explicitly told to do so.
NOTE: See Flat Rate
Times to learn more about FRTs and how they are created.
NOTE: See Personal Protection to make sure wearing proper PPE when
performing the below procedure. NOTE: See Ergonomic Precautions for safe and healthy working
practices.
Correction code
30011022
2.88
NOTE: Unless otherwise explicitly
stated in the procedure, the above correction code and FRT reflect all of the work
required to perform this procedure, including the linked procedures. Do not stack correction codes unless
explicitly told to do so.
NOTE: See Flat Rate
Times to learn more about FRTs and how they are created.
NOTE: See Personal Protection to make sure wearing proper PPE when
performing the below procedure. NOTE: See Ergonomic Precautions for safe and healthy working
practices.
- 2025-03-26: Added step to refer to the suspension alignment tables to define whether an alignment check is required and, if so, what type of alignment check is required.
- 2024-11-25: Added note on O-ring installation.
Remove
- Remove the front subframe assembly from the vehicle. See Subframe Assembly - Front (Dual Motor) (Remove and Install).
-
Remove and discard the bolts
that attach the LH front motor mount isolator to the body, and then remove
the isolator from the vehicle.
WarningSecure the LH front motor mount isolator while removing the bolts, as the isolator will fall once unbolted.
Install
-
Install an o-ring (part
number 1473485-00-A) 5 threads from the tip of each new bolt (x3).
-
Hand-tighten the new bolts
that attach the LH front motor mount isolator to the body.
TIpIf the bolt o-rings are getting stuck in the isolator mount, remove the o-rings from the 3 mounting bolts, position the bolts through the mount, and then reinstall the o-rings.
-
Tighten the new bolts (x3)
that attach the LH front motor mount isolator to the body.
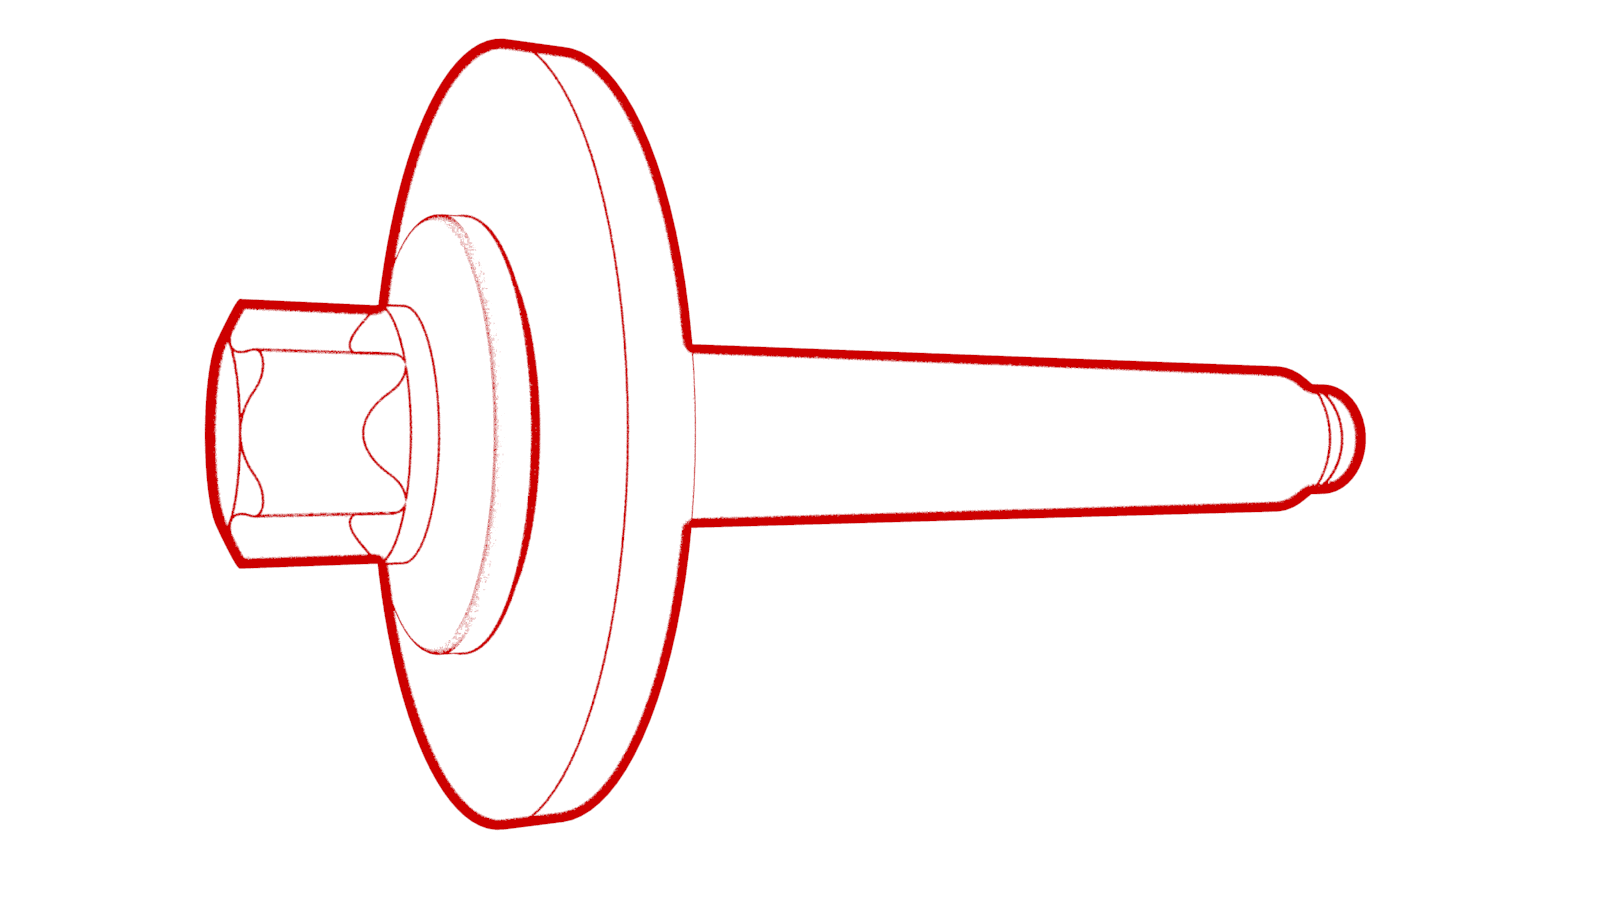 62 Nm (45.7 lbs-ft)
 - Install the front subframe assembly on the vehicle. See Subframe Assembly - Front (Dual Motor) (Remove and Install).
- Since the subframe was removed and reinstalled: Refer to the Alignment Requirement tables to determine whether an EPAS alignment check (EC) or four wheel alignment check (AC) is necessary. If performed, add the alignment check/adjust correction code as a separate activity to the SV. See Alignment Requirement - Suspension.