Flood Ports - 2nd Generation (Remove and Replace)
 Correction code
16102702
0.36
NOTE: Unless otherwise explicitly
stated in the procedure, the above correction code and FRT reflect all of the work
required to perform this procedure, including the linked procedures. Do not stack correction codes unless
explicitly told to do so.
NOTE: See Flat Rate
Times to learn more about FRTs and how they are created.
NOTE: See Personal Protection to make sure wearing proper PPE when
performing the below procedure. NOTE: See Ergonomic Precautions for safe and healthy working
practices.
Correction code
16102702
0.36
NOTE: Unless otherwise explicitly
stated in the procedure, the above correction code and FRT reflect all of the work
required to perform this procedure, including the linked procedures. Do not stack correction codes unless
explicitly told to do so.
NOTE: See Flat Rate
Times to learn more about FRTs and how they are created.
NOTE: See Personal Protection to make sure wearing proper PPE when
performing the below procedure. NOTE: See Ergonomic Precautions for safe and healthy working
practices.
- 2023-06-16: Replaced steps for Toolbox 3 Tools tab.
- 2024-06-17 Deleted ancillary bay air leak test.
Remove
- Remove the rear HV battery skid plate. See Skid Plate - HV Battery - Rear (Remove and Replace).
-
Release the clips that
attach the HV battery coolant hoses to the LH shear plate.
-
Release the clips that
attach the HV battery coolant hoses to the RH shear plate.
-
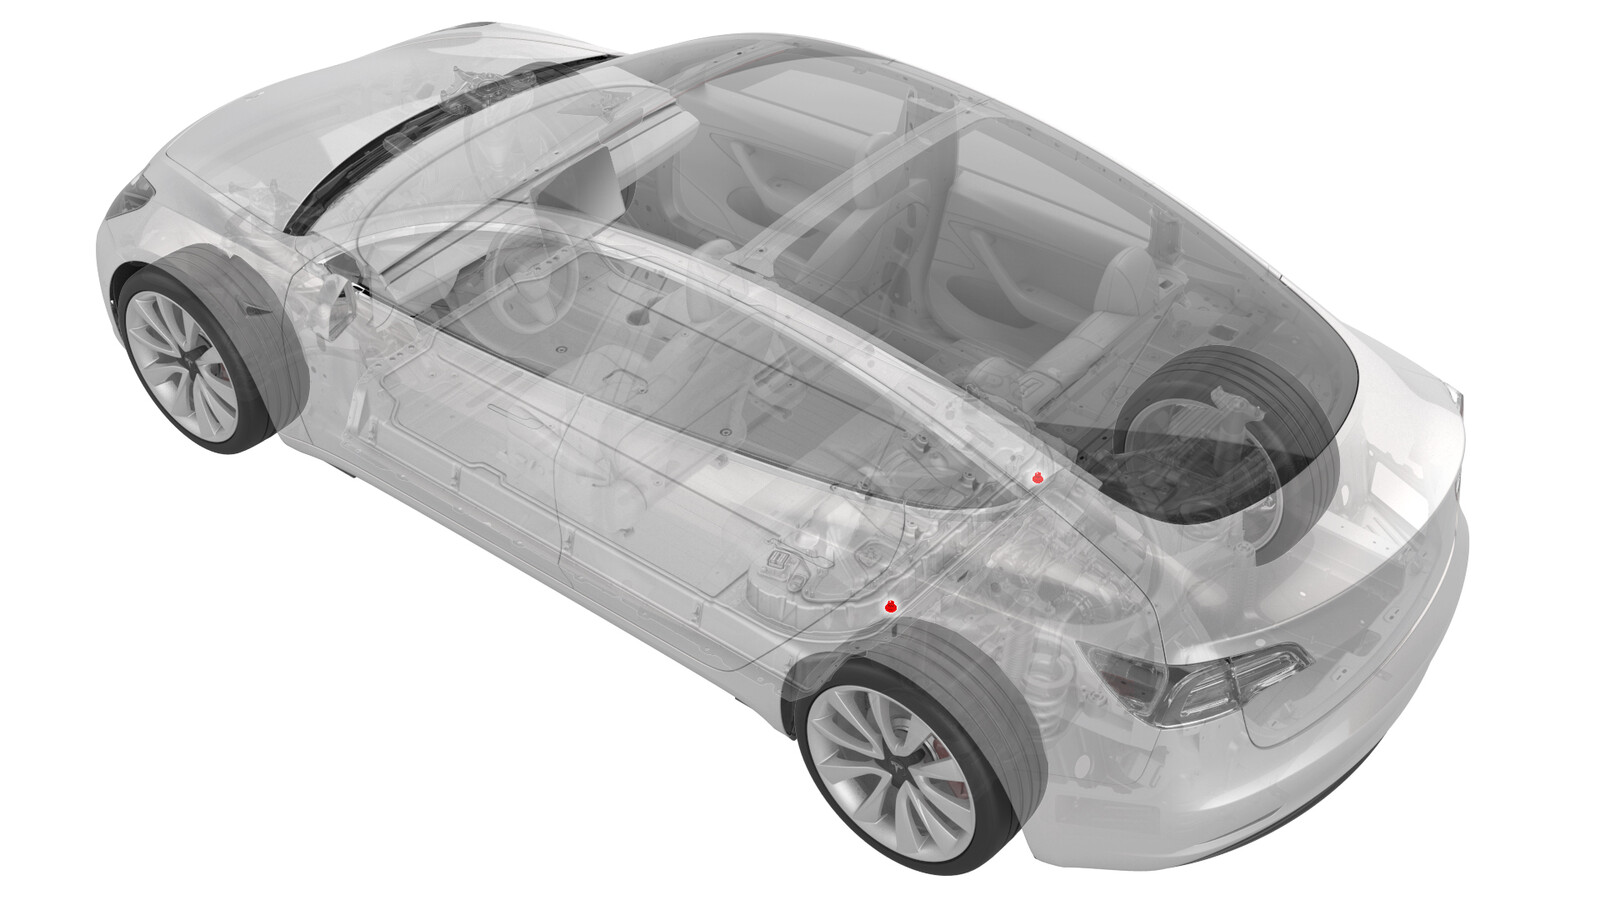
Remove the 2nd generation
flood ports from the LH and RH underside of the HV battery ancillary
bay.
NoteTwist the flood port while pulling down.
Install
- Use an IPA wipe to clean the area around the openings where the flood ports were removed.
-
Install the 2nd generation
flood ports into the openings at the LH and RH underside of the HV battery
ancillary bay.
NotePress up firmly to fully seat the flood ports and fasten the clips (x8) internally.
-
Fasten the clips that attach
the HV battery coolant hoses to the RH shear plate.
-
Fasten the clips that attach
the HV battery coolant hoses to the LH shear plate.
- Check that the HV connections at the rear of the HV battery are tight and secure.
- Install the rear HV battery skid plate. See Skid Plate - HV Battery - Rear (Remove and Replace).
-
Add the ancillary bay air leak test as a separate activity if necessary.
See Ancillary Bay Air Leak Test (Inspection).
NoteAdd correction code 16100400 as needed.