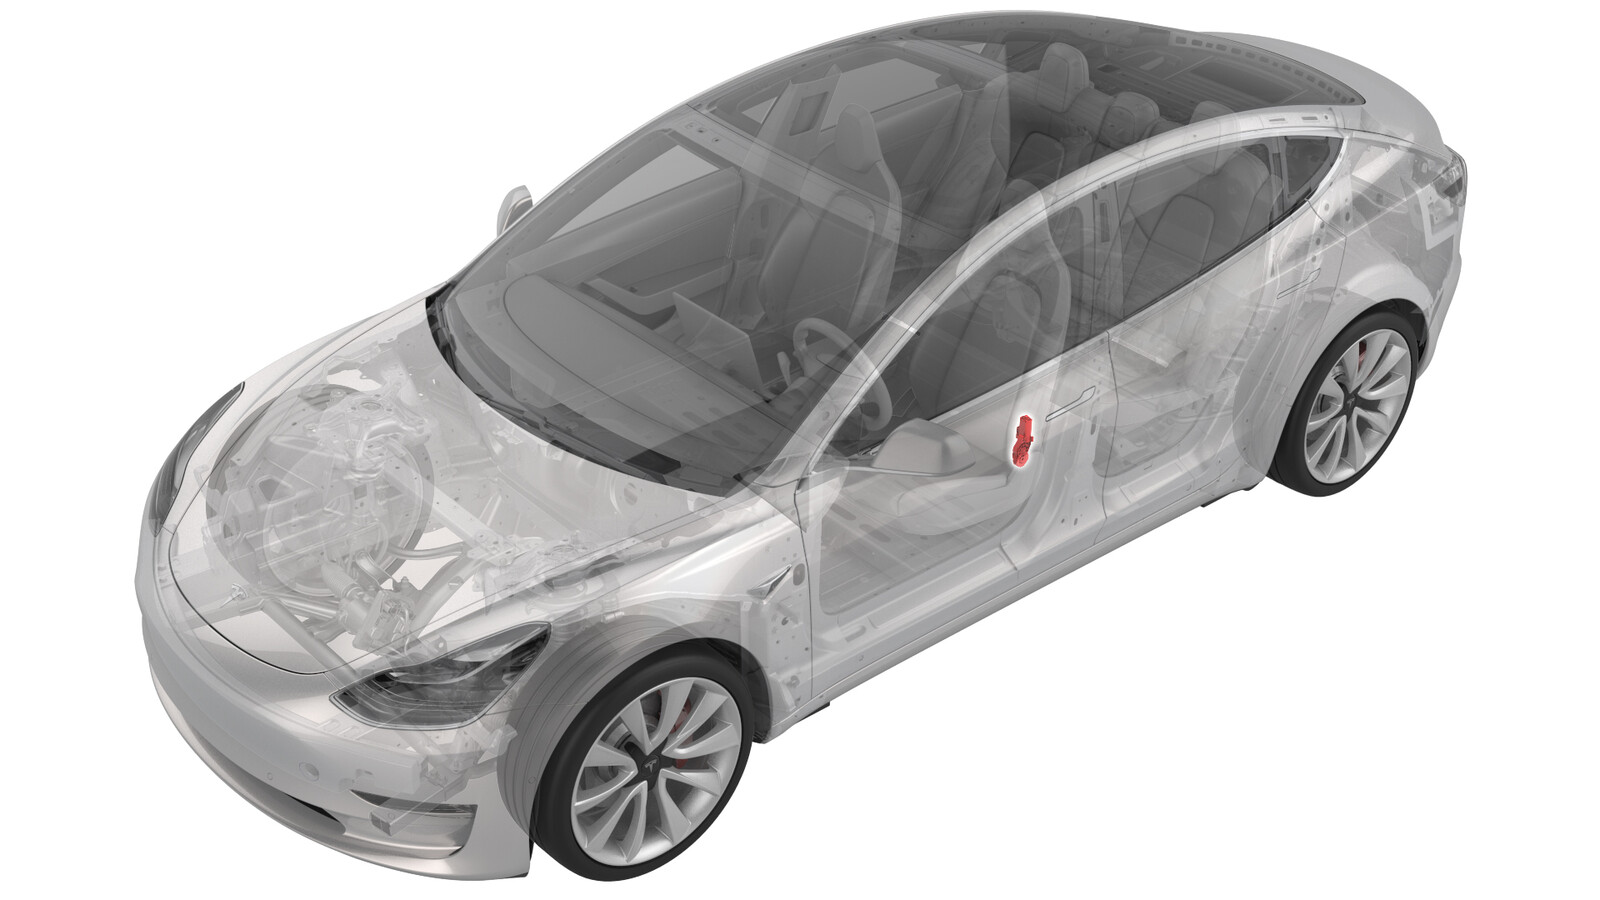
Motor - Recliner - Backrest - Driver Seat (Remove and Replace)
 Correction code
13016602
1.08
NOTE: Unless otherwise explicitly
stated in the procedure, the above correction code and FRT reflect all of the work
required to perform this procedure, including the linked procedures. Do not stack correction codes unless
explicitly told to do so.
NOTE: See Flat Rate
Times to learn more about FRTs and how they are created.
NOTE: See Personal Protection to make sure wearing proper PPE when
performing the below procedure. NOTE: See Ergonomic Precautions for safe and healthy working
practices.
Correction code
13016602
1.08
NOTE: Unless otherwise explicitly
stated in the procedure, the above correction code and FRT reflect all of the work
required to perform this procedure, including the linked procedures. Do not stack correction codes unless
explicitly told to do so.
NOTE: See Flat Rate
Times to learn more about FRTs and how they are created.
NOTE: See Personal Protection to make sure wearing proper PPE when
performing the below procedure. NOTE: See Ergonomic Precautions for safe and healthy working
practices.
- 2025-12-16: Updated procedure to include removal of additional parts.
- 2023-05-03: Added step for front passenger seat calibration and OCS calibration.
Remove
- Remove the lumbar support assembly from the driver's seat back. See Lumbar Support - Backrest - Driver Seat (Remove and Replace).
- Remove the driver back rest cover. See Cover - Back Rest - Driver (With Inboard Airbag) (Remove and Replace).
- Remove the driver seat outboard side shield. See Side Shield - Outboard - Driver Seat (Remove and Replace).
- Remove the driver seat inboard side shield. See Side Shield - Inboard - Driver Seat (Remove and Replace).
- Disconnect the LH front seat buckle electrical connector, and then release the clip that attach the LH seat belt buckle connector.
-
Remove the clips (x2) that attach the side shield carrier.
-
Partially lift the side shield carrier upper shroud.
-
Remove the inner side cover carrier from the LH front seat by sliding it
backwards.
-
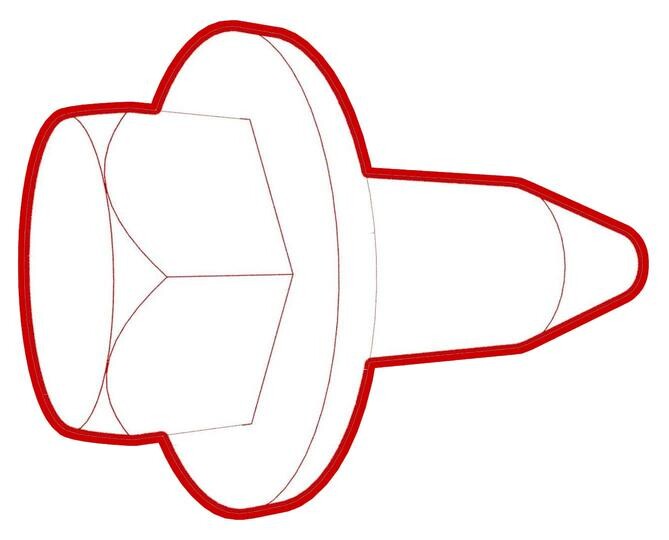
Remove and discard the clip that attaches the recliner tube to the frame.
-
Use a rubber hammer to tap the recliner tube where the clip was located earlier, and then remove the tube from the frame.
NoteThe removal of the tube might require several taps with the rubber hammer in order to get the tube out of the seat.
-
Remove the bolt that attaches the recliner motor to the seat back frame.
-
Remove the recliner motor from the frame.
Install
-
Install the recliner motor onto the seat back frame, and hand-tighten the bolt that attaches the motor to the frame
-
Install the recliner tube into the seat back frame, through the recliner motor, and to the other side of the frame.
NoteUse the rubber hammer to tap the recliner tube so that the tube extends 16mm out of the seat back frame.
-
With assistance, install a new clip onto the recliner tube.
NoteUse a 12mm deep socket and rubber hammer to tap the clip onto the recliner tube. Have an assistant use another hammer at the other end of the tube to oppose the tapping.
-
Tighten the bolt that attaches the recliner motor to the seat back frame.
 5 Nm (3.7 lbs-ft)
 -
Install the inner side cover carrier to the LH front seat.
-
Install the clips (x2) that attach the side shield carrier.
- Install the clip that attaches the LH seat belt buckle connector, and then connect the LH front seat buckle electrical connector.
- Install the driver seat inboard side shield. See Side Shield - Inboard - Driver Seat (Remove and Replace).
- Install the driver seat outboard side shield. See Side Shield - Outboard - Driver Seat (Remove and Replace).
- Install the the driver back rest cover. See Cover - Back Rest - Driver (With Inboard Airbag) (Remove and Replace).
- Install the lumbar support assembly to the driver's seat back. See Lumbar Support - Backrest - Driver Seat (Remove and Replace).
-
If servicing the front passenger seat in
a North American vehicle:
- Remove all objects from the front passenger seat before beginning calibration.
- On the vehicle touchscreen, touch and check the vehicle firmware version. If the vehicle firmware is 2023.2.11 or newer, perform a software reinstall. See Software Reinstall - Touchscreen. If the vehicle firmware is not 2023.2.11 or newer, update the vehicle firmware. See Software Update.
- Locally connect a laptop with Toolbox 3 to the vehicle. See Toolbox (Connect and Disconnect).
- Unlock the vehicle gateway. See Gateway (Unlock).
- In Toolbox, click on the Actions tab, and then search for "OCS".
- Run the PROC_OCS1P_SELF-CALIBRATIONvia Service Mode Plus:Safety & Restraints ➜ Seats ➜ OCS1P Self Capacitance Calibrationvia Toolbox:(link) routine.
- Click on the Actions tab, and then search for "Seat calibration".
- Run the PROC_VCRIGHT_SEAT-CALIBRATEvia Service Mode:Low Voltage ➜ Seats ➜ Calibrate Seatvia Toolbox:(link) routine.
- Disconnect Toolbox and remove the laptop from the vehicle.
-
Calibrate the driver seat, steering and mirrors through the touchscreen.
NoteTouch , and then touch Start. Allow the routine to complete.