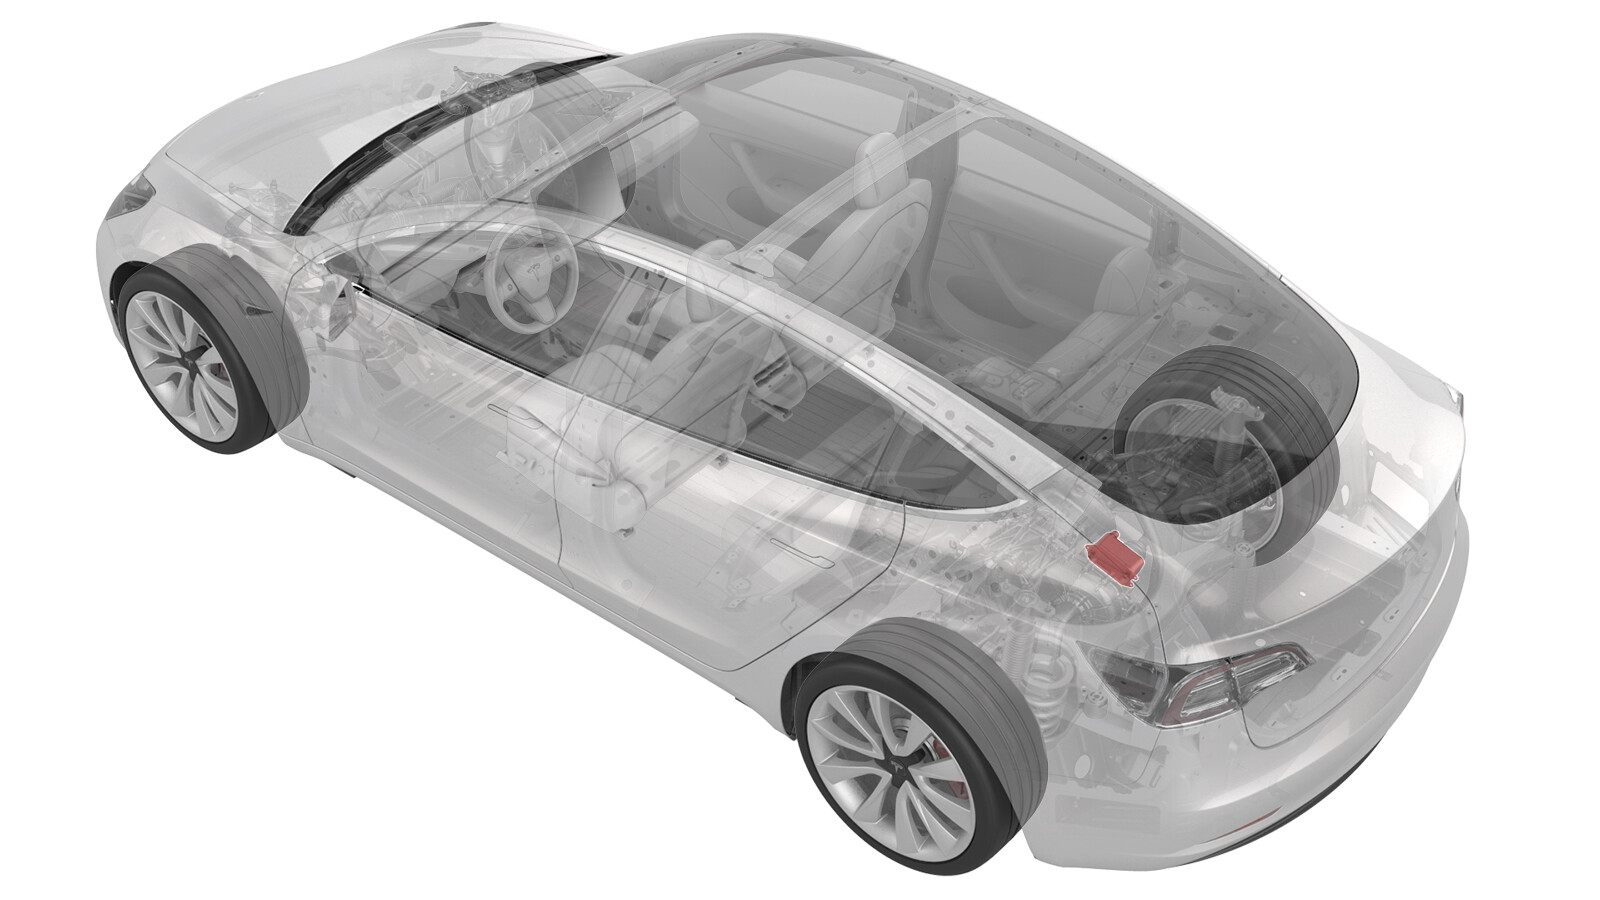
Heat Exchanger - Rear Drive Unit (3DU) (Remove and Replace)
 Correction code
40305202
1.68
NOTE: Unless otherwise explicitly
stated in the procedure, the above correction code and FRT reflect all of the work
required to perform this procedure, including the linked procedures. Do not stack correction codes unless
explicitly told to do so.
NOTE: See Flat Rate
Times to learn more about FRTs and how they are created.
NOTE: See Personal Protection to make sure wearing proper PPE when
performing the below procedure. NOTE: See Ergonomic Precautions for safe and healthy working
practices.
Correction code
40305202
1.68
NOTE: Unless otherwise explicitly
stated in the procedure, the above correction code and FRT reflect all of the work
required to perform this procedure, including the linked procedures. Do not stack correction codes unless
explicitly told to do so.
NOTE: See Flat Rate
Times to learn more about FRTs and how they are created.
NOTE: See Personal Protection to make sure wearing proper PPE when
performing the below procedure. NOTE: See Ergonomic Precautions for safe and healthy working
practices.
- 2025-03-27: Added step to refer to the suspension alignment tables to define whether an alignment check is required and, if so, what type of alignment check is required.
- 2024-04-05: Updated gearbox fluid information with link.
- 2024-02-27: Updated gearbox fluid to KAF 1.
Remove
-
NoteRear subframe assembly components have been removed from illustrations for clarity. It is not necessary to remove the rear drive unit from the rear subframe assembly to perform this procedure.
- Remove the rear subframe assembly. See Subframe Assembly - Rear (Remove and Install).
-
Release the clips (x3) that attach the coolant outlet hose to the motor and heat exchanger body.
-
Release the clip, and then
disconnect the coolant outlet hose from the heat exchanger.
-
Release the clips (x4) that attach the coolant inlet hose to the LH mount, gearbox, and heat exchanger body.
-
Release the clip, and then
disconnect the coolant inlet hose from the heat exchanger.
-
Remove the bolts that attach the heat exchanger to the rear drive unit, and then remove the heat exchanger from the rear drive unit.
 5 Nm (3.7 lbs-ft) +30 degNoteThe number of bolts that attach the heat exchanger to the rear drive unit (x2 or x3) might vary due to changes in production.
Install
-
Lightly coat the heat
exchanger O-rings with clean gearbox fluid.
NoteRefer to Fluids and Capacities to determine which gearbox fluid is applicable.
-
Install the heat exchanger to the rear drive unit, and then install the
bolts that attach the heat exchanger to the rear drive unit.5 Nm (3.7 lbs-ft) +30 degNoteThe number of bolts that attach the heat exchanger to the rear drive unit (x2 or x3) might vary due to changes in production.
-
Connect the coolant inlet hose to the heat exchanger, and then fasten the
clip that attaches the hose to the heat exchanger.
CAUTIONPerform a push-pull test to verify that the hose is fully seated.
-
Fasten the clips (x4) that attach the coolant inlet hose to the heat
exchanger body, gearbox, and LH mount.
-
Connect the coolant outlet hose to the heat exchanger, and then fasten the
clip that attaches the hose to the heat exchanger.
CAUTIONPerform a push-pull test to verify that the hose is fully seated.
-
Fasten the clips (x3) that attach the coolant outlet hose to the heat
exchanger body and the motor.
- Install the rear subframe assembly. See Subframe Assembly - Rear (Remove and Install).
- Since the subframe was removed and reinstalled: Refer to the Alignment Requirement tables to determine whether an EPAS alignment check (EC) or four wheel alignment check (AC) is necessary. If performed, add the alignment check/adjust correction code as a separate activity to the SV. See Alignment Requirement - Suspension.