2023-10-17
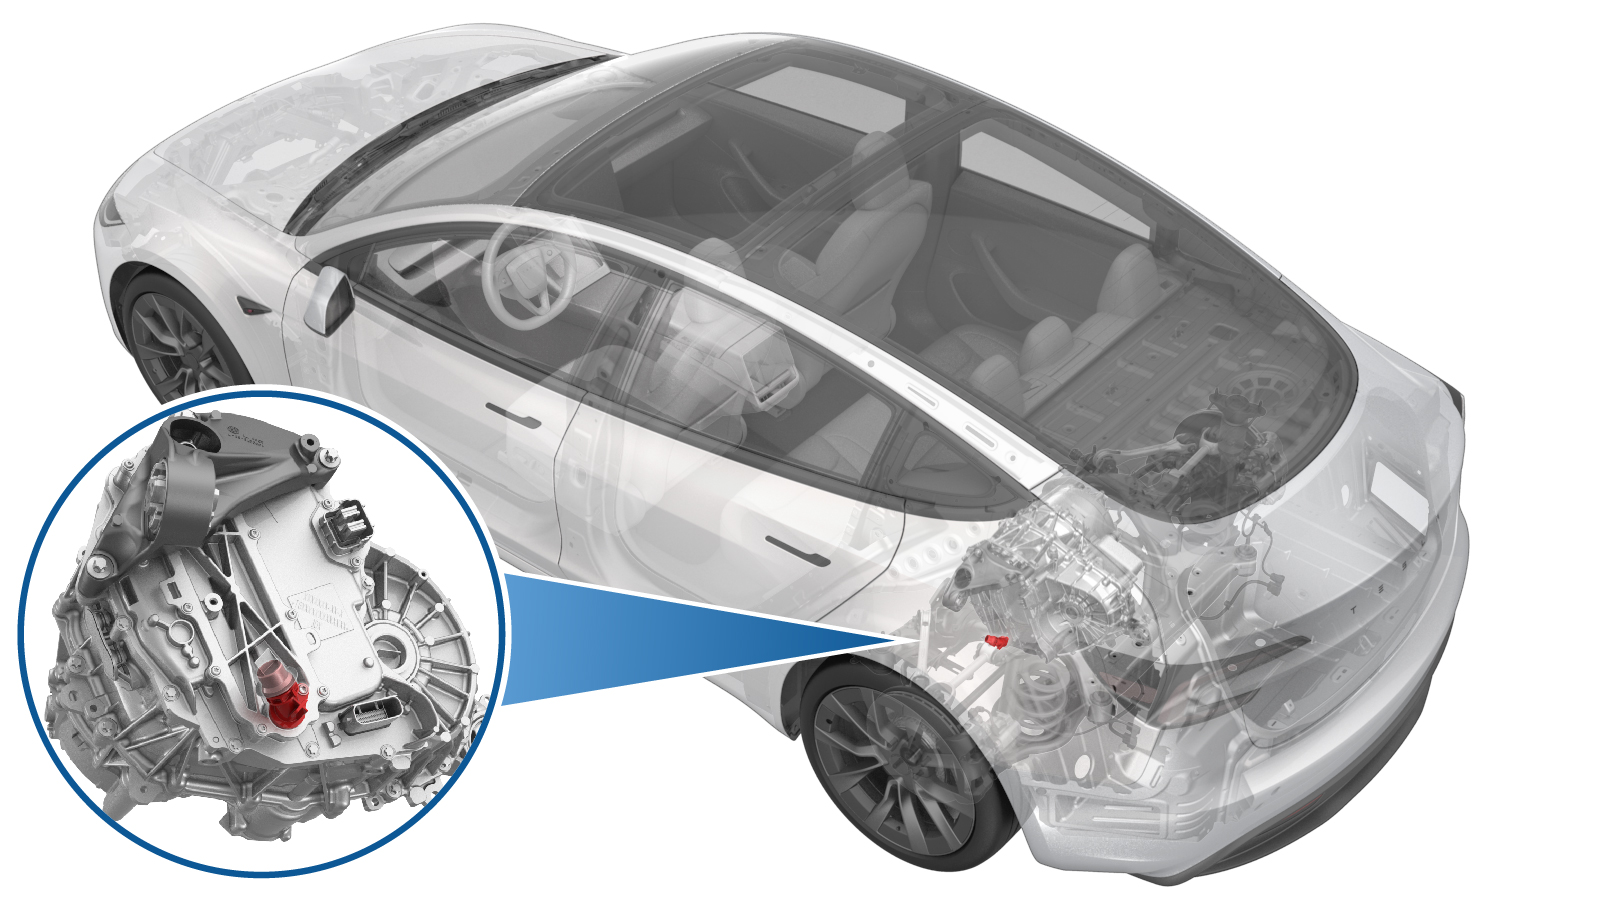
Fluid Coupling (55 Degrees) - Rear Drive Inverter (Remove and Replace)
 Correction code
4020010062
FRT
0.42
NOTE: Unless otherwise explicitly stated in the procedure, the correction code and FRT listed above reflect all of the work required to perform this procedure, including the linked procedures. Do not stack correction codes unless explicitly told to do so.
NOTE: See Flat Rate Times to learn more about FRTs and how they are created.
NOTE: See Personal Protection to make sure you
are wearing proper PPE when performing the procedure below.
NOTE: See Ergonomic Precautions for safe and healthy working practices.
Correction code
4020010062
FRT
0.42
NOTE: Unless otherwise explicitly stated in the procedure, the correction code and FRT listed above reflect all of the work required to perform this procedure, including the linked procedures. Do not stack correction codes unless explicitly told to do so.
NOTE: See Flat Rate Times to learn more about FRTs and how they are created.
NOTE: See Personal Protection to make sure you
are wearing proper PPE when performing the procedure below.
NOTE: See Ergonomic Precautions for safe and healthy working practices.
Equipment:
- 1135762-00-A Kit, Svc Plug, Cooling Hose, Model 3
Torque Specifications
| Description | Torque Value | Recommended Tools | Reuse/Replace | Notes |
|---|---|---|---|---|
| Bolt that attaches the 55 degree fluid coupling to the rear drive unit |
 6 Nm (4.4 lbs-ft) |
|
Replace |
Remove
- Raise and support the vehicle.
- Disconnect LV power. See LV Power (Disconnect and Connect).
- Remove the rear aero shield panel. See Panel - Aero Shield - Rear (Remove and Replace).
- Remove the rear HV battery skid plate. See Skid Plate - HV Battery - Rear (Remove and Replace).
- Position a coolant drain container underneath the LH rear drive unit area.
-
Release the clip that
attaches the rear drive unit inverter inlet tube to the rear drive unit HV
cable harness.
-
Disconnect the rear drive
unit inverter inlet tube from the fluid coupling, and then plug the male and
female fittings.
-
Remove and discard the bolt that attaches the 55 degree fluid coupling to
the rear drive unit.
TIpUse of the following tool(s) is recommended:
- 1/4 in Dr. to 1/4 in Hex Bit Quick Change Adapter
- Torx T25 socket
- Cordless Ratchet/Impact Driver
-
Remove the rear drive unit
55 degree fluid coupling from the rear drive unit, and then insert a plug in
the rear drive unit 55 degree fluid coupling opening.
TIpUse of the following tool(s) is recommended:
- 1135762-00-A Kit, Svc Plug, Cooling Hose, Model 3
Install
- Lubricate the 55 degree fluid coupling O-ring with coolant.
-
Install the rear drive unit
55 degree fluid coupling onto the rear drive unit.
-
Install a new bolt that
attaches the 55 degree fluid coupling to the rear drive unit.6 Nm (4.4 lbs-ft)TIpUse of the following tool(s) is recommended:
- 1/4 in Dr. to 1/4 in Hex Bit Quick Change Adapter
- Torx T25 socket
- Cordless Ratchet/Impact Driver
-
Remove the plug, and then
connect the rear drive unit inverter inlet tube to the 55 degree fluid
coupling.
-
Install the clip that
attaches the rear drive unit inverter inlet tube to the rear drive unit HV
cable harness.
- Remove the coolant drain container from underneath the vehicle.
- Install the rear HV battery skid plate. See Skid Plate - HV Battery - Rear (Remove and Replace).
- Install the rear aero shield panel. See Panel - Aero Shield - Rear (Remove and Replace).
- Connect LV power. See LV Power (Disconnect and Connect).
- Remove the coolant bottle cap, and then fill the coolant bottle to the "MAX" level.
- Enable Service Mode through the touchscreen. See Service Mode.
- On the touchscreen, touch .
- Hold up on the turn signal stalk, and at the same time press and hold the brake pedal for 10 seconds to authorize.
- On the touchscreen, touch START to the left of “Start Coolant Air Purge” and wait for the task to complete (10 minutes).
-
Add coolant to the coolant
bottle as necessary, and then install the coolant bottle cap.
- Exit Service Mode through the touchscreen. See Service Mode.
- Install the rear underhood apron. See Underhood Apron - Rear (Remove and Replace).
- Lower rack arms fully and remove them from under the vehicle.