2023-10-17
Carrier - Bumper - Front (Remove and Replace)
 Correction code
1001010012
FRT
1.02
NOTE: Unless otherwise explicitly stated in the procedure, the correction code and FRT listed above reflect all of the work required to perform this procedure, including the linked procedures. Do not stack correction codes unless explicitly told to do so.
NOTE: See Flat Rate Times to learn more about FRTs and how they are created.
NOTE: See Personal Protection to make sure you
are wearing proper PPE when performing the procedure below.
NOTE: See Ergonomic Precautions for safe and healthy working practices.
Correction code
1001010012
FRT
1.02
NOTE: Unless otherwise explicitly stated in the procedure, the correction code and FRT listed above reflect all of the work required to perform this procedure, including the linked procedures. Do not stack correction codes unless explicitly told to do so.
NOTE: See Flat Rate Times to learn more about FRTs and how they are created.
NOTE: See Personal Protection to make sure you
are wearing proper PPE when performing the procedure below.
NOTE: See Ergonomic Precautions for safe and healthy working practices.
Remove
- Remove the front fascia. See Fascia - Front (Remove and Replace).
- Remove the LH and RH front fascia reinforcements. See Reinforcement - Fascia - Front - LH (Remove and Replace).
- Remove the front bumper beam. See Bumper Beam - Front (Remove and Replace).
- Remove the hood latch actuator. See Hood Latch (Remove and Replace).
- Remove the front end module harness. See Harness - Front End Module (Remove and Replace).
-
Remove the LH bolt that
attaches the bottom of the condenser fan module to the ankle catcher.
NoteLift the condenser fan module up to ease removal of the bolts.TIpUse of the following tool(s) is recommended:
- 8 mm socket
Figure 1. LH shown, RH similar -
Remove the bolts (x2) that
attach the front end carrier to the LH subframe crash can.
TIpUse of the following tool(s) is recommended:
- Cordless hex driver
- 13 mm socket
Figure 2. LH shown, RH similar -
Loosen but do not remove the
bolt that attaches the LH upper section of the front end carrier to the
body.
TIpUse of the following tool(s) is recommended:
- 13 mm socket
Figure 3. LH shown, RH similar - Repeat step 2 through step 4 on the RH side of the vehicle.
-
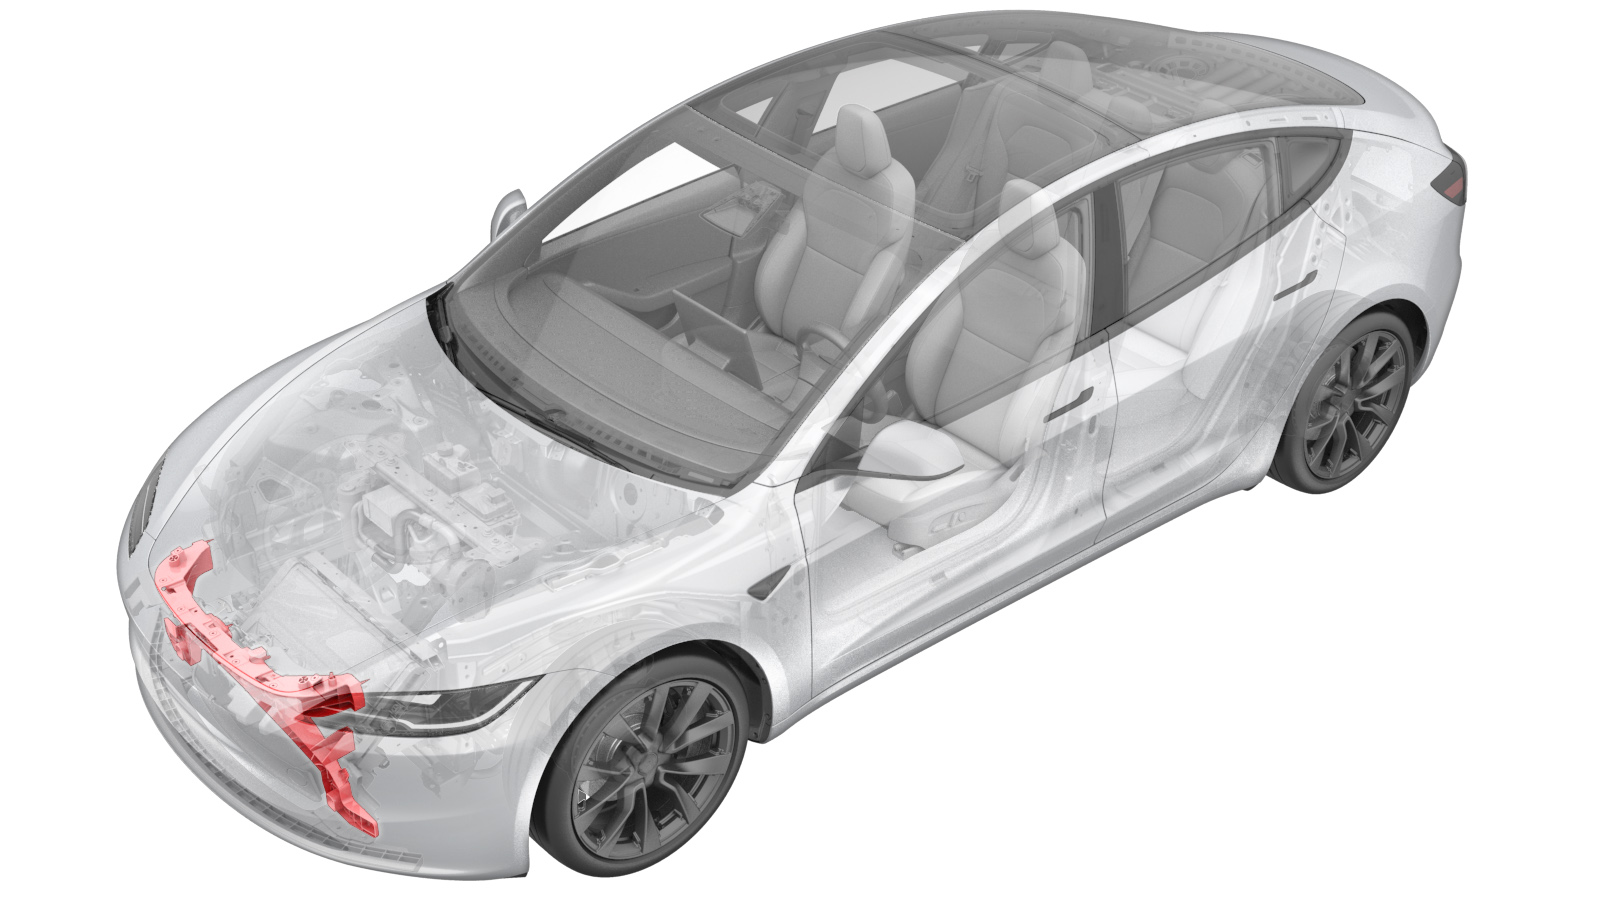
Remove the front end carrier.
CAUTIONBe cautious the ankle catcher may fall off.
Install
- Position the front end carrier to the vehicle.
-
Hand-tighten the bolts (x2)
that attach the front end carrier to the LH subframe crash can, then repeat
this step on the RH side.
Figure 4. LH shown, RH similar -
Hand tighten the bolt that
attaches the LH upper section of the front end carrier to the body, then
repeat this step on the RH side.
Figure 5. LH shown, RH similar -
Torque the bolt that
attaches the LH upper section of the front end carrier to the body, then
repeat this step on the RH side.
 16 Nm (11.8 lbs-ft)TIpUse of the following tool(s) is recommended:
- 13 mm socket
Figure 6. LH shown, RH similar -
Torque the bolts (x2) that
attach the front end carrier to the LH subframe crash can, then repeat this
step on the RH side.16 Nm (11.8 lbs-ft)TIpUse of the following tool(s) is recommended:
- 13 mm socket
Figure 7. LH shown, RH similar -
Install the LH bolt that
attaches the bottom of the condenser fan module to the ankle catcher, then
repeat this step on the RH side.10 Nm (7.4 lbs-ft)TIpUse of the following tool(s) is recommended:
- 8 mm socket
Figure 8. LH shown, RH similar - Install the front end module harness. See Harness - Front End Module (Remove and Replace).
- Install the hood latch actuator. See Hood Latch (Remove and Replace).
- Install the front bumper beam. See Bumper Beam - Front (Remove and Replace).
- Install the LH and RH front fascia reinforcements. See Reinforcement - Fascia - Front - LH (Remove and Replace).
- Install the front fascia. See Fascia - Front (Remove and Replace).