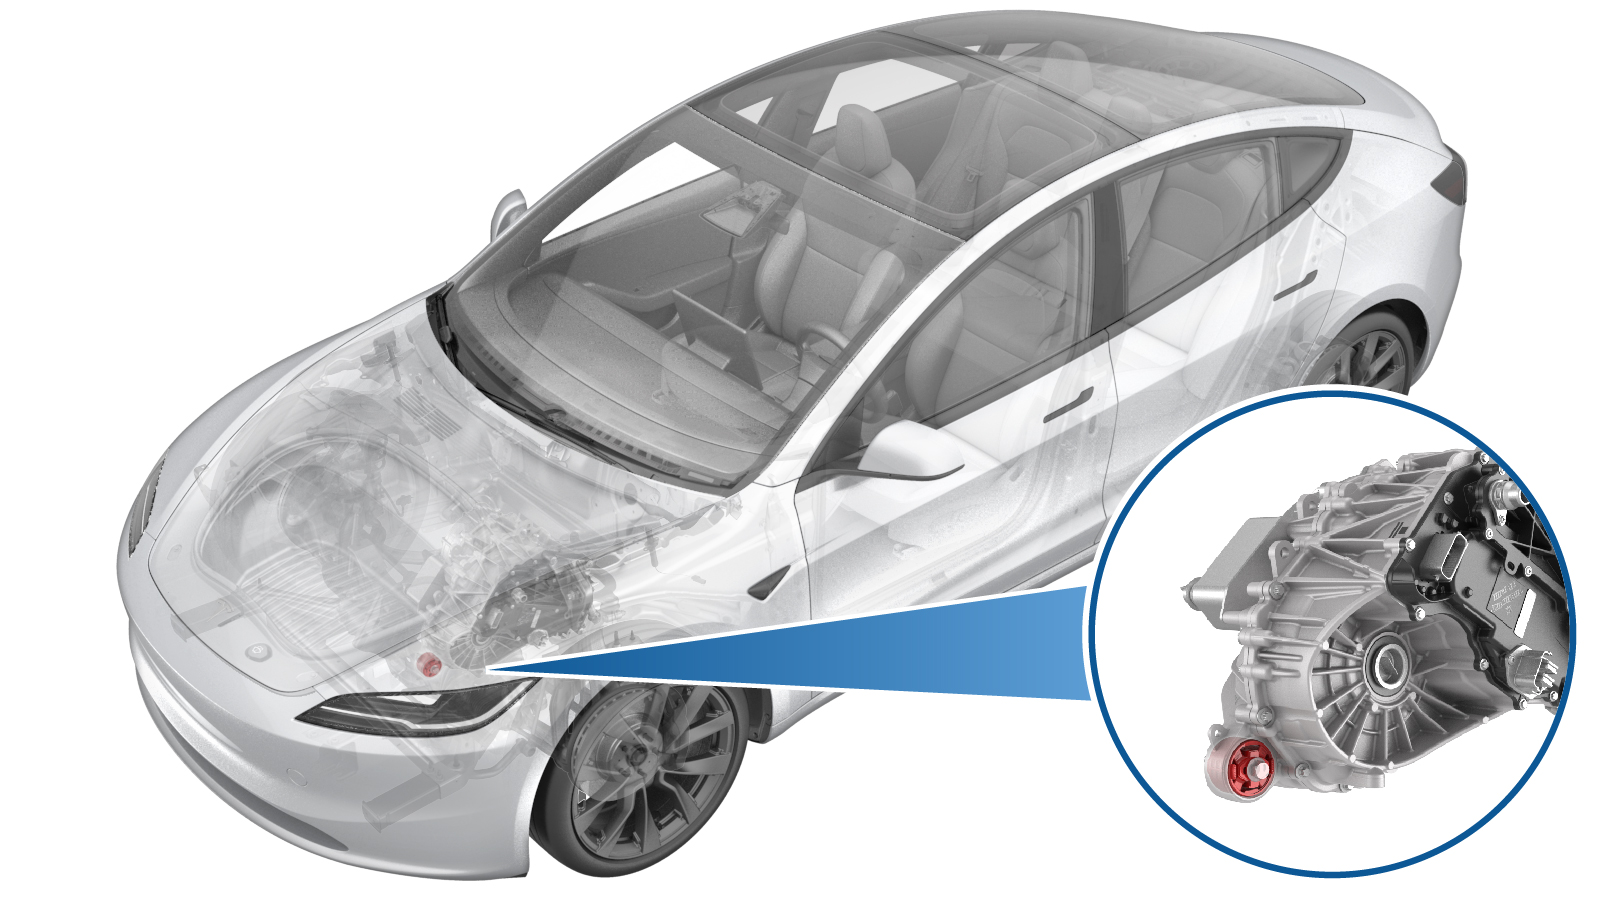
Bushing - Gearcase - Front Drive Unit (3DU) (Remove and Replace)
 Correction code
3901010102
FRT
0.60
NOTE: Unless otherwise explicitly stated in the procedure, the above correction code and FRT reflect all of the work required to perform this procedure, including the linked procedures. Do not stack correction codes unless explicitly told to do so.
NOTE: See Flat Rate Times to learn more about FRTs and how they are created. To provide feedback on FRT values, email ServiceManualFeedback@tesla.com.
NOTE: See Personal Protection to make sure wearing proper PPE when performing the below procedure.
NOTE: See Ergonomic Precautions for safe and healthy working practices.
- 1137785-00-A Kit, Drive Unit Bushing R&R, Model 3
- 1494178-00-A MS/X Raven Drive Unit Cradle
| Description | Torque Value | Recommended Tools | Reuse/Replace | Notes |
|---|---|---|---|---|
| Bolts that attach the LH and the RH motor mounts to the LH and the RH motor mount brackets |
 105 Nm (77.4 lbs-ft) |
|
Reuse | |
| Front drive unit mount bolt |
 80 Nm (59.0 lbs-ft) |
|
Reuse |
Remove
-
Place the vehicle on the 2-post lift.
NoteEnsure the vehicle is not charging.
- Open the LH front door and lower the LH front window.
-
Raise the vehicle to a
comfortable working height, and lower the lift onto locks.
CAUTION
Make sure there is an audible click of the locks on both sides before lowering, otherwise the vehicle may tilt to one side.
Make sure that the doors are clear of surrounding objects.
- Remove the front aero shield panel. See Panel - Aero Shield - Front (Remove and Replace).
- Place the front drive unit stand and the underhoist stand under the front drive unit.
-
Remove the bolts (x2) that attach the LH and the RH motor mounts to the LH
and the RH motor mount brackets.
TIpUse of the following tool(s) is recommended:
- External Torx E18
- Flex head ratchet/flex head torque wrench
- ¼ in to 3/8 in adapter
- 3/8 in to 1/2 in adapter
- Cordless 1/4in Dr Ratchet
- 6 in extension
-
Remove the front drive unit mount bolt.
TIpUse of the following tool(s) is recommended:
- 18 mm socket
- Cordless Ratchet/Impact Driver
- Flex head ratchet/flex head torque wrench
-
Lower the front drive unit slightly, and then adjust the knob of the
lifting bracket to tilt the motor 30 to 40 degrees to separate the front
drive unit from the subframe.
CAUTIONDo not damage the coolant lines and harness connections.TIpUse of the following tool(s) is recommended:
- Transmission Jack
- MS/X Raven Drive Unit Cradle - 1494178-00-A
-
Install the bushing removal cups and the threaded stud onto the gearbox
bushing, and then use cups K, A, H, and L to press the bushing out of the
front drive unit gearbox.
NoteAlways apply torque to the bearing when driving the bushing.TIpUse of the following tool(s) is recommended:
- M3 Drive Unit Bushing Kit - 1137785-00-A
- Combination Wrench 12pt 22mm
- Ratcheting Combination wrench Fixed head 22mm
WarningThe video(s) included in this procedure are meant as an overview for supplemental purposes only. Follow all of the steps listed in the procedure to avoid damage to components and/or personal injury. -
Remove the cups and the old bushing from the threaded stud.
Install
-
Position the gearbox bushing and the installation cups to the front drive
unit gearbox, and then use cups L, H, and D to press the bushing into the
front drive unit gearbox.
NoteAlways apply torque to the bearing when driving the bushing.TIpUse of the following tool(s) is recommended:
- M3 Drive Unit Bushing Kit - 1137785-00-A
- Combination Wrench 12pt 22mm
- Ratcheting Combination wrench Fixed head 22mm
WarningThe video(s) included in this procedure are meant as an overview for supplemental purposes only. Follow all of the steps listed in the procedure to avoid damage to components and/or personal injury. - Remove the bushing installation cups from the front drive unit.
-
Adjust the front drive unit to the horizontal position, and then raise the
front drive unit up to the installation position to install the front drive
unit.
TIpUse of the following tool(s) is recommended:
- Transmission Jack
- MS/X Raven Drive Unit Cradle - 1494178-00-A
-
Install the front drive unit mount bolt.
 80 Nm (59.0 lbs-ft)TIpUse of the following tool(s) is recommended:
- 18 mm socket
- Cordless Ratchet/Impact Driver
- Flex head ratchet/flex head torque wrench
-
Install the bolts (x2) that attach the LH and the RH motor mounts to the LH
and the RH motor mount brackets.
 105 Nm (77.4 lbs-ft)TIpUse of the following tool(s) is recommended:
- External Torx E18
- Flex head ratchet/flex head torque wrench
- ¼ in to 3/8 in adapter
- 3/8 in to 1/2 in adapter
- Cordless 1/4in Dr Ratchet
- 6 in extension
- Remove the front drive unit stand and the underhoist stand from underneath the front drive unit.
- Install the front aero shield panel. See Panel - Aero Shield - Front (Remove and Replace).
- Raise the LH front window and close the LH front door.
- Remove the lift arms from below the vehicle.