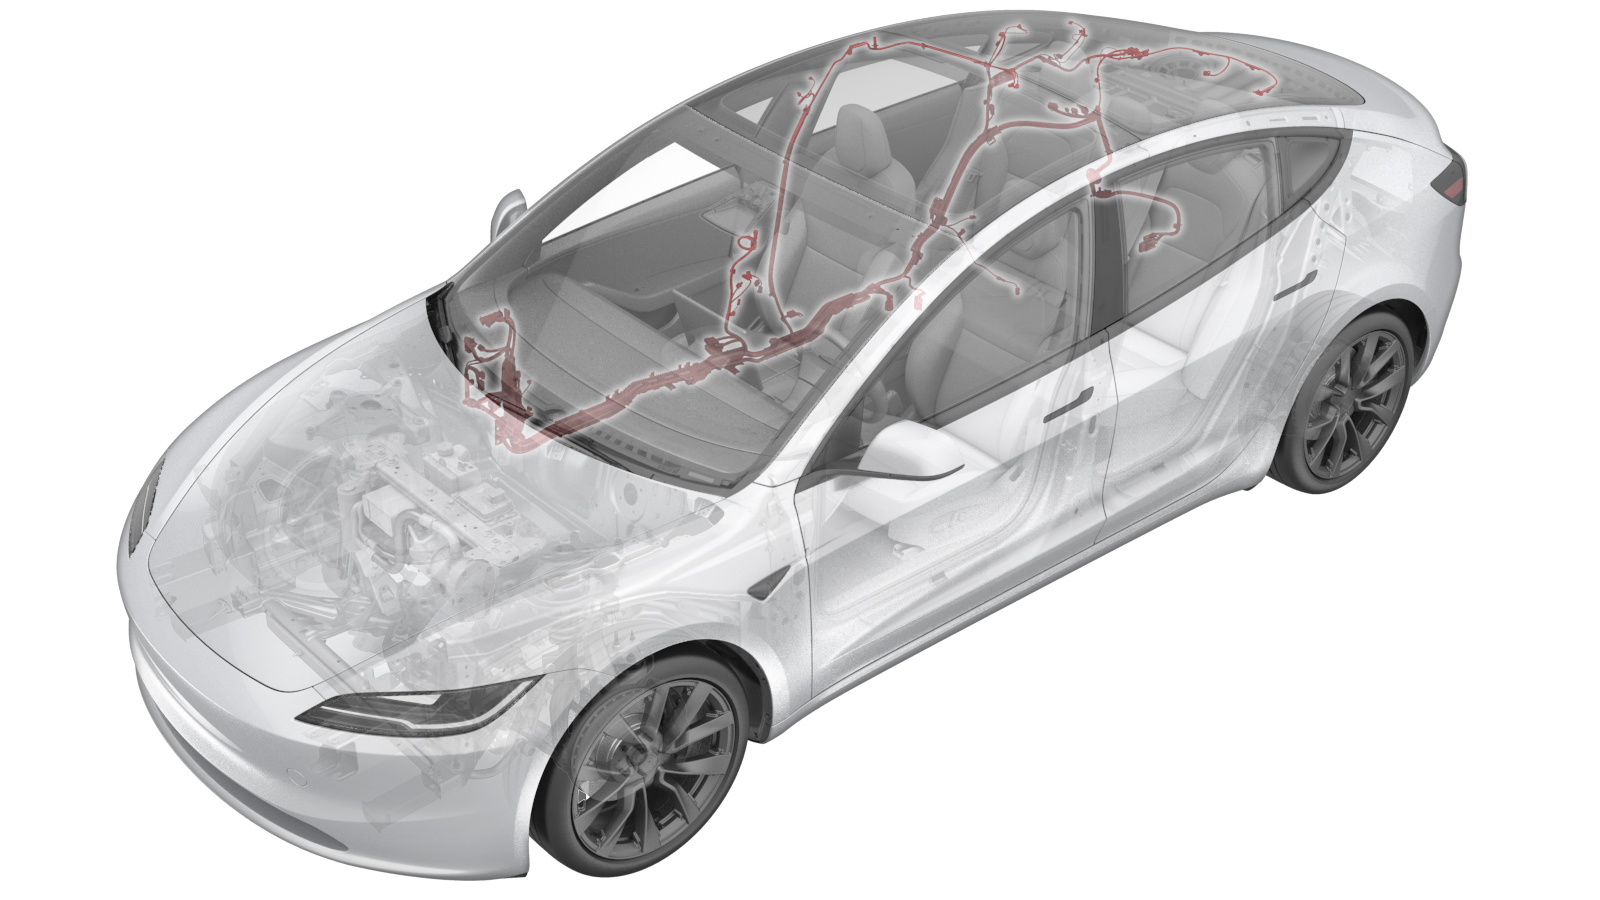
Harness - Body - RH (LHD) (Remove and Replace)
 Correction code
1710040042
2.46
NOTE: Unless otherwise explicitly stated in the procedure, the correction code and FRT listed above reflect all of the work required to perform this procedure, including the linked procedures. Do not stack correction codes unless explicitly told to do so.
NOTE: See Flat Rate Times to learn more about FRTs and how they are created.
NOTE: See Personal Protection to make sure you
are wearing proper PPE when performing the procedure below.
NOTE: See Ergonomic Precautions for safe and healthy working practices.
Correction code
1710040042
2.46
NOTE: Unless otherwise explicitly stated in the procedure, the correction code and FRT listed above reflect all of the work required to perform this procedure, including the linked procedures. Do not stack correction codes unless explicitly told to do so.
NOTE: See Flat Rate Times to learn more about FRTs and how they are created.
NOTE: See Personal Protection to make sure you
are wearing proper PPE when performing the procedure below.
NOTE: See Ergonomic Precautions for safe and healthy working practices.
- 2026-04-13: Updated the specs of the bolt securing the RH retractor to the base of B-pillar from 15 mm to 13 mm.
Remove
-
Open all four doors
NoteIf vehicle is being powered down, Latch rear doors to prevent accidental closure
-
Open trunk from exterior switch
- Lower all four windows.
-
Place vehicle into tow mode
NoteVia Controls > Service > ''Towing''
-
Place wheel chocks to keep vehicle from moving
- Disconnect the LV battery power. See LV Power (Disconnect and Connect).
-
Remove RH IP end cap
Note5x clips, 2x guide tabs
-
Release RH footwell cover
Note2x magnets, 1x guide tab, 1x connector
-
Remove connectors from RH footwell cover
Note1x puddle light connector, 1x Speaker connector
-
Remove clips securing passenger footwell duct
Note2x clips
-
Disconnect glove box USB cable from car computer
Note1x connector, Release locking tab then release connector
-
Remove screws securing glove box to IP
Note4x screws, T20, 2.3 Nm
-
Release glove box from IP carrier
Note10x clips, 3x locator pins, 1x datum, Avoid damage to electromagnetic switch
-
Disconnect the glove box connectors
(x2).
-
Remove RH passenger footwell duct from HVAC module
-
Remove RH upper A-pillar trim
Note6x clips, 1x tether, 2x guide tabs,1x alignment pin, Pull inside of the upper portion of upper A-pillar, Depress 2x tabs to remove tether from body side, Then pull upper A-pillar upward to remove
-
Remove RH sun visor bracket cover
Note4x clips, Extending the sun visor may allow for extra working room
-
Remove RH sun visor fastener
Note1x screw, T25, 3.5 Nm, Extending the sun visor may allow for extra working room
-
Remove RH sun visor from headliner area
NoteFold sun visor to the closed and folded down position but do not latch in place
-
Disconnect RH sun visor connector
Note1x connector
-
Remove clip for RH lower A-pillar trim
Note1x push clip
-
Remove RH lower A-pillar trim
Note4x clips, 2x guide tabs, Pull rear of lower A-pillar upward to release clip then pull rearward to release front tabs from carpet
-
Remove RH side rail assembly
Note4x clips, 2x locations, 4x tethers, Pull the upper corner of the side rail then work your way to bottom, Pull the lower side rail toward RH to release clips, Release tethers from bolted bungee tether
-
Remove tether hooks from RH body
Note2x tether hooks, Discard after removal
-
Push open RH coat hook
-
Pry open RH coat hook screw cover
Note2x clips
-
Remove RH coat hook screw
Note1x screw, T25, 2.5 Nm
-
Release 2nd row seat cushion and disconnect harness
Note2x clips, 2x connectors, Press tabs backward then pull front edge up
-
Fold 2nd row 40 seatback down
-
Remove RH side bolster
Note1x locator clip, 3x guide tabs, Pull outward then slightly upward to remove
-
Remove bolster plastic bracket from RH side body
Note2x clips, If necessary, depress the clips from behind, this bracket may come out with bolster. Discard after removal
-
Remove RH C pillar assembly and move it aside
Note3x clips, 3x tabs, Pull rear C-pillar inward then forward to remove
-
Remove RH lower B-pillar assembly
Note7x clips, 5x locator clips, Pull the trim panel outward in the direction of the arrow to release clip from lower B-pillar
-
Remove RH middle B-pillar assembly
Note5x clips, 3x locator clips, Pull the bottom of the B-pillar middle trim panel into the vehicle, and then pull the upper part to release the remaining clips
-
Release clips securing RH upper B-pillar assembly and move aside
Note3x clips,3x locator pins,Pull the bottom of the upper B-pillar toward inside of the car, then pull the top to release the remaining clips
-
Remove LH side rail assembly
Note4x clips, 2x locations, 4x tethers, Pull the upper corner of the side rail then work your way to bottom, Pull the lower side rail toward RH to release clips, Release tethers from bolted bungee tether
-
Remove tether hooks from LH body
Note2x tether hooks, Discard after removal
-
Push open LH coat hook
-
Pry open LH coat hook screw cover
Note2x clips
-
Remove LH coat hook screw
Note1x screw, T25, 2.5 Nm
-
Fold 2nd row 60 seatback down
NotePull release, Fold down, Protect the seat cushion if necessary
-
Remove LH side bolster
Note1x locator clip, 3x guide tabs, Pull outward then slightly upward to remove
-
Remove bolster plastic bracket from LH side body
Note2x clips, If necessary, depress the clips from behind, this bracket may come out with bolster. Discard after removal
-
Remove LH C pillar assembly and move it aside
Note3x clips, 3x tabs, Pull rear C-pillar inward then forward to remove
-
Remove LH IP end cap
Note5x clips, 2x guide tabs
-
Remove clip securing LH lower A-pillar assembly
Note1x push clip
-
Remove LH lower A-pillar assembly
Note4x clips, 2x guide tabs, Pull rear of lower A-pillar upward to release clip then pull rearward to release front tabs from carpet
-
Remove LH lower B-pillar assembly
Note7x clips, 4x locator clips, Pull the trim panel outward in the direction of the arrow to release clip from lower B-pillar
-
Remove LH middle B-pillar assembly
Note5x clips, 3x locator clips, Pull the bottom of the B-pillar middle trim panel into the vehicle, and then pull the upper part to release the remaining clips
-
Release clips securing the LH upper B-pillar assembly and move aside
Note3x clips,3x locator pins,Pull the bottom of the upper B-pillar toward inside of the car, then pull the top to release the remaining clips
-
Release rear headliner from body
Note4x clips, 2x locator pins,loosen the rear of the headliner to facilitate the next step
-
Remove package tray harness clips around C-pillar area
Note2x clips
-
Disconnect package tray harness connector from RH body harness
Note1x connector
-
Remove package tray
Note5x tabs, 3 at the rear of panel and 2 on the sides, Slide towards front of vehicle to remove
-
Remove load floor
NoteUse pull tab located at rear edge of panel
-
Remove trunk sill trim assembly
Note4x clips, Pull corner upward to release clip on end then pull away from body for remaining clips
-
Remove RH load floor bracket
Note4x clips, 2x locations, Release bracket front clips, then release clips at the bracket rear, and remove the floor bracket
-
Remove trunk garnish assembly
Note6x clips, 4x locating tabs
-
Remove clips for RH trunk side trim
Note2x clips
-
Disconnect RH trunk task light connector
Note1x connector
-
Remove RH trunk side trim
-
Release harness connectors on left side of car computer
Note3x connectors, Release locking tab, then remove connector body
-
Release harness clips from left of car computer
Note1x clips
-
Release harness clips from lower of car computer
Note2x clips
-
Disconnect connectors from car computer
Note4x connector
-
Release RH body harness from RH body controller and A-pillar and move aside
Note3x clips
-
Remove the bolt securing the RH body
controller to vehicle
Note1x nyloc nut, 10mm, 6 Nm
-
Remove RH body controller from vehicle
NoteMove RH controller up and away from the vehicle body for easier access to the connector in the next step
-
Disconnect J2 connector from RH body controller
Note1x connector, 1x locking tab, J2
-
Disconnect J5 connector from RH body controller
Note1x connector, J5
-
Disconnect J4 connector from RH body controller
Note1x connector, 1x locking tab, J4
-
Disconnect J12 connector from RH body controller
Note1x connector, J12
-
Disconnect seat connector from RH body controller
Note1x connector, 1x locking tab, J9
-
Disconnect connector from the right body harness
Note1x connector
-
Fold RH front main cabin carpet aside for access
Note1x clip
-
Release harness clip from RH body controller
Note1x clip
-
Disconnect connectors from harness clip at RH lower A-pillar area
Note3x connectors
-
Disconnect DCDC positive cable from right body harness
Note1x connector, 1x clip. Pull up the red locking tab and then press
- Release the LH front seat harness from sill trim clips (x5).
-
Disconnect LH harness connectors around RH lower B-pillar area
Note3x connectors
-
Remove fixed harness connector bracket from RH b pillar area
Note1x connector bracket
-
Remove bolt securing RH retractor to base of B-pillar
Note1x patch bolt, 13mm, 40 Nm, Discard patch bolt
-
Disconnect harness connectors from RH retractor
Note2x connectors, 2 stage locking connectors, Lift the red tab to release the connector Disconnect connector after removing retractor from B-pillar
-
Remove RH B-pillar impact accelerometer sensor
Note1x connector
-
Disconnect RH body wiring harness and RH rear door wiring harness connectors from RH B-pillar area
Note1x connector
-
Remove RH body harness clips from B-pillar area
Note3x clips
-
Remove clip securing RH rear carpet of vehicle to body
Note1x clip
-
Remove RH body harness ground strap around lower B-pillar
Note1x bolt, 10mm, 10 Nm
-
Release RH body harness clips along RH front sill area
Note1x clip
-
Remove RH B-pillar applique fasteners cover
Note4x clips, 1x tab, Release upper clips first, then slide tab out of body
-
Remove bolts securing RH B-pillar applique to body
Note2x bolts, 8mm, 5 Nm
-
Release RH B-pillar applique from vehicle
Note1x clip, 2x tabs, Release the bottom of the applique and slide the applique downward to remove, Use caution not to damage the connectors
-
Disconnect B-pillar camera and RH antenna connector
Note2x connectors, Release red locking tab first before removing connector
-
Release RH upper B-pillar bracket form body
Note2x bolts 10mm2.5 Nm
-
Remove the RH body harness clips from B-pillar area
Note7x clips
-
Disconnect RH body harness to the TCU connector
Note2x connector
-
Disconnect HVC logic connector and install logic cap
Note1x connector, 1x cap, Release locking tab then push the handle downward to release connector
-
Release positive LV output cover from PCS cable
Note1x cover
-
Remove nut securing positive LV output from PCS cable and move cable aside
Note1x nut, 13mm, 15 Nm, Discard after removal
-
Disconnect 40 seat back heater harness
Note1x connector
-
Disconnect RH rear seat belt buckle connector
Note1x connector
-
Remove clip securing RH rear seatbelt
buckle harness to vehicle body
Note2x clips
-
Remove RH body harness clips around lower C-pillar area
Note6x clips
-
Disconnect RH 2nd row seat belt retractor connector
Note1x connector, 2 stage locking connectors, Lift the red tab to release the connector
-
Disconnect harness connector for RH side curtain airbag
Note1x connector, 2 stage locking connectors, Lift the white tab to release the connector
-
Disconnect RH antenna filter harness connector
Note1x connector. Gently disconnect the harness. Do not damage the heater grid
-
Release the trunk harness connectors under package tray area
Note2x connectors
-
Release trunk harness connectors bracket under package tray area
Note2x connector bracket
-
Disconnect LH and RH parcel shelf speaker connectors
Note2x connector
-
Remove the RH body harness clips around the upper C-pillar area
Note10x clips
-
Disconnect RH power strut connector
Note1x connector
-
Remove ground strap of body harness in RH area of the trunk
Note1x bolt, 10mm, 10 Nm
-
Remove RH body harness clips around RH side of trunk area
Note1x connector bracket3x harness clips
-
Disconnect connector from RH rear audio amplifier
Note3x connectors
-
Remove wheel chocks
-
Push vehicle onto lift
NoteRecommend assistance, Note this vehicle can only be safely pushed for a very short distance and at very slow speed
- Raise and support the vehicle. See Raise Vehicle - 2 Post Lift.
-
Loosen RH rear wheel
Note5x nuts, 21mm, 175 Nm
-
Raise vehicle partially and lower lift onto locks
NoteSet vehicle to a comfortable working height, Make sure there's an audible click of the locks on both sides before lowering, otherwise vehicle may tilt to the side
-
Remove RH rear wheel
Note5x nuts, 21mm, 175 Nm
-
Remove clips securing the RH rear wheel liner to body
Note8x push clips, 7x fan clips
-
Remove RH rear wheel liner
-
Disconnect RH side subframe harness connector
Note1x connector, Release locking tab
-
Disconnect RH rear EBP harness from rear main body harness
Note1x connector, Release locking tab
-
Remove RH body harness clips around RH subwoofer area
Note2x harness clips2x connector bracket
-
Lower vehicle partially and set lift onto locks
NoteRaise lift off locks, then hold lock release lever to keep locks free while vehicle is lowered, Set vehicle to comfortable working height
-
Push grommet through RH side trunk bulkhead and feed harness through
Note1x grommet, Bulkhead around rear portion RH wheel liner area
-
Remove RH body wiring harness from vehicle
Install
-
Position RH body harness to vehicle for installation
NoteLayout the position and direction of the new wiring harness on the vehicle for installation
-
Push rear subframe portion of RH body harness through RH side trunk bulkhead
NoteCheck if the seal is in place after installation
-
Install RH body harness clips around RH subwoofer area
Note2x harness clips2x connector bracket
-
Connect RH rear EPB harness to rear main body harness
Note1x connector, Engage locking tab
-
Connect RH side subframe harness connector
Note1x connector
-
Raise the vehicle to a comfortable
working height, and lower the lift onto locks.
CAUTION
Make sure there is an audible click of the locks on both sides before lowering, otherwise the vehicle may tilt to one side.
Make sure that the doors are clear of surrounding objects.
-
Position the RH rear wheel liner for installation
-
Install the clips securing RH rear wheel liner
Note8x push clips, 7x fan clips
-
Install RH rear wheel
Note5x nuts, 21mm, 175 Nm, Start lug nuts by hand before using power tool
-
Lower vehicle fully
NoteRaise lift off locks, then hold lock release lever to keep locks free while vehicle is lowered
-
Remove lift arms from below vehicle
NoteLower rack arms fully and remove them from under vehicle
-
Torque RH rear wheel
Note5x nuts, 21mm, 175 Nm
-
Push vehicle away from lift
NoteRecommend assistance, Note this vehicle can only be safely pushed for a very short distance and at very slow speed, Chock wheels.
-
Place wheel chocks to keep vehicle from moving
-
Connect connector on rear RH audio
amplifier
Note3x connectors
-
Install RH body harness clips around RH side of trunk area
Note1x connector bracket3x harness clips
-
Install ground strap of body harness in RH area of the trunk
Note1x bolt, 10mm, 10 Nm
-
Connect RH power strut connector
Note1x connector
-
Install RH body harness clips around the upper C-pillar area
Note10x clips
-
Connect LH and RH parcel shelf speaker
Note2x connectors
-
Install trunk harness connectors bracket under package tray area
Note2x connector bracket
-
Connect the trunk harness connectors under package tray area
Note2x connectors
-
Connect RH antenna filter harness connector to RH connector to antenna grid
-
Connect harness connector for RH side curtain airbag
Note1x connector,Press the connector. When the connector is fully seated, you will hear the click sound of the secondary locking pin returning
-
Connect RH 2nd row seat belt retractor connector
Note1x connector, 2 stage locking connectors, Press the connector. When the connector is fully seated, you will hear the click sound of the secondary locking pin returning
-
Install RH body harness clips around lower C-pillar area
Note6x clips
-
Secure RH rear right seatbelt buckle harness to vehicle body
Note2x clips
-
Connect RH rear seat belt buckle connector
Note1x connector
-
Connect 40 seat back heater harness
Note1x connector
-
Install positive LV output
Note1x nut, 13mm, 9 Nm, Make sure rubber boot is not pinched between cable terminal and pass through
-
Install positive LV output cover to PCS cable
Note1x cover
-
Remove logic cap and connect HVC logic connector
Note1x connector, 1x cap, Align connector then pull the handle to locking position get connector fully seated
-
Install the RH body harness clips to B-pillar area
Note7x clips
-
Connect RH body harness to TCU connector
Note2x connector
-
Secure RH upper B-pillar bracket to body
Note2x bolts 10mm2.5 Nm
-
Install the RH body harness ground strap around lower B-pillar
Note1x bolt, 10mm, 10 Nm
-
Connect B-pillar camera and RH antenna connector
Note2x connectors, Secure red locking tab after installing connector
-
Secure RH B-pillar applique to vehicle
Note1x clip, 2x tabs, Align B-Pillar applique into position and secure clips into body, Use caution not to damage the connectors
-
Install bolts securing RH B-pillar applique to body
Note2x bolts, 8mm, 5 Nm
-
Install RH B-pillar applique fasteners cover
Note4x clips, 1x tab, Slide tab into body first, then engage clips
-
Install clip securing the RH rear main carpet to vehicle
Note1x clip
-
Install RH body harness clips from B-pillar area
Note3x clips
-
Connect RH body harness connector to RH rear door harness connector B-pillar area
Note1x connector
-
Connect RH B-pillar impact accelerometer sensor connector
Note1x connector
-
Make connections to RH retractor
Note2x connectors,Press the connector. When the connector is fully seated, you will hear the click sound of the secondary locking pin returning Installing connector, place retriever in B-pillar
-
Install bolt securing RH retractor to base of B-pillar
Note1x patch bolt, 13mm, 40 Nm, Install new patch bolt (1004383-00-C)
-
Install harness retaining bracket to RH B pillar body
Note1x connector bracket
-
Connect the LH harness connectors around RH lower B-pillar area
Note3x connectors, Connect the connector and push in the red locking tab
-
Install RH body harness clips along RH front sill area
Note1x clip
-
Install clips securing LH seat harness to sill trim
Note5x clips, Tuck excess harness between harness bracket and body
-
Connect connectors from harness clip at RH lower A-pillar area
Note3x connectors
-
Secure harness clip to RH body controller
Note1x clip
-
Connect connector to the right body harness
Note1x connector
-
Unfold RH front main cabin carpet back to original position
Note1x clip
-
Connect DCDC positive cable to right body harness
Note1x connector,1x clip Connect the connector and push in the red locking tab
-
Connect J4 connector to RH body controller
Note1x connector, J4, Fully seat connector then engage lock
-
Connect J2 connector to RH body controller
Note1x connector, J2, Fully seat connector then engage lock
-
Connect J5 connector to RH body controller
Note1x connector, J5
-
Connect J12 connector to RH body controller
Note1x connector, J12
-
Connect seat connector to RH body controller
Note1x connector, 1x locking tab, J9
-
Install RH body controller
Note1x W clip, Maneuver right body controller into position under IP carrier and align the W clip with body cut out, Then slide down controller to secure
-
Install the bolt securing the right
controller to body
Note1x nyloc nut, 10mm, 6 Nm,
-
Secure RH body harness to RH body controller and A-pillar
Note3x clips
-
Connect connectors to car computer
Note4x connector
-
Instal harness connectors on left side of car computer
Note3x connectors. Install the plug in place and lock the locking tab
-
Install harness clips from left of car computer
Note1x clips
-
Install harness clips from lower of car computer
Note2x clips
-
Install RH trunk side trim
-
Connect RH trunk task light connector
Note1x connector
-
Install clips for RH trunk side trim
Note2x clips
-
Install trunk garnish assembly
Note6x clips, 4x locating tabs, Align locating tabs to slot, Verify trunk seal is fully seated along garnish
-
Install RH load floor bracket
Note4x clips, 2x locations
-
Install trunk sill trim assembly
Note4x clips, Align striker with center slot then 2 locators to slots then press to secure clips, Manipulate seal to overlap trim
-
Install load floor
-
Install package tray
Note5x tabs, 3 at the rear of panel and 2 on the sides, Slide towards rear of vehicle to install
-
Connect package tray harness connector to RH body harness
Note1x connector
-
Install package tray harness clips around upper C-pillar area
Note2x clips
-
Install rear headliner to body
Note4x clips, 2x locator pins,Align the locating pin of the roof liner with the slot, and then push in the direction of the arrow to install the clip, ensuring that the seal overlaps with the trim
-
Install LH coat hook screw
Note1x screw, T25, 2.5 Nm
-
Close LH coat hook screw cover
Note2x securing tabs
-
Install tether hook onto LH side rail assembly
Note2x tether hooks, Install new tether hook
-
Install LH side rail assembly
Note4x clips, 2x locations, 2x tether hooks, Align the clips from bottom to top then press clips from top to bottom, Align the seal to sit on top of the trim
-
Install LH upper B-pillar
Note3x clips,3x locator pins, Lower the seat belt slider to align it with the B-pillar panel, align the locating pin of the B-pillar upper trim panel with the slot, push in the direction of the arrow to install the clips after aligning them, Make sure the seal sits overlapping the trim
-
Install LH middle B-pillar assembly
Note5x clips, 3x locator clips,Align the locator clips to slot, Then push in the direction of the arrow to install the clips after aligning them, Make sure the seal sits overlapping the trim
-
Install LH lower B-pillar assembly
Note7x clips, 4x locator clips, Align the locator clips to slot, Then push in the direction of the arrow to install the clips after aligning them, Make sure the seal sits overlapping the trim
-
Install LH C pillar assembly to body
Note3x clips, 3x tabs, Slide the back tabs into package tray then align clips
-
Install bolster plastic bracket to LH side bolster
Note2x tabs, Install new bolster bracket
-
Install LH side bolster
Note1x locator clip, 3x guide tabs, Align the bottom and side tabs then push inward to install
-
Return 2nd row 60 seatback to vertical position
-
Install LH lower A-pillar assembly
Note4x clips, 2x guide tabs, Align the 2 front tabs then align the slot with harness bracket and then push rear clip to secure to lower B-pillar, Fully seat seal along trim
-
Install clip securing LH lower A-pillar assembly
Note1x push clip
-
Install LH IP end cap
Note5x clips, 2x guide tabs
-
Install LH front primary seal
NoteVerify seal is seated properly on all trim panels
-
Install RH upper A-pillar trim
Note6x clips, 1x tether, 2x guide tabs,1x alignment pin, Slide bottom of trim along IP and speaker grill, attach tether to body side, Set clips starting at the bottom and work up, Pull seal over trim
-
Connect RH sun visor connector
Note1x connector
-
Install RH sun visor into headliner area
NoteFirst push the connector and wire harness backward, then fold sun visor to the closed and folded down position but do not latch in place
-
Install RH sun visor fastener
Note1x screw, T25, 3.5 Nm
-
Install RH sun visor bracket cover
Note4x tabs
-
Install RH coat hook screw
Note1x screw, T25, 2.5 Nm
-
Close RH coat hook screw cover
Note2x clips
-
Push RH coat hook closed
-
Install the RH upper B-pillar
Note3x clips,3x locator pins,Lower the seat belt slider to align it with the B-pillar panel, align the locating pin of the B-pillar upper trim panel with the slot, push in the direction of the arrow to install the clips after aligning them, Make sure the seal sits overlapping the trim
-
Install RH middle B-pillar assembly
Note5x clips, 3x locator clips,Align the locator clips to slot, Then push in the direction of the arrow to install the clips after aligning them, Make sure the seal sits overlapping the trim
-
Install RH lower B-pillar assembly
Note7x clips, 5x locator clips,Align the locator clips to slot, Then push in the direction of the arrow to install the clips after aligning them, Make sure the seal sits overlapping the trim
-
Install RH C pillar assembly to body
Note3x clips, 3x tabs, Slide the back tabs into package tray then align clips
-
Install tether hook onto RH side rail assembly
Note2x tether hooks, Install new tether hook
-
Install RH side rail assembly
Note4x clips, 2x locations, 2x tether hooks, Align the clips from bottom to top then press clips from top to bottom, Align the seal to sit on top of the trim
-
Install bolster plastic bracket to RH side bolster
Note2x tabs, Install new bolster bracket
-
Install RH side bolster
Note1x locator clip, 3x guide tabs, Align the bottom and side tabs then push inward to install
-
Return 2nd row 40 seatback to vertical position
-
Connect 2nd row seat harness and secure cushion
Note2x clips, 2x connectors, Insert buckles through holes, Slide rear inward then align front clips, Perform push-pull-push test
-
Install RH lower A-pillar trim
Note4x clips, 2x guide tabs, Align the 2 front tabs then align the slot with harness bracket and then push rear clip to secure to lower B-pillar, Fully seat seal along trim
-
Install clip for RH lower A-pillar trim
Note1x push clip
-
Install RH passenger footwell duct to HVAC module
-
Connect glove box assembly connectors
Note2x connectors
-
Install glove box into IP carrier
Note10x clips, 3x locator pin, 1x datum
-
Install screws securing glove box assembly to IP carrier
Note4x screws, T20, 2.3 Nm
-
Connect glove box USB cable to car computer
Note1x connector, Engage locking tab
-
Install clips securing passenger footwell duct
Note2x push clips
-
Connect RH footwell cover connectors
Note3x connectors
-
Install RH footwell cover
Note5x clips, 1x guide tab
-
Install RH IP end cap
Note5x clips, 2x guide tabs
- Connect the LV battery power. See LV Power (Disconnect and Connect).
-
Close trunk via interior switch
-
Hold brake pedal and select park on UI to disable EPB service mode
-
Remove wheel chocks
-
Raise all windows
-
Close all four doors