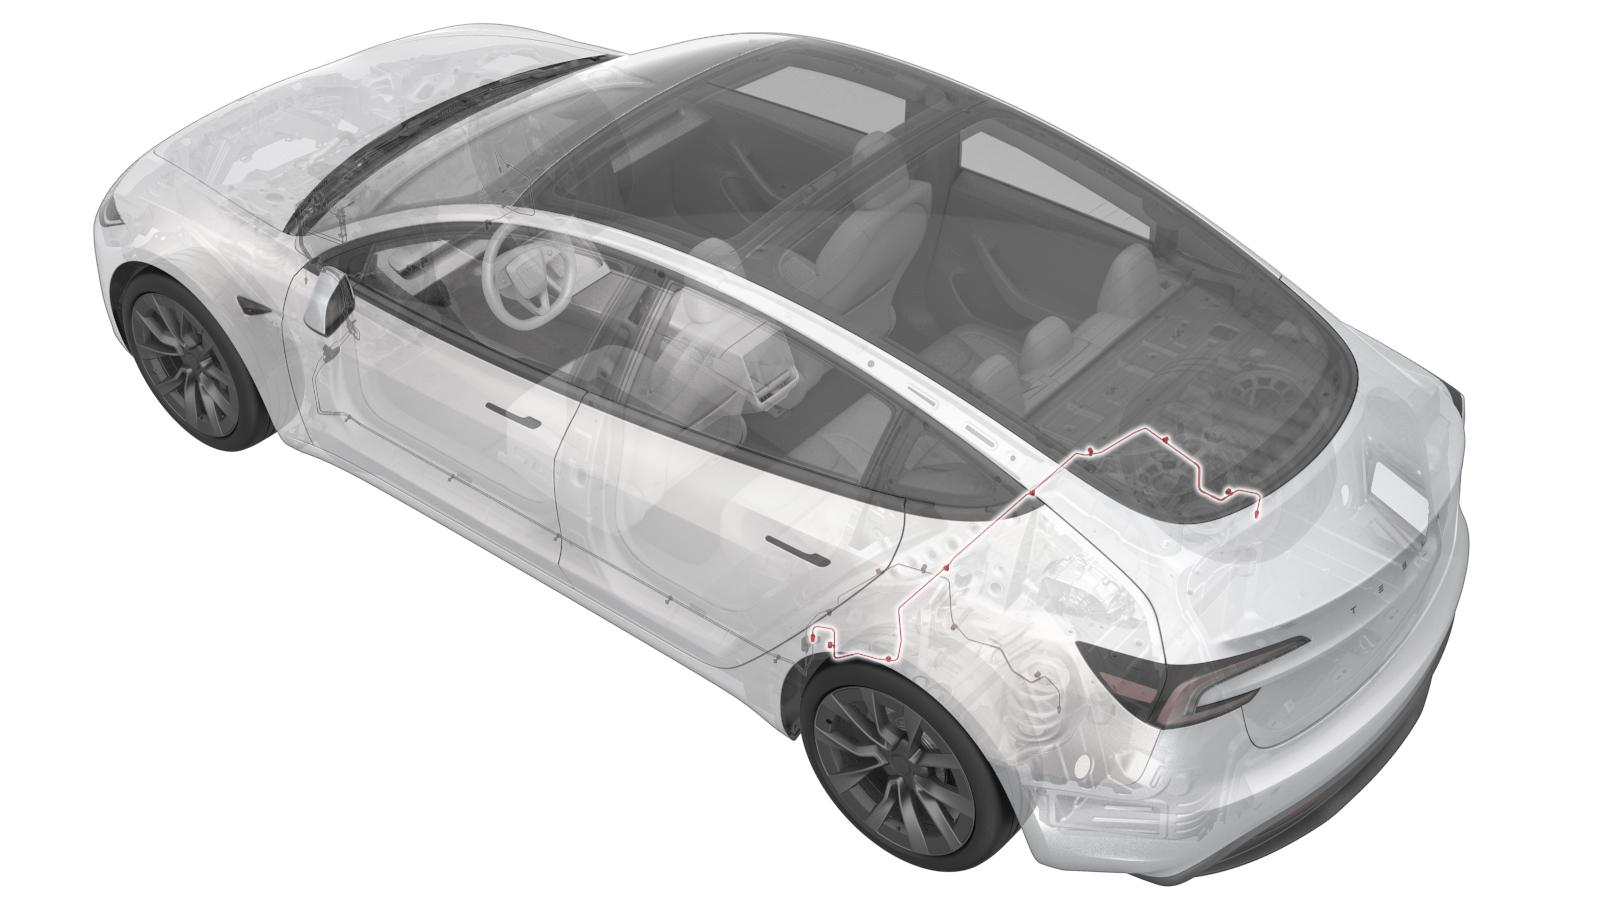
Assembly - Brake Lines - Rear - RH (Remove and Replace)
 Correction code
3303010012
FRT
3.18
NOTE: Unless
otherwise explicitly stated in the procedure, the above correction code and
FRT reflect all of the work required to perform this procedure, including
the linked procedures. Do
not stack correction codes unless explicitly told to do so.
NOTE: See Flat Rate
Times to learn more about FRTs and how
they are created. To provide feedback on FRT values, email ServiceManualFeedback@tesla.com.
NOTE: See Personal Protection
to make sure wearing proper PPE when performing the below procedure.
NOTE: See Ergonomic Precautions for safe and
healthy working practices.
- 2023-12-11: Updated last step with cross reference to Alignment Requirement Tables.
| Description | Torque Value | Recommended Tools | Reuse/Replace | Notes |
|---|---|---|---|---|
| RH rear brake line tube nut on the rear brake pipe junction block |
 16 Nm (11.8 lbs-ft) |
|
Reuse | |
| RH rear brake line tube nut on the RH rear brake hose |
 23 Nm (17.0 lbs-ft) |
|
Reuse |
Remove
- Raise and support the vehicle. See Raise Vehicle - 2 Post Lift.
- Remove all the four wheels. See Wheel Assembly (Remove and Install).
- Remove the rear subframe assembly. See Subframe Assembly - Rear (Remove and Replace).
- Remove the LH rear wheel arch liner. See Wheel Arch Liner - Rear - LH (Remove and Replace).
- Place an oil drain pan under the brake line junction box.
-
Remove the RH rear brake
line tube nut from the rear brake pipe junction block.
TIpUse of the following tool(s) is recommended:
- 12 mm socket
- Ratchet/torque wrench
- ¼ in to 3/8 in adapter
- Place the oil drain pan under the RH rear brake hose junction to caliper.
-
Remove the RH rear brake
line tube nut from the RH rear brake hose.
TIpUse of the following tool(s) is recommended:
- Ratchet/torque wrench
- Flex head ratchet/flex head torque wrench
- Remove the oil drain pan from underneath the vehicle.
-
Release the clips (x7), and then remove the RH rear brake line from the
vehicle.
Install
-
Position the end of the RH brake line into the LH rear bundle and secure
the clips (x7) from left to right.
-
Install the RH rear brake line tube nut to the RH rear brake hose.
 23 Nm (17.0 lbs-ft)WarningThe video(s) included in this procedure are meant as an overview for supplemental purposes only. Follow all of the steps listed in the procedure to avoid damage to components and/or personal injury.TIpUse of the following tool(s) is recommended:
- Ratchet/torque wrench
- Flex head ratchet/flex head torque wrench
-
Install the RH rear brake line tube nut to the rear brake pipe junction
block.
 16 Nm (11.8 lbs-ft)TIpUse of the following tool(s) is recommended:
- 12 mm socket
- Ratchet/torque wrench
- ¼ in to 3/8 in adapter
- Install the LH rear wheel arch liner. See Wheel Arch Liner - Rear - LH (Remove and Replace).
- Install the rear subframe assembly. See Subframe Assembly - Rear (Remove and Replace).
- Bleed the brake lines for all the four calipers. See Brake Fluid Bleed/Flush (Maintenance).
- Install the rear underhood apron. See Underhood Apron - Rear (Remove and Replace).
- Raise all windows and close all doors.
- In this procedure, the front or rear subframe was removed and reinstalled. Therefore, refer to the Alignment Requirement tables to determine whether an EPAS alignment check (EC) or four wheel alignment check (AC) is necessary. If performed, add the alignment check/adjust as a separate activity. See Alignment Requirement - Suspension.