2026-03-27
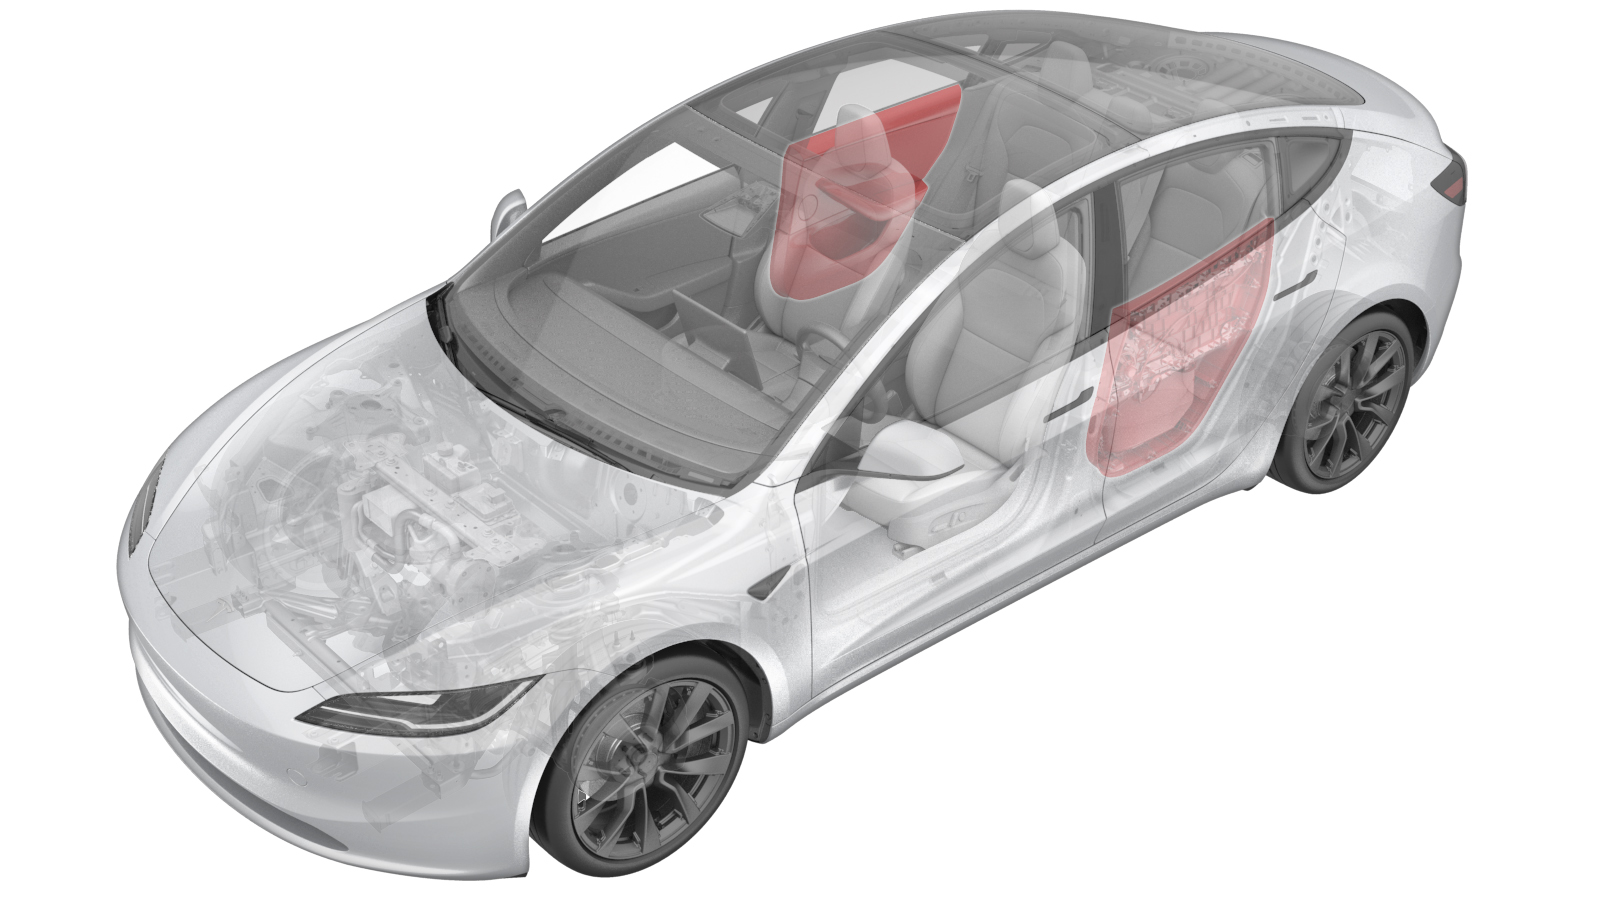
Panel - Door Trim - Rear - LH (Remove and Replace)
 Correction code
1513020012
FRT
0.18
NOTE: Unless otherwise explicitly stated in the procedure, the correction code and FRT listed above reflect all of the work required to perform this procedure, including the linked procedures. Do not stack correction codes unless explicitly told to do so.
NOTE: See Flat Rate Times to learn more about FRTs and how they are created.
NOTE: See Personal Protection to make sure you
are wearing proper PPE when performing the procedure below.
NOTE: See Ergonomic Precautions for safe and healthy working practices.
Correction code
1513020012
FRT
0.18
NOTE: Unless otherwise explicitly stated in the procedure, the correction code and FRT listed above reflect all of the work required to perform this procedure, including the linked procedures. Do not stack correction codes unless explicitly told to do so.
NOTE: See Flat Rate Times to learn more about FRTs and how they are created.
NOTE: See Personal Protection to make sure you
are wearing proper PPE when performing the procedure below.
NOTE: See Ergonomic Precautions for safe and healthy working practices.
- 2026-03-30: Added the software reinstallation step and steps of removing the NVH pad and door harness from the old door trim and installing them to the replacement door trim.
- 2024-01-09: Added the ambient light-related routine.
Torque Specifications
| Description | Torque Value | Recommended Tools | Reuse/Replace | Notes |
|---|---|---|---|---|
| Screws (x2) that attach the LH rear door panel to the LH rear door |
 6 Nm (4.4 lbs-ft) |
|
Reuse |
Remove
- Open the LH rear door, and fully lower the window.
-
Remove the screws (x2) that
attach the LH rear door trim panel to the door.
TIpUse of the following tool(s) is recommended:
- Torx T30 socket
- Remove the LH rear door puddle light. See Puddle Lamp - Rear Door (Remove and Replace).
-
Pull out on the trim panel
from the puddle light opening to release the clips that attach the trim
panel to the door.
CAUTIONDo not remove the trim panel from the door at this time.WarningThe video(s) included in this procedure are meant as an overview for supplemental purposes only. Follow all of the steps listed in the procedure to avoid damage to components and/or personal injury.
-
Continue to pull and release
all of the clips around the edge of the trim panel, working from the bottom
up.
CAUTIONDo not remove the trim panel from the door at this time.
-
Disconnect the electrical
wiring harness from the door connector.
CAUTIONDo not remove the trim panel from the door at this time.
- Raise the trim panel up to unhook it from the door, and then remove the panel from the door.
-
Check the LH rear door for
any remaining push clip retainers, and if present, remove them from the
door.
-
Release the LH rear door NVH pad from
the tabs (x3), and then remove it from the LH rear door trim panel.
-
Disconnect the LH rear door electric
release switch connector from the LH rear door trim panel.
-
Disconnect the LH rear door window
switch connector from the LH rear door trim panel.
-
Disconnect the LH rear door LED light
connector from the LH rear door trim panel.
-
Disconnect the LH rear door atmosphere
light connector from the LH rear door trim panel.
-
Disconnect the LH rear door speaker
connector from the LH rear door trim panel.
-
Release the clips (x5) that attach the
LH rear door harness to the LH rear door trim panel, and then remove the harness from
the door trim panel.
Install
-
Install the clips (x5) that attach the
LH rear door harness to the LH rear door trim panel.
-
Connect the LH rear door speaker
connector to the LH rear door trim panel.
-
Connect the LH rear door atmosphere
light connector to the LH rear door trim panel.
-
Connect the LH rear door LED light
connector to the LH rear door trim panel.
-
Connect the LH rear door window switch
connector from the LH rear door trim panel.
-
Connect the LH rear door electric
release switch connector to the LH rear door trim panel.
-
Install the LH rear door NVH pad onto
the LH rear door trim panel.
- Install the LH rear door puddle light to the door trim panel. See Puddle Lamp - Rear Door (Remove and Replace).
- Bring the replacement trim panel to the door, and rest it on the door edge.
-
Connect the electrical
harness to the LH rear door connector.
- Lift the trim panel, compress the LH rear door inner belt seal slightly, and hook the three trim panel tabs into the top edge of the door.
- Fasten the clips that attach the trim panel to the door.
- Make sure that the trim panel fits tightly, and that there are no gaps from misaligned or bent clips.
-
Install the screws (x2) that
attach the LH rear door trim panel to the LH rear door.6 Nm (4.4 lbs-ft)CAUTIONMake sure that all fasteners are properly torqued and not cross-threaded.TIpUse of the following tool(s) is recommended:
- Torx T30 socket
- Raise the LH rear window and close the door.
- Open the LH front door.
- Unlock the vehicle gateway. See Gateway Unlock.
-
Perform the following
routine using Service Mode or Toolbox (see 0005 - Service Modes):
PROC_VC_X_RGB-LIGHTS-ADDRESSINGvia Service Mode:
- Low Voltage ➜ Interior Lighting ➜ Address RGB Lights
- Mid Voltage ➜ Interior Lighting ➜ Address RGB Lights
- Reinstall the vehicle software. See Software Reinstall - Touchscreen.
- Exit Service Mode or disconnect the laptop if applicable (see 0005 - Service Modes).
- Close the LH front door.