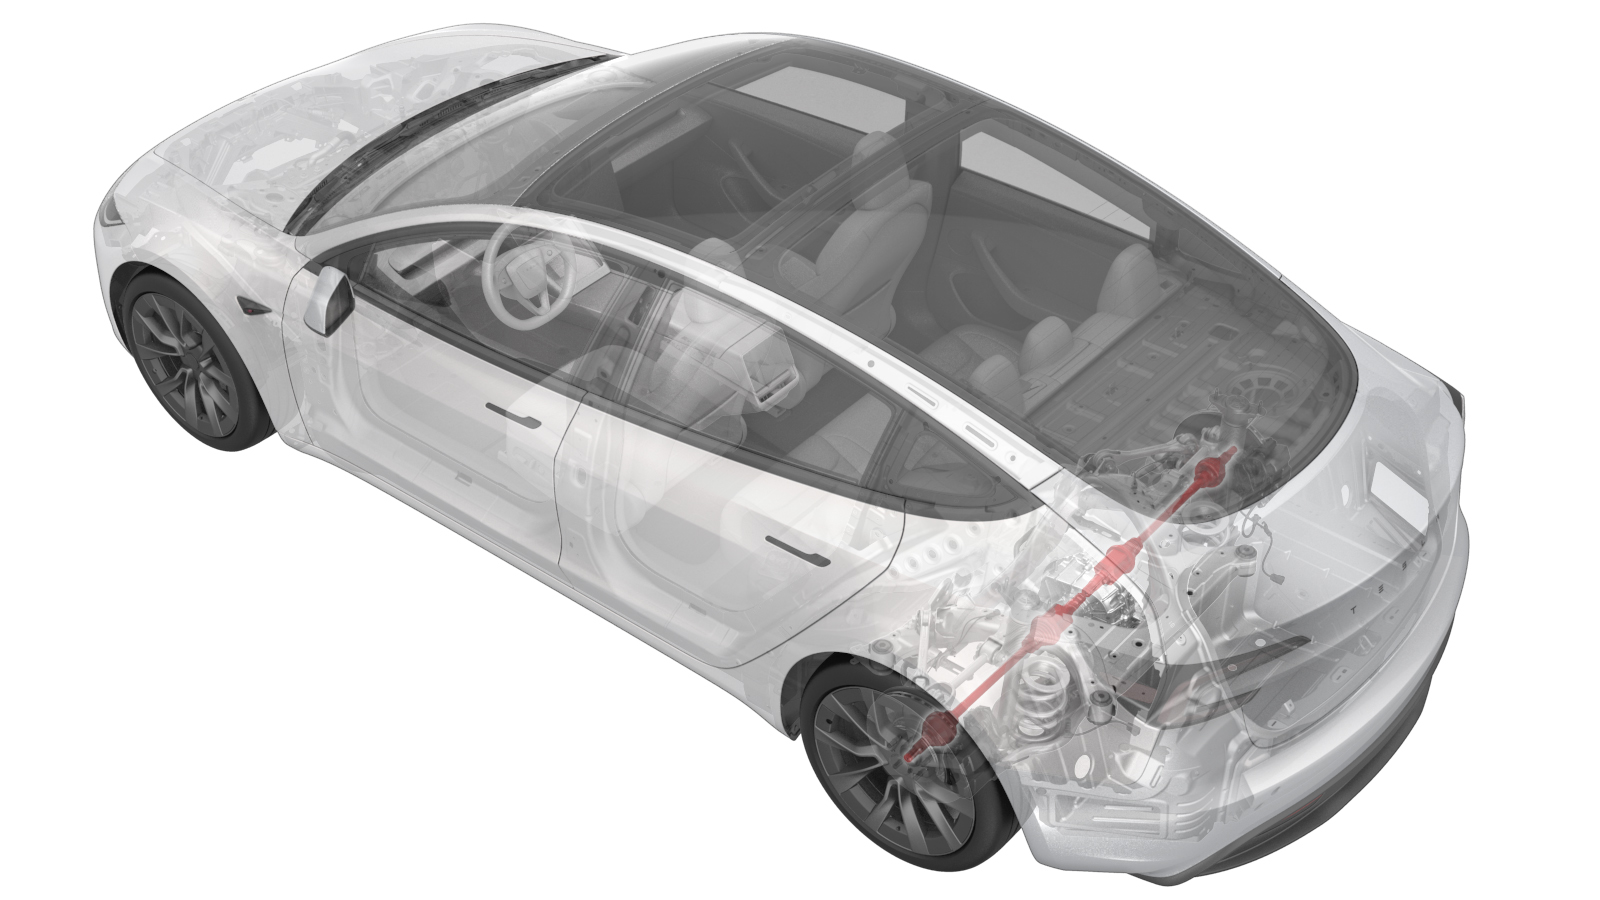
Half shaft - Rear Drive Unit - LH (Lubricate at Hub)
 Correction code
40302405
0.24
NOTE: Unless
otherwise explicitly stated in the procedure, the above correction code and
FRT reflect all of the work required to perform this procedure, including
the linked procedures. Do
not stack correction codes unless explicitly told to do so.
NOTE: See Flat Rate
Times to learn more about FRTs and how
they are created. To provide feedback on FRT values, email ServiceManualFeedback@tesla.com.
NOTE: See Personal Protection
to make sure wearing proper PPE when performing the below procedure.
NOTE: See Ergonomic Precautions for safe and
healthy working practices.
Correction code
40302405
0.24
NOTE: Unless
otherwise explicitly stated in the procedure, the above correction code and
FRT reflect all of the work required to perform this procedure, including
the linked procedures. Do
not stack correction codes unless explicitly told to do so.
NOTE: See Flat Rate
Times to learn more about FRTs and how
they are created. To provide feedback on FRT values, email ServiceManualFeedback@tesla.com.
NOTE: See Personal Protection
to make sure wearing proper PPE when performing the below procedure.
NOTE: See Ergonomic Precautions for safe and
healthy working practices.
- 2024-07-04: Updated torque figure for rear halfshaft nut from 245 Nm to 300 Nm.
- 1096075-00-A Tool, Hub Puller, Hydraulic
Procedure
-
Use a wheel trim removal
tool to remove the LH rear wheel center cap.
-
Loosen the LH rear wheel lug
nuts (x5).
CAUTIONUse only hand tools to remove or install the fasteners. Do not use impact or power tools.CAUTIONUse a 6 point socket. Do not use a 12 point socket or a specialty socket.TIpUse of the following tool(s) is recommended:
- Breaker bar
- 6 in extension
- 21 mm deep sleeved socket
-
Loosen the LH rear drive
unit half shaft nut.
TIpUse of the following tool(s) is recommended:
- Breaker bar
- 6 in extension
- 32 mm deep impact socket
- Raise and support the vehicle. See Raise Vehicle - 2 Post Lift.
- Remove the lug nuts from the LH rear wheel, and then remove the wheel from the vehicle.
-
Remove and discard the LH
rear drive unit half shaft nut and washers.
NoteThe washers are attached to the nut.
- Cordless Ratchet/Impact Driver
- 32 mm deep impact socket
-
Remove the bolt that attaches the LH rear brake motor to the wheel
hub.
TIpUse of the following tool(s) is recommended:
- Cordless Ratchet/Impact Driver
- 32 mm deep impact socket
- Install the hydraulic hub puller tool onto the LH rear wheel studs, and then install and hand-tighten the wheel lug nuts (x5).
-
Hold the hub in position,
and turn the hydraulic hub puller tool handle clockwise to push the LH rear
drive unit half shaft in from the LH rear hub assembly for a distance of 2
in.
CAUTIONIf the half shaft stops moving in respect to the hub, stop, and turn the tool handle counter-clockwise for two turns.WarningThe video(s) included in this procedure are meant as an overview for supplemental purposes only. Follow all of the steps listed in the procedure to avoid damage to components and/or personal injury.
-
Apply approximately 1 gram
of Molykote M-77 Lubricant Paste only to the hub
mating face on the outboard side of the LH rear drive unit half shaft.
TIpA bent acid brush can be of assistance.CAUTIONDo not apply any lubricant to the half shaft splines. If lubricant is mistakenly applied, wipe the splines clean with a shop towel.
- Remove the hydraulic hub puller tool from the LH rear wheel studs.
-
Pull on the inner half shaft
cup to confirm that the circlip is locked into place. If the half shaft
detaches from the drive unit then reinstall the half shaft and then test
that it is fully seated.
CAUTIONIf reinstalling the half shaft to the drive unit:
- Take care not to damage or displace the oil seals.
- Make sure that the opening of the snap rings are facing towards the bottom of the drive unit.
- Carefully push the half shaft into the drive unit until there is an audible "click" from the half shaft stub contacting the pinion shaft.
- There will be a slight pulling sensation on the half shaft as the half shaft circlip locks into place.
- Pull on the inner half shaft cup to confirm that the circlip is locked into place. If the half shaft detaches from the drive unit then reinstall the half shaft and then test that it is fully seated.
- Align the splines of the LH rear half shaft with those of the LH rear hub, and then install the half shaft into the hub.
-
Install only the axle nut
onto the half shaft, and then use a ratchet and socket to manually tighten
the nut to pull the half shaft into the hub until it seats.
NoteDo not use power tools to tighten the nut as it might strip the threads.
-
Remove the axle nut from the
half shaft, install a new washer onto the half shaft, and then reinstall the
axle nut hand tightened.
NoteThe axle nut is torqued in a later step.
-
Install the bolt that attaches the LH rear brake motor to the wheel
hub.
 5 Nm (3.7 lbs-ft)TIpUse of the following tool(s) is recommended:
- Cordless Ratchet/Impact Driver
- 32 mm deep impact socket
- Install the LH rear wheel, and then install and hand-tighten the wheel lug nuts.
- Lower the vehicle. See Raise Vehicle - 2 Post Lift.
-
Fully tighten the LH rear wheel lug nuts in a star-pattern.175 Nm (129.1 lbs-ft)TIpUse of the following tool(s) is recommended:
- Ratchet/torque wrench
- 6 in extension
- 21 mm deep sleeved socket
-
Fully tighten the LH rear
drive unit half shaft nut.300 Nm (221.2 lbs-ft)TIpUse of the following tool(s) is recommended:
- Ratchet/torque wrench
- 6 in extension
- 32 mm deep impact socket
- Flex head ratchet/flex head torque wrench
-
Install the LH rear wheel
center cap.