2024-05-07
Center Console (Remove and Replace)
 Correction code
1519010012
FRT
0.36
NOTE: Unless otherwise explicitly stated in the procedure, the correction code and FRT listed above reflect all of the work required to perform this procedure, including the linked procedures. Do not stack correction codes unless explicitly told to do so.
NOTE: See Flat Rate Times to learn more about FRTs and how they are created.
NOTE: See Personal Protection to make sure you
are wearing proper PPE when performing the procedure below.
NOTE: See Ergonomic Precautions for safe and healthy working practices.
Correction code
1519010012
FRT
0.36
NOTE: Unless otherwise explicitly stated in the procedure, the correction code and FRT listed above reflect all of the work required to perform this procedure, including the linked procedures. Do not stack correction codes unless explicitly told to do so.
NOTE: See Flat Rate Times to learn more about FRTs and how they are created.
NOTE: See Personal Protection to make sure you
are wearing proper PPE when performing the procedure below.
NOTE: See Ergonomic Precautions for safe and healthy working practices.
- 2024-05-07: Added step for connector removal at RH front side of center console.
Warning
The video(s)
included in this procedure are meant as an overview for supplemental purposes only.
Follow all of the steps listed in the procedure to avoid damage to components and/or
personal
injury.
Equipment:
- 1060071-00-A Torque Wrench 1/4in Dr Hexagon
Torque Specifications
| Description | Torque Value | Recommended Tools | Reuse/Replace | Notes |
|---|---|---|---|---|
| Bolts (x2) that attach the rear part of the center console to the body |
 7 Nm (5.2 lbs-ft) |
|
Reuse | |
| Bolts (x2) that attach the LH front part of the center console to the body |
7 Nm (5.2 lbs-ft) |
|
Reuse | |
| Bolts (x2) that attach the RH front part of the center console to the body |
7 Nm (5.2 lbs-ft) |
|
Reuse |
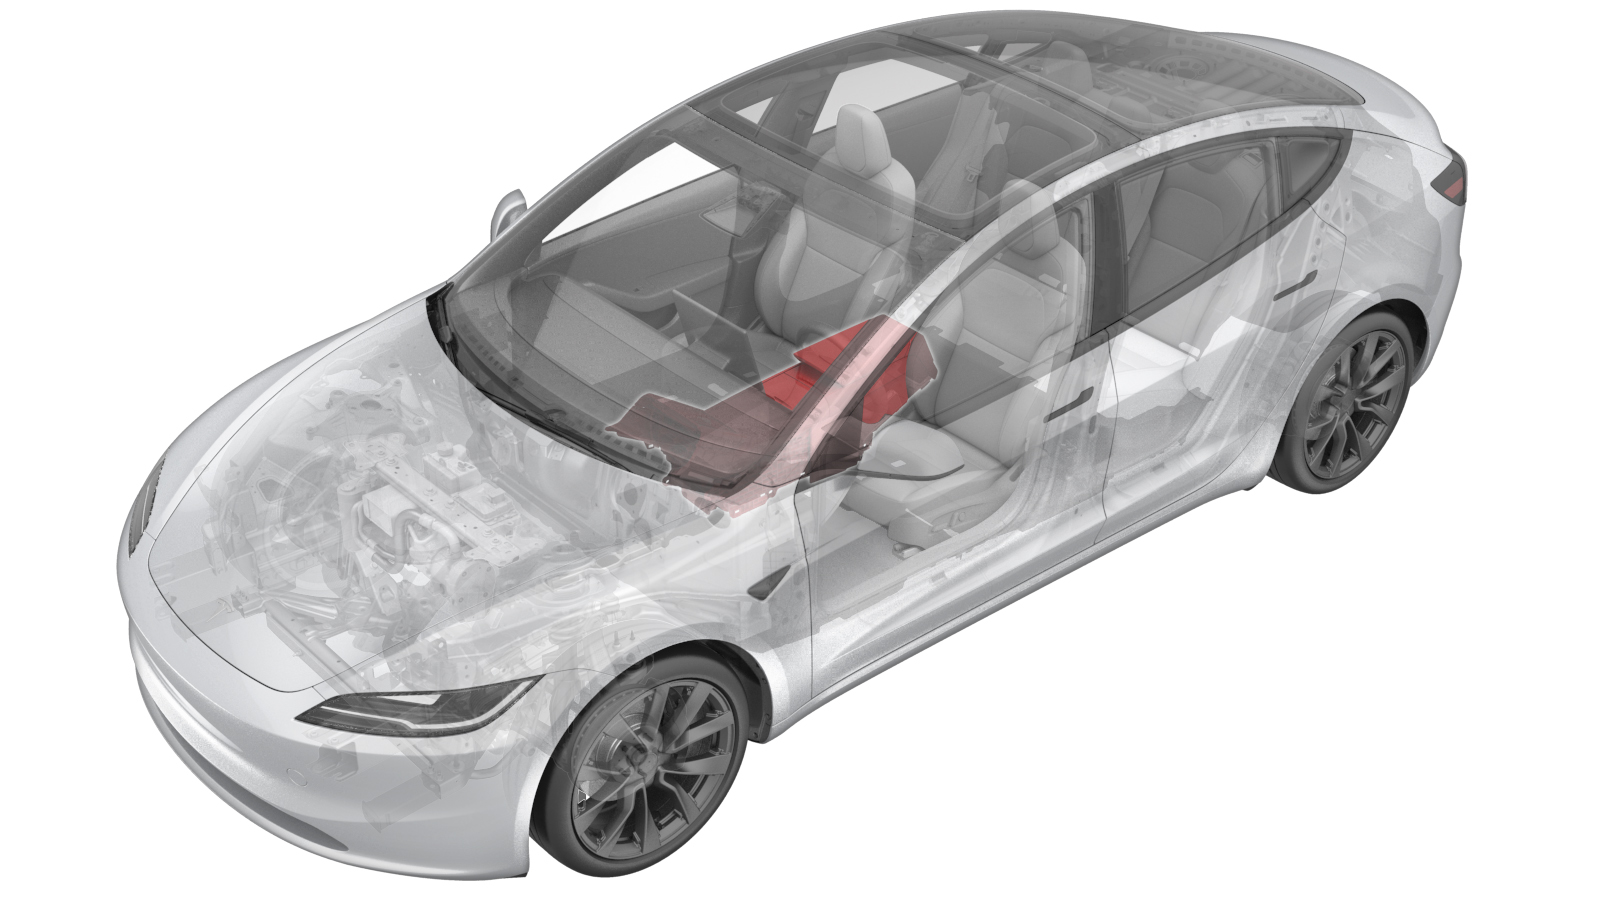
Remove
- Open all the doors and lower all the windows.
- Remove the center console rear end panel. See Panel - Rear End - Center Console (Remove and Replace).
-
Remove the bolts (x2) that attaches
the LH and RH rear of the center console to the body.
NoteUse of the following tool(s) is recommended:
- 10 mm socket
- Remove the LH center console front side panel carpet. See Carpet - Side - Center Console - LH (Remove and Replace).
-
Remove the bolts (x2) that
attach the LH front of the center console to the body.
NoteUse of the following tool(s) is recommended:
- 10 mm socket
- Remove the RH center console front side panel carpet. See Carpet - Side - Center Console - LH (Remove and Replace).
-
Remove the bolts (x2) that
attach the RH front of the center console to the body.
NoteUse of the following tool(s) is recommended:
- 10 mm socket
- Disconnect the LV power. See LV Power (Disconnect and Connect).
-
Disconnect the electrical
connector from the rear of the center console.
NoteAfter disconnecting the electrical harness, release the clip that attaches the electrical connector to the center console with a clip prytool.
-
Remove the harness clip from the RH front side of the center console, and then
disconnect the connector.
-
With an assistant, remove
the center console from the vehicle as follows:
- Tilt the rear of the center console upwards.
- Pull the center console towards the rear of the vehicle.
- Tilt the front of the center console upwards.
- Remove the center console through the passenger front door.
Install
-
With an assistant, install the center console into the vehicle as
follows:
- Tilt the front of the center console downwards.
- Slide the center console towards the front of the vehicle.
- Tilt the rear of the center console downwards until it is in place.
-
Connect the electrical
connector in the rear of the center console.
NoteInstall the clip that attaches the electrical connector to the center console first and then connect the electrical harness.CAUTIONEnsure the connector is properly installed. Perform a push-pull test before continuing this procedure.
- Reconnect the LV power. See LV Power (Disconnect and Connect).
-
Install the bolts (x2) that
attach the RH front of the center console to the body.7 Nm (5.2 lbs-ft)NoteUse of the following tool(s) is recommended:
- 10 mm socket
- Install the RH center console front side panel carpet. See Carpet - Side - Center Console - RH (Remove and Replace).
-
Install the bolts (x2) that
attach the LH front of the center console to the body.7 Nm (5.2 lbs-ft)NoteUse of the following tool(s) is recommended:
- 10 mm socket
- Install the LH center console front side panel carpet. See Carpet - Side - Center Console - LH (Remove and Replace).
-
Install the bolts (x2) that attaches
the LH and RH rear of the center console to the body.7 Nm (5.2 lbs-ft)NoteUse of the following tool(s) is recommended:
- 10 mm socket
- Install the center console rear end panel. See Panel - Rear End - Center Console (Remove and Replace).
- Reinstall the vehicle firmware. See Software Reinstall - Touchscreen.
- Raise all the windows and close all the doors.