2023-11-22
Fender Alignment
Procedure
-
Identify any adjacent panels that may also need adjustment to successfully align the fender to within specification.
NoteIf multiple panels require adjustment, the best practice is to start with a panel that is adjacent to a fixed panel on the vehicle (e.g. quarter panel or roof rail).NoteThe optimal adjustment order is the following:
- Trunk/liftgate
- Rear doors
- Front doors
- Fenders
- Hood
- Identify what directions the fender needs to be adjusted to bring it within specification.
-
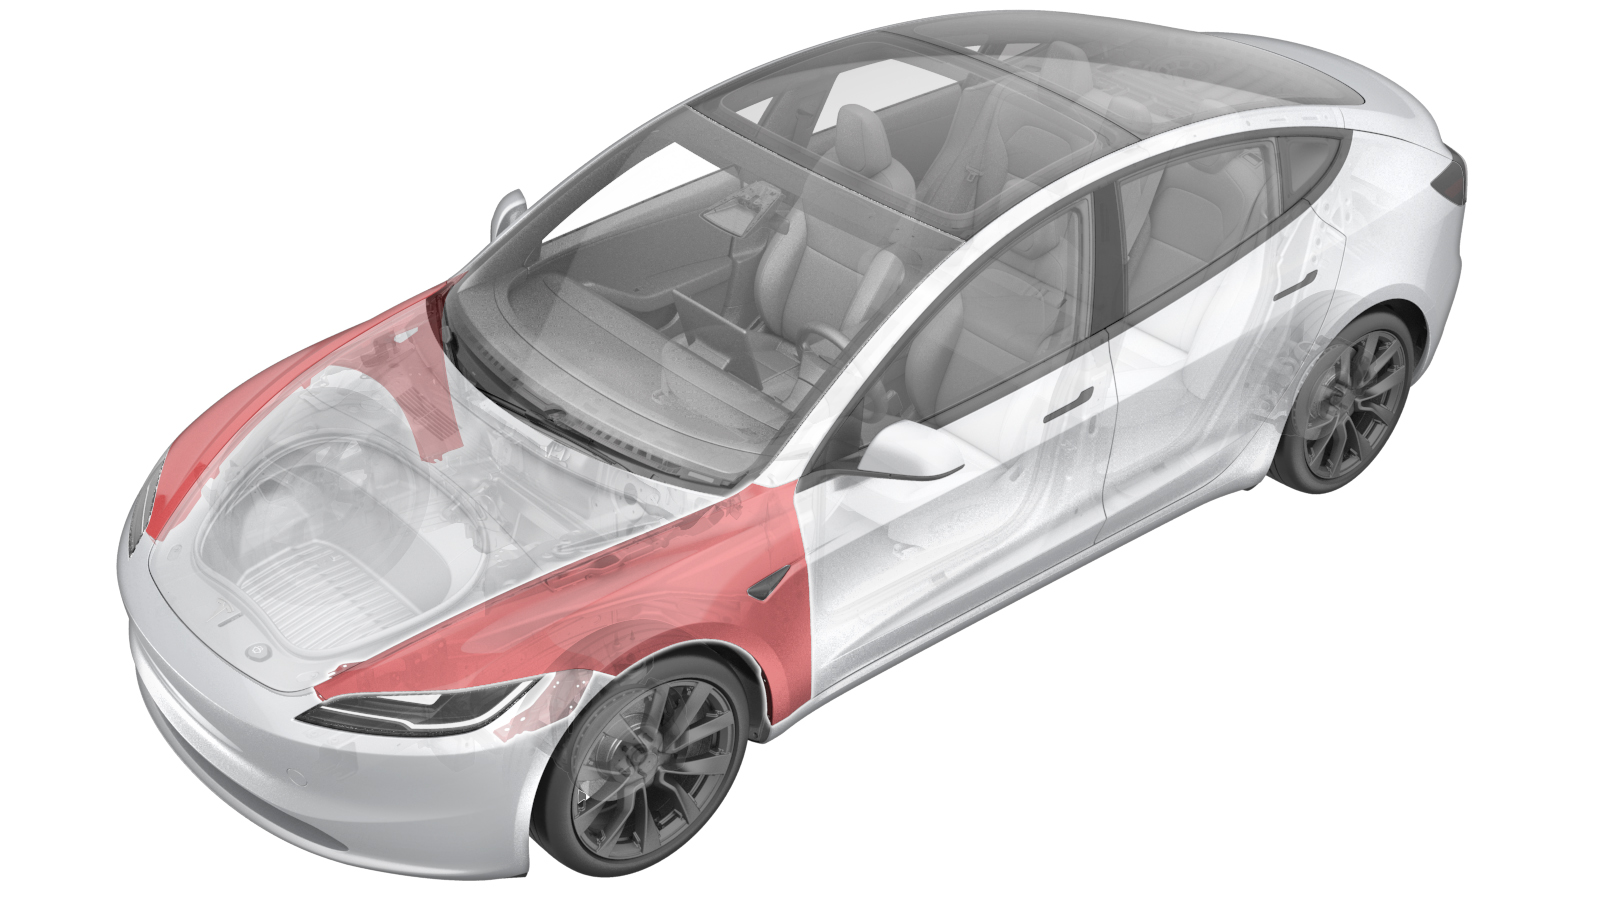
Use the images to identify the hardware that needs to be loosened to adjust the fender position in the necessary directions.
- Loosen the necessary bolts just enough to enable adjusting the fender with a light application of force.
- Retighten them.
-
Check to see if the fit has improved.
CAUTIONAdjust the fender in only one direction at a time to reduce risk of damage from panels contacting each other during the adjustment process.
- Repeat the process until the fender fit is within gap and flushness specifications.
- Re-torque all hardware that was loosened back to factory values.