2026-02-19
Assembly - A/C Line - Supermanifold to Compressor (Remove and Replace)
 Correction code
1820010022
FRT
0.30
NOTE: Unless otherwise explicitly stated in the procedure, the correction code and FRT listed above reflect all of the work required to perform this procedure, including the linked procedures. Do not stack correction codes unless explicitly told to do so.
NOTE: See Flat Rate Times to learn more about FRTs and how they are created.
NOTE: See Personal Protection to make sure you
are wearing proper PPE when performing the procedure below.
NOTE: See Ergonomic Precautions for safe and healthy working practices.
Correction code
1820010022
FRT
0.30
NOTE: Unless otherwise explicitly stated in the procedure, the correction code and FRT listed above reflect all of the work required to perform this procedure, including the linked procedures. Do not stack correction codes unless explicitly told to do so.
NOTE: See Flat Rate Times to learn more about FRTs and how they are created.
NOTE: See Personal Protection to make sure you
are wearing proper PPE when performing the procedure below.
NOTE: See Ergonomic Precautions for safe and healthy working practices.
- 2024-02-04: Added steps of performing the touchscreen routines.
Note
This procedure requires the A/C
Refrigerant (Recovery and Recharge) procedure to be performed. If not already
automatically added to the Service Visit, add correction code 18200102 as a
separate correction within the same activity to the Service Visit.
| Description | Torque Value | Recommended Tools | Reuse/Replace | Notes |
|---|---|---|---|---|
| Nut that attaches the supermanifold to compressor suction line to the compressor |
 22 Nm (16.2 lbs-ft) |
|
Reuse | |
| Nut that attaches the supermanifold to compressor discharge line to the compressor |
22 Nm (16.2 lbs-ft) |
|
Reuse | |
| Bolt that attaches the supermanifold to compressor A/C line to the supermanifold |
22 Nm (16.2 lbs-ft) |
|
Reuse |
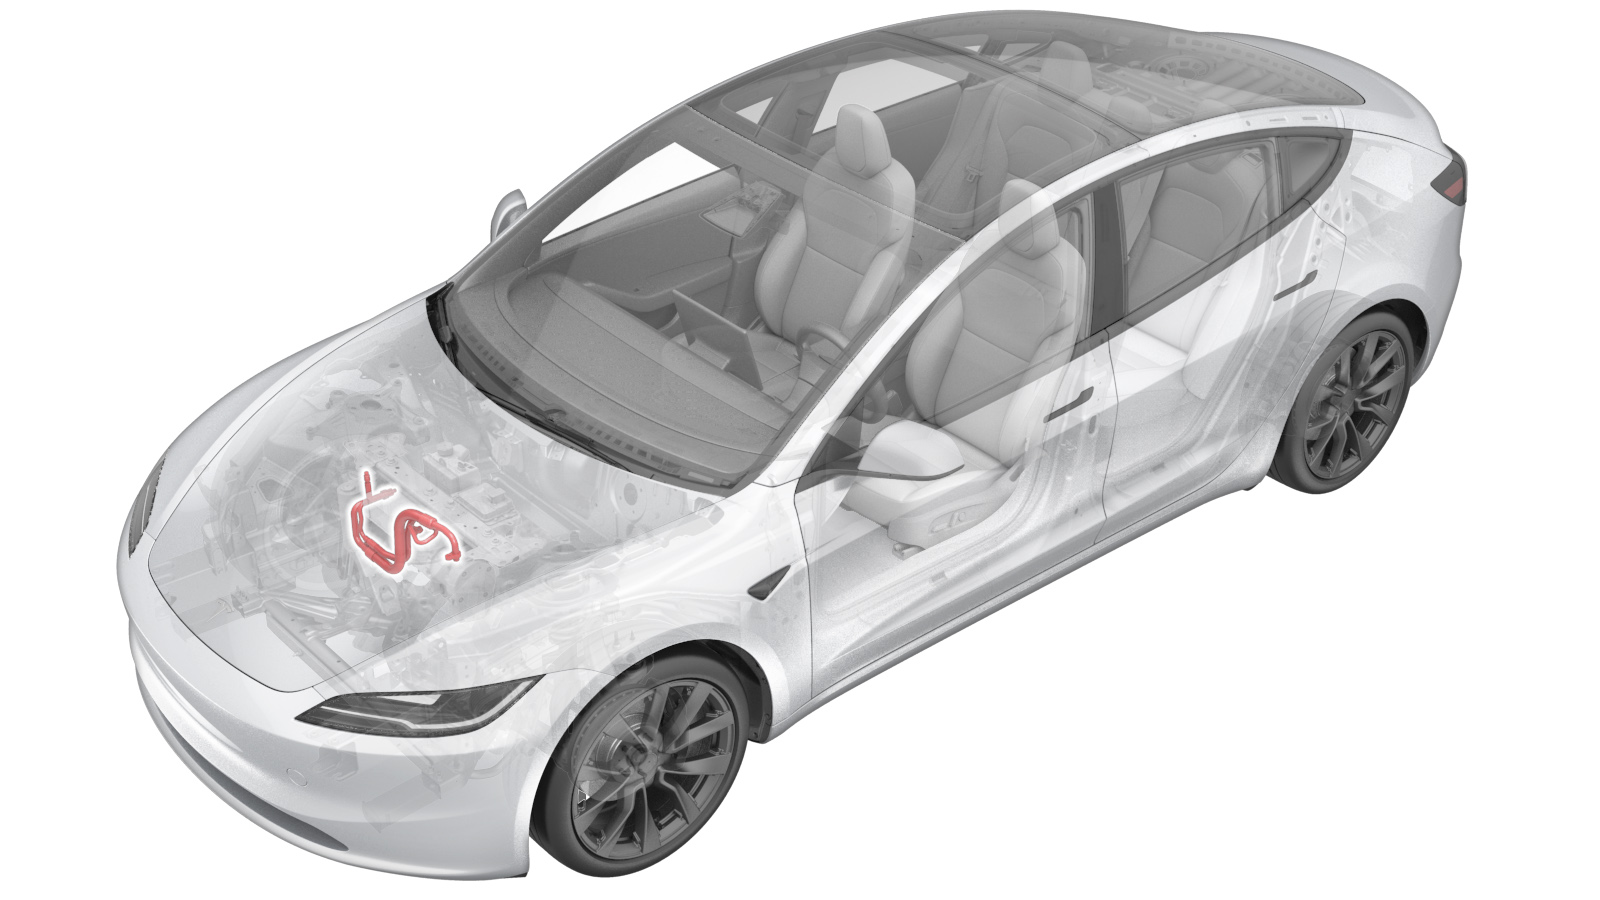
Remove
- Open the LH front door and lower the LH front window.
- Place the vehicle in Service Mode by using the touchscreen. See Service Mode.
- Remove the underhood storage unit. See Underhood Storage Unit (Remove and Replace).
- Unlock the vehicle gateway. See Gateway Unlock.
- On the touchscreen, tap the Service Mode "wrench" (at the bottom of the touchscreen UI), and then tap , and allow the routine to complete.
- Recover the A/C refrigerant. See A/C Refrigerant (Recovery and Recharge) (Restore).
-
Remove the bolt that attaches the
supermanifold to compressor A/C line to the supermanifold.
NoteUse of the following tool(s) is recommended:
- 13 mm socket
- Cordless Ratchet/Impact Driver
- 6 in extension
- Flex head ratchet/flex head torque wrench (for installation only)
-
Remove the nut that attaches the
supermanifold to compressor suction line to the compressor, then move the line aside for
clearance.
NoteUse of the following tool(s) is recommended:
- 13 mm socket
- 3 in extension
- Ratchet/torque wrench (for installation only)
-
Remove the nut that attaches the
supermanifold to compressor discharge line to the compressor, then move the line aside
for clearance, and then remove the supermanifold to compressor A/C line assembly from
the vehicle.
NoteUse of the following tool(s) is recommended:
- 13 mm socket
- 3 in extension
- Ratchet/torque wrench (for installation only)
Install
- Position the supermanifold to compressor A/C line onto the supermanifold, and then hand tighten the bolt that attaches the A/C line to the supermanifold.
-
Install the nut that attaches the
supermanifold to compressor suction line to the compressor.22 Nm (16.2 lbs-ft)NoteUse of the following tool(s) is recommended:
- 13 mm socket
- 3 in extension
- Ratchet/torque wrench (for installation only)
-
Install the nut that attaches the
supermanifold to compressor discharge line to the compressor.22 Nm (16.2 lbs-ft)NoteUse of the following tool(s) is recommended:
- 13 mm socket
- 3 in extension
- Ratchet/torque wrench (for installation only)
-
Hand-tighten the bolt that attaches
the supermanifold to compressor A/C line to the supermanifold, and then torque it.22 Nm (16.2 lbs-ft)NoteUse of the following tool(s) is recommended:
- 13 mm socket
- Cordless Ratchet/Impact Driver
- 6 in extension
- Flex head ratchet/flex head torque wrench (for installation only)
- Perform the vacuum leak test and oil injection procedure. See Vacuum Leak Test and Oil Injection.
- Recharge the A/C refrigerant. See A/C Refrigerant (Recovery and Recharge) (Restore).
-
For vehicles built in Giga Berlin
only: On the touchscreen, tap and update refrigACLineType configuration to one of the following values:
- If part number 1502020-00-B or newer is installed: CONTI_LIMITED
- If part number 1625910-00-C or -D is installed: SAAA_LIMITED
- If part number 1625910-00-E or newer is installed: UNLIMITED
- If part number 1807596-XX-X is installed: UNLIMITED
- On the touchscreen, tap the Service Mode "wrench" (at the bottom of the touchscreen UI), and then tap , and close once the routine is passed.
- Tap , and close once the routine is passed.
- Tap , and close once the routine is passed.
- Exit Service Mode. See Service Mode.
- Install the underhood storage unit. See Underhood Storage Unit (Remove and Replace).