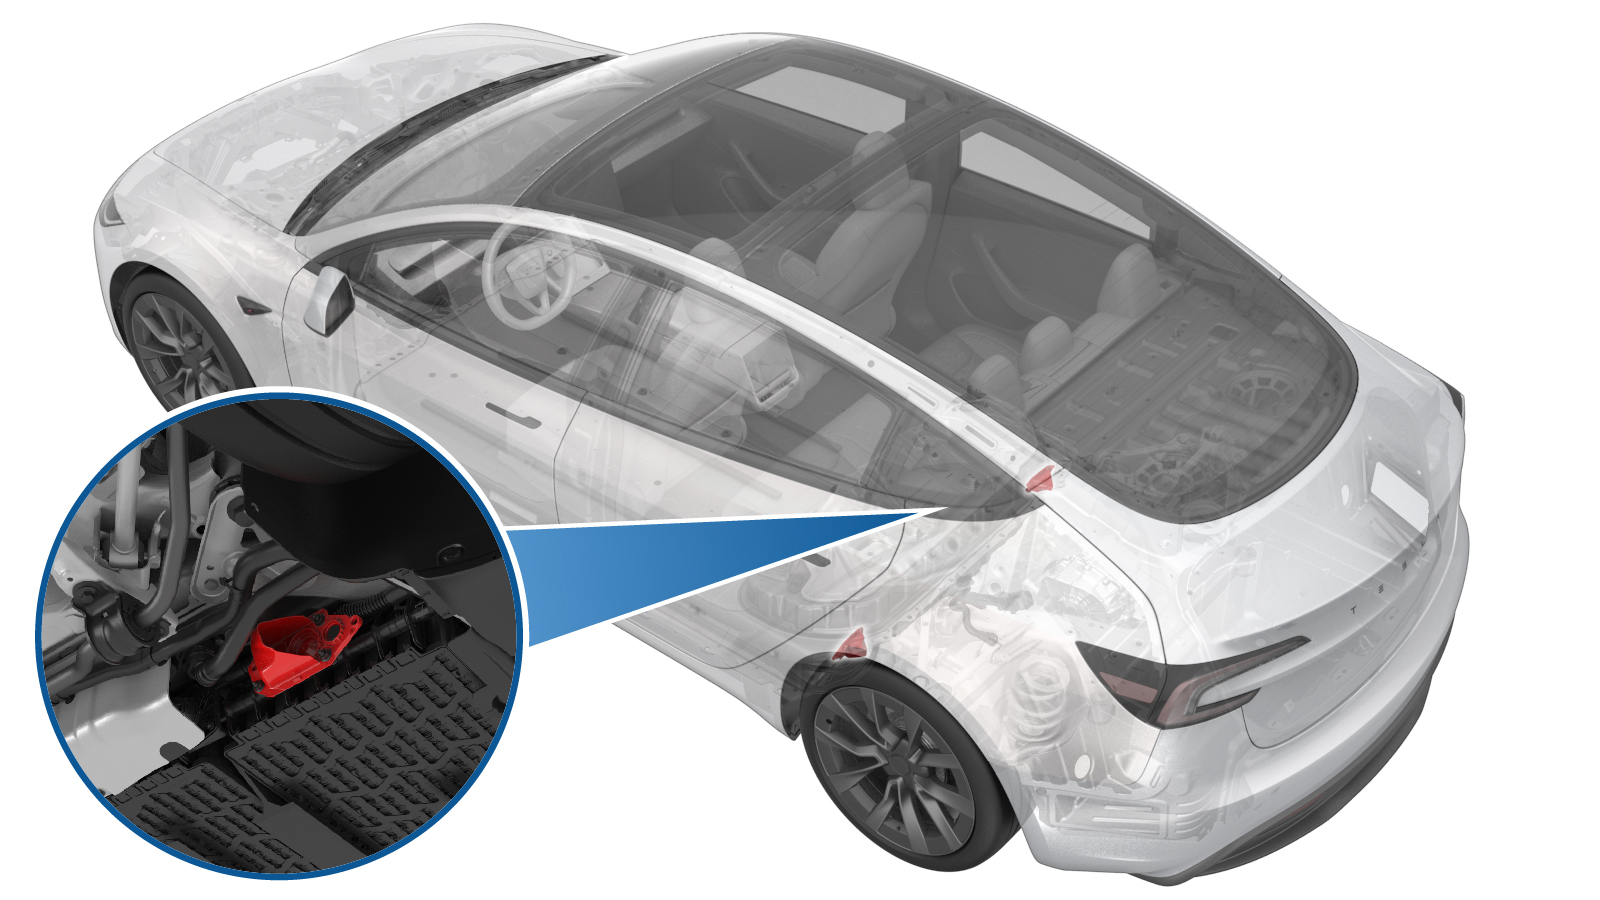
Snap In Vent - HV Battery - Rear (Remove and Replace)
 Correction code
1601010122
FRT
0.66
NOTE: Unless otherwise explicitly stated in the procedure, the correction code and FRT listed above reflect all of the work required to perform this procedure, including the linked procedures. Do not stack correction codes unless explicitly told to do so.
NOTE: See Flat Rate Times to learn more about FRTs and how they are created.
NOTE: See Personal Protection to make sure you
are wearing proper PPE when performing the procedure below.
NOTE: See Ergonomic Precautions for safe and healthy working practices.
Correction code
1601010122
FRT
0.66
NOTE: Unless otherwise explicitly stated in the procedure, the correction code and FRT listed above reflect all of the work required to perform this procedure, including the linked procedures. Do not stack correction codes unless explicitly told to do so.
NOTE: See Flat Rate Times to learn more about FRTs and how they are created.
NOTE: See Personal Protection to make sure you
are wearing proper PPE when performing the procedure below.
NOTE: See Ergonomic Precautions for safe and healthy working practices.
Equipment:
- 1140501-00-A Pack Kit, Enclosure, Leak Test, HV Battery, Complete
- 1813553-00-A 5-Way Air Splitter
- 1108272-00-B Cap, Logic Conn, Inv, 3DU
- 1144879-00-A Kit, Encl Leak Test Adapters, HV Battery
| Description | Torque Value | Recommended Tools | Reuse/Replace | Notes |
|---|---|---|---|---|
| Nuts that attach the LH vent assembly to the HV battery |
 10 Nm (7.4 lbs-ft) |
|
Reuse |
- 2025-10-13: Updated procedure and images to snap-in style vent. Added missing reassembly instructions.
High Voltage Awareness Care Pointsfor additional safety information.
Remove
- Use Toolbox to put the vehicle into Factory Mode.
- Invoke diagnostics on the touchscreen.
-
Inspect the Notifications for either a
BMS_a123 or a BMS_W123 alert.
- If either alert is present - Contact Service Engineering. Do not perform this procedure.
- If neither alert is present - Continue to the next step.
- Exit diagnostics and restart the touchscreen.
- Use Toolbox to exit Factory Mode.
- Perform the Vehicle HV Disablement Procedure. See Vehicle HV Disablement Procedure (Test/Adjust).
-
Raise the vehicle fully and lower the
lift onto locks.
CAUTION
Make sure there is an audible click of the locks on both sides before lowering, otherwise the vehicle may tilt to one side.
Make sure that the doors are clear of surrounding objects.
- Remove the rear aero shield panel. See Panel - Aero Shield - Rear (Remove and Replace).
-
Remove the LH HV battery snap-in vent assembly from the HV battery.
NotePry the 2x tabs from the inside to release the vent assembly.
Install
- Use isopropyl alcohol to clean the snap-in vent contact surface. Let dry for 1 minute.
-
Inspect the HV battery snap-in vent and replace it if damaged.
-
Position the vent assembly to the
battery, and then install the nuts (x3) that attach the LH vent assembly to the HV
battery.
TIpInsert the outer side first, then press the inner side forward. The vent will audibly click when fully engaged.
-
Install the fir free clips (x2) that attach the coolant hoses to the LH
shear plate.
- Perform an HV battery air leak test. See HV Battery Air Leak Test.
- Install the rear aero shield. See Panel - Aero Shield - Rear (Remove and Replace).
- Connect LV power. See LV Power (Disconnect and Connect).
- Reinstall the 2nd row lower seat cushion. See Seat Cushion - 2nd Row (Remove and Replace).