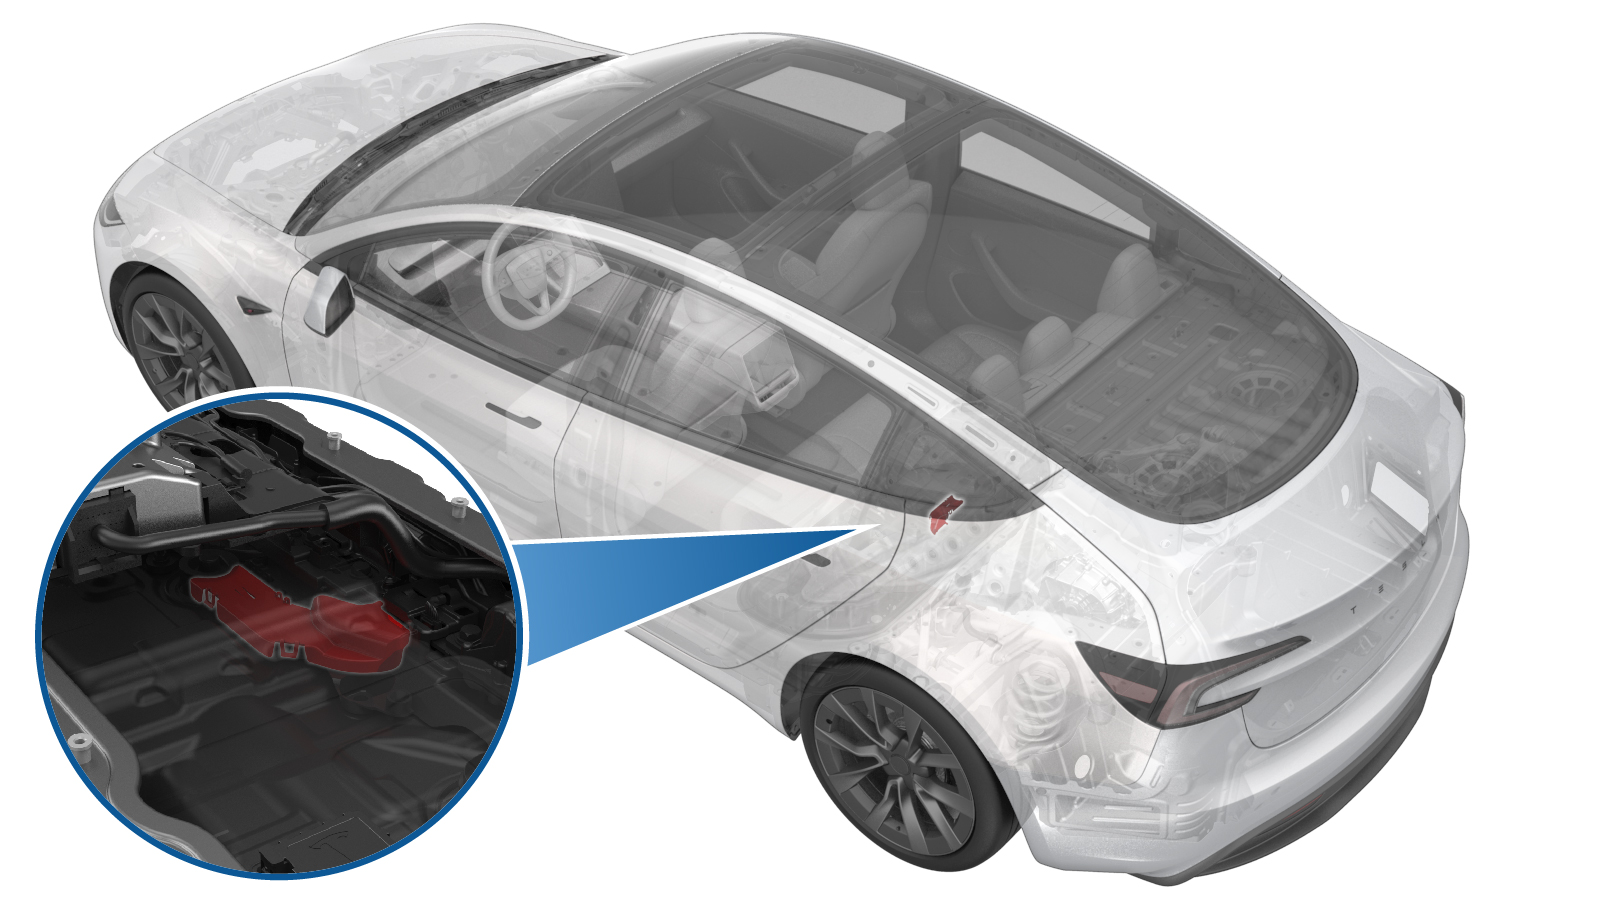
Cover - Busbar Module 3 to Shunt - Ancillary Bay (Remove and Replace)
 Correction code
1630010162
FRT
2.04
NOTE: Unless
otherwise explicitly stated in the procedure, the above correction code and
FRT reflect all of the work required to perform this procedure, including
the linked procedures. Do
not stack correction codes unless explicitly told to do so.
NOTE: See Flat Rate
Times to learn more about FRTs and how
they are created. To provide feedback on FRT values, email ServiceManualFeedback@tesla.com.
NOTE: See Personal Protection
to make sure wearing proper PPE when performing the below procedure.
NOTE: See Ergonomic Precautions for safe and
healthy working practices.
Correction code
1630010162
FRT
2.04
NOTE: Unless
otherwise explicitly stated in the procedure, the above correction code and
FRT reflect all of the work required to perform this procedure, including
the linked procedures. Do
not stack correction codes unless explicitly told to do so.
NOTE: See Flat Rate
Times to learn more about FRTs and how
they are created. To provide feedback on FRT values, email ServiceManualFeedback@tesla.com.
NOTE: See Personal Protection
to make sure wearing proper PPE when performing the below procedure.
NOTE: See Ergonomic Precautions for safe and
healthy working practices.
Only
technicians who have completed all required certification courses are permitted to
perform this procedure. Tesla recommends third party service provider technicians
undergo equivalent training before performing this procedure. For more information on
Tesla Technician requirements, or descriptions of the subject matter for third parties,
see HV Certification Requirements. Proper personal protective equipment (PPE) and insulating HV
gloves with a minimum rating of class 0 (1000V) must
be worn at all times a high voltage cable, busbar, or fitting is handled. Refer to Tech Note TN-15-92-003, High Voltage Awareness
Care Points
for additional safety
information.
Remove all jewelry (watches, bracelets, rings, necklaces, earrings, ID tags, piercings, etc.) from your person, and all objects (keys, coins, pens, pencils, tools, fasteners, etc.) from your pockets before performing any procedure that exposes you to high voltage.
Remove
- Move the vehicle to a 2 post lift. See Raise Vehicle - 2 Post Lift.
- Remove the rear underhood apron. See Underhood Apron - Rear (Remove and Replace).
- Disconnect the LV power. See LV Power (Disconnect and Connect).
- Remove the rear aero shield panel. See Panel - Aero Shield - Rear (Remove and Replace).
- Remove the rear HV battery skid plate. See Skid Plate - HV Battery - Rear (Remove and Replace).
- Drain the coolant from the power conversion system. See Ancillary Bay Coolant (Drain and Refill) (Test/Adjust).
- Disconnect the coolant drain hose adapters from the power conversion system inlet and outlet hoses and plug the power conversion inlet and outlet hoses.
- Remove the coolant collection tools, and then remove the coolant pressure tester from underneath the vehicle.
- Lower the vehicle fully.
- Remove the 2nd row lower seat cushion. See Seat Cushion - 2nd Row (Remove and Replace).
- Perform Vehicle HV Disablement Procedure. See Vehicle HV Disablement Procedure (Test/Adjust).
-
Remove the ancillary bay cover.
See Ancillary Bay Cover (Remove and Replace).
WarningHV insulating gloves and leather glove protectors must be worn throughout the remainder of this procedure. Do not remove gloves or protectors until otherwise noted.
- Remove the pyrotechnic battery disconnect. See Pyro Disconnect - HV Battery (Remove and Replace).
- Remove the power conversion system. See PCS Assembly (Remove and Replace).
- Check whether all HV insulators are installed; if not, install insulators as needed.
-
Remove the insulator cap
from the HV battery shunt busbar nut.
-
Release the clips (x3) that
attach the HV battery shunt busbar cover to the HV battery shunt busbar, and
then remove the cover from the busbar.
Install
-
Fasten the clips (x3) that attach the HV battery shunt busbar cover to the
HV battery shunt busbar.
-
Install the insulator cap to the HV battery shunt busbar nut.
- Install the power conversion system. See PCS Assembly (Remove and Replace).
- Measure the voltage across the pyrotechnic battery disconnect mount points, and then install the pyrotechnic battery disconnect. See Pyro Disconnect - HV Battery (Remove and Replace).
-
Install the ancillary bay cover.
See Ancillary Bay Cover (Remove and Replace).
NoteBefore installing the ancillary bay cover, inspect the ancillary bay cover seal and confirm there is no visual damage. If the seal is torn and/or delaminated, replace the ancillary bay cover.
- Install the 2nd row lower seat cushion. See Seat Cushion - 2nd Row (Remove and Replace).
- Raise the vehicle to a comfortable working height.
- Connect the coolant drain hose adapters to the power conversion system inlet and outlet hoses, and then put the coolant container underneath the vehicle.
- Perform ancillary bay air leak test. See Ancillary Bay Air Leak Test (Inspection).
- Install the rear HV battery skid plate. See Skid Plate - HV Battery - Rear (Remove and Replace).
- Install the rear aero shield panel. See Panel - Aero Shield - Rear (Remove and Replace).
- Refill the coolant. See Ancillary Bay Coolant (Drain and Refill) (Test/Adjust).
- Install the rear underhood apron. See Underhood Apron - Rear (Remove and Replace).
- Exit Service mode. See Service Mode.
- Remove the vehicle from the 2 post lift. See Raise Vehicle - 2 Post Lift.