2024-02-06
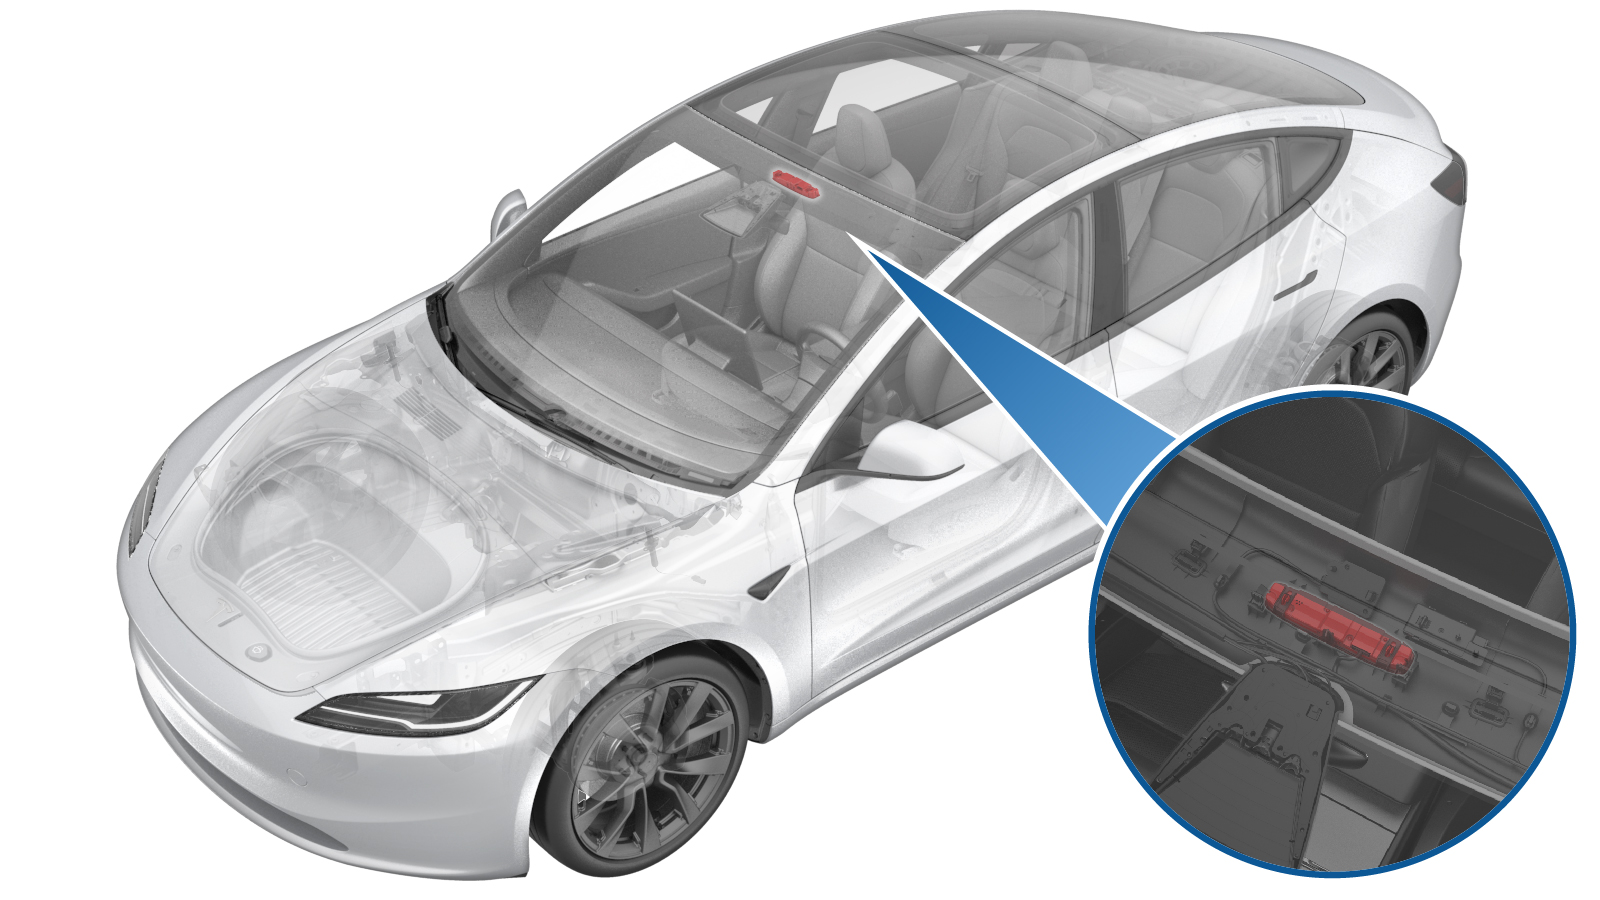
Overhead Console - Front (Remove and Replace)
 Correction code
1520010022
FRT
0.30
NOTE: Unless otherwise explicitly stated in the procedure, the correction code and FRT listed above reflect all of the work required to perform this procedure, including the linked procedures. Do not stack correction codes unless explicitly told to do so.
NOTE: See Flat Rate Times to learn more about FRTs and how they are created.
NOTE: See Personal Protection to make sure you
are wearing proper PPE when performing the procedure below.
NOTE: See Ergonomic Precautions for safe and healthy working practices.
Correction code
1520010022
FRT
0.30
NOTE: Unless otherwise explicitly stated in the procedure, the correction code and FRT listed above reflect all of the work required to perform this procedure, including the linked procedures. Do not stack correction codes unless explicitly told to do so.
NOTE: See Flat Rate Times to learn more about FRTs and how they are created.
NOTE: See Personal Protection to make sure you
are wearing proper PPE when performing the procedure below.
NOTE: See Ergonomic Precautions for safe and healthy working practices.
Warning
The video(s)
included in this procedure are meant as an overview for supplemental purposes only.
Follow all of the steps listed in the procedure to avoid damage to components and/or
personal
injury.
Remove
- Remove the rear underhood apron. See Underhood Apron - Rear (Remove and Replace).
- Disconnect LV battery power. See LV Power (Disconnect and Connect)
-
Release the clips (x6) and guide tabs
(x2) that attach the LH upper A-pillar trim to the A-pillar.
NoteDo not pull the trim too far from the A-pillar, since the tether is still attached.
- Remove the LH sun visor. See Sun Visor Assembly, LH (Remove and Replace).
- Repeat step 3 through step 4 for the RH side of the vehicle.
-
Adjust the rear view mirror position so that it is centered and in the highest
position.
NoteThis is to allow enough space to release the headliner and without scratching the mirror.
-
Release the clips (x4) and locator pin
that attach the front of the headliner to the vehicle.
NoteTake care not to bend the headliner when releasing the clips.NoteIf the metal clips are damaged during releasing, replace them with new metal clips.
-
Carefully insert inflatable air bags (x2) between the headliner and the body to gain
access to the tabs of the overhead console.
-
Release the tabs (x2) that attach the overhead console to the headliner.
CAUTIONHand hold the console since the connector is still attached.
-
Disconnect the electrical
connector from the overhead console.
-
Remove the overhead console
from the headliner.
Install
-
Connect the front overhead console electrical connector.
-
Push the front overhead console upwards into the headliner and engage the
clips (x2).
- Remove the inflatable air bags (x2) from the headliner.
-
Align the locating pin of the front of
the headliner to the slot, and then install the clips (x4) that attach the front of the
headliner to vehicle.
- Return the rear view mirror back to its original position.
-
Firmly fasten the clips (x6) and guide
tabs (x2) that attach the LH upper A-pillar trim to the A-pillar.
NoteFasten the bottom clip first, and then work toward the top.NoteLook through the windshield from outside of the vehicle to check that the LH upper A-pillar trim is flush with the A-pillar.NoteMake sure that the door seal correctly overlaps the LH upper A-pillar trim.
- Install the LH sun visor. See Sun Visor Assembly, LH (Remove and Replace).
- Repeat step 6 through step 7 for the RH side of the vehicle.
- Connect LV battery power. See LV Power (Disconnect and Connect)
- Install the rear underhood apron. See Underhood Apron - Rear (Remove and Replace).
- Reinstall the vehicle firmware. See Software Reinstall - Touchscreen.