2026-06-22
SIM Card - Car Computer (Remove and Replace)
 Correction code
2110010012
FRT
0.18
NOTE: Unless otherwise explicitly stated in the procedure, the correction code and FRT listed above reflect all of the work required to perform this procedure, including the linked procedures. Do not stack correction codes unless explicitly told to do so.
NOTE: See Flat Rate Times to learn more about FRTs and how they are created.
NOTE: See Personal Protection to make sure you
are wearing proper PPE when performing the procedure below.
NOTE: See Ergonomic Precautions for safe and healthy working practices.
Correction code
2110010012
FRT
0.18
NOTE: Unless otherwise explicitly stated in the procedure, the correction code and FRT listed above reflect all of the work required to perform this procedure, including the linked procedures. Do not stack correction codes unless explicitly told to do so.
NOTE: See Flat Rate Times to learn more about FRTs and how they are created.
NOTE: See Personal Protection to make sure you
are wearing proper PPE when performing the procedure below.
NOTE: See Ergonomic Precautions for safe and healthy working practices.
- 2026-06-22: Updated steps from removing/installing the side rail trim and coat hook to partially releasing/securing the rear headliner.
| Description | Torque Value | Recommended Tools | Reuse/Replace | Notes |
|---|---|---|---|---|
| Screws that attach the LH and RH rear coat hooks to the body |
 2.5 Nm (1.8 lbs-ft) |
|
Reuse |
Remove
- Open all doors and lower all windows.
- Move the front seats forward.
- Remove the rear underhood apron. See Underhood Apron - Rear (Remove and Replace).
- Disconnect LV power. See LV Power (Disconnect and Connect).
- Partially release the rear headliner from the body and use an inflatable air wedge in between.
-
Partially release the rear headliner from the body, then use an inflatable air wedge
to separate the rear headliner for sufficient clearance.
NoteInflate the wedge manually to create additional space for SIM card replacement. During inflation, take care not to damage any components.
-
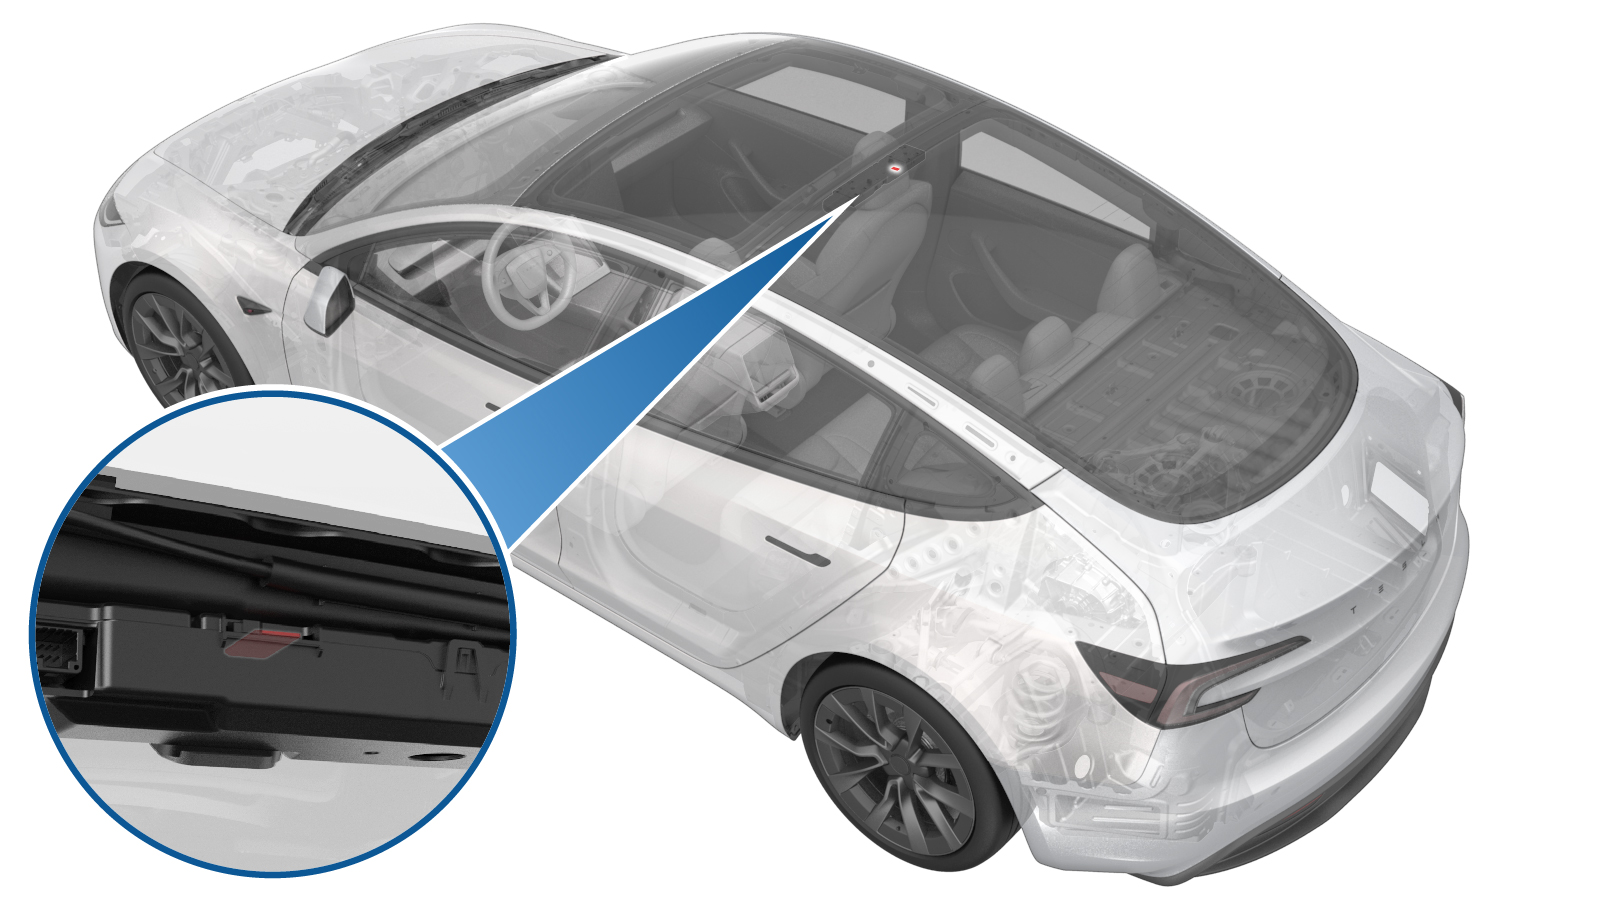
Slide the retaining tab of
the telematics control unit (TCU) SIM card to the left, and then remove the
SIM card.
-
Destroy the SIM card by
cutting the card in half through the center, and then cut each piece into
half, resulting in 4 pieces.
CAUTIONIt is mandatory to destroy the SIM card to protect user data.
Replace
-
Install the new SIM card into the telematics control unit (TCU) slot with
the gold pads facing downward.
WarningMake sure that the SIM card goes into the slot, before releasing your grip of the SIM card.NoteOnce the SIM card is fully pressed into the slot, the retaining tab will automatically return to its original position.
-
Deflate and remove the inflatable air wedge, then secure the rear headliner to the
body.
NoteEnsure the rear headliner is installed in place.
- Install the rear underhood apron. See Underhood Apron - Rear (Remove and Replace).
- Connect LV power. See LV Power (Disconnect and Connect).
- Enter the Service Mode. See Service Mode.
- On the touchscreen, touch and confirm the connection in cellular panel is normal, and then disable WiFi and confirm web browser pages are normally loaded.
- Confirm infotainment connectivity and web browser function normally.
- Move the front seats back to their original positions
- Raise all windows and close all doors.