2026-03-06
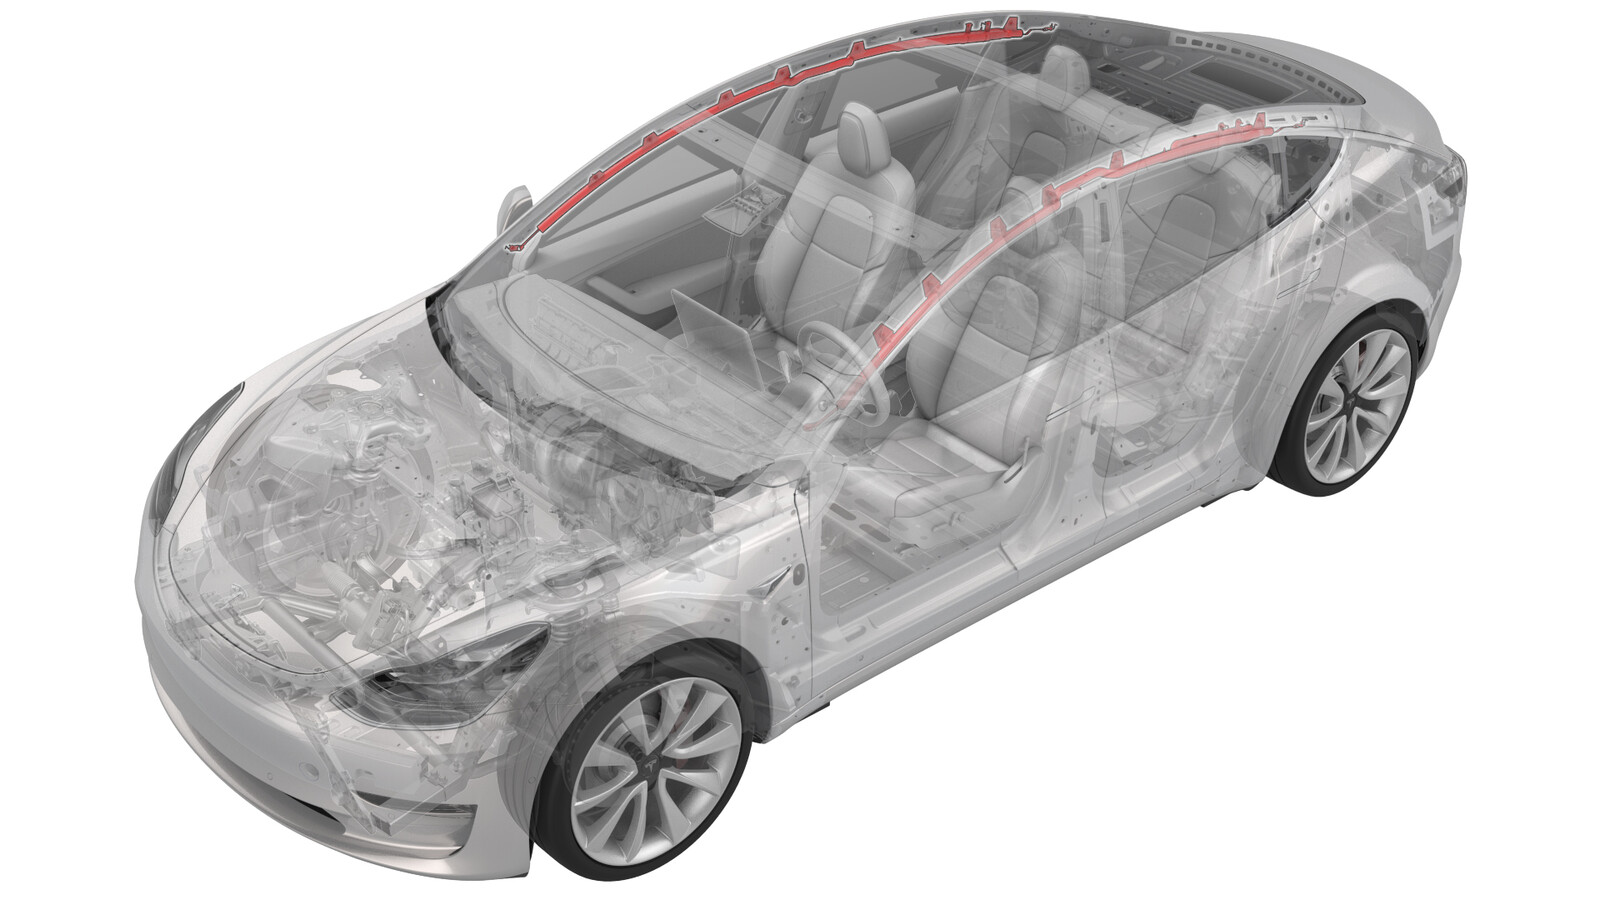
에어백 - 커튼 - LH(탈거 및 교체)
 교정 코드
20012002 1.20
메모: 절차에서 명시적으로 언급하지 않는 한 위 교정 코드 및 FRT는 연결된 절차를 포함하여 이 절차를 수행하는 데 필요한 모든 작업을 반영합니다. 명시적으로 지시하지 않는 한 교정 코드를 누적하지 마십시오.
참고: FRT와 그 생성 방법에 대한 자세한 내용은 표준 정비 작업시간을 참조하십시오.
메모: 아래 절차를 수행할 때 개인 보호을(를) 참조하여 적절한 PPE를 착용했는지 확인하십시오. 메모: 안전하고 건강한 작업 사례는 인체공학적 주의 사항의 내용을 참조하십시오.
교정 코드
20012002 1.20
메모: 절차에서 명시적으로 언급하지 않는 한 위 교정 코드 및 FRT는 연결된 절차를 포함하여 이 절차를 수행하는 데 필요한 모든 작업을 반영합니다. 명시적으로 지시하지 않는 한 교정 코드를 누적하지 마십시오.
참고: FRT와 그 생성 방법에 대한 자세한 내용은 표준 정비 작업시간을 참조하십시오.
메모: 아래 절차를 수행할 때 개인 보호을(를) 참조하여 적절한 PPE를 착용했는지 확인하십시오. 메모: 안전하고 건강한 작업 사례는 인체공학적 주의 사항의 내용을 참조하십시오.
- 2026-02-20: SRS 진단을 위해 이 프로시저를 사용하는 경우 PROC_RCM_DISARM 사용에 대한 참고 사항을 추가했습니다.
- 2024-2-5: 다양한 커튼 에어백 패스너 수에 대한 참고 사항을 추가했습니다.
경고
이 절차를 사용하여 차량의 안전보조장치(SRS)를 진단하는 경우, 모든 에어백과 프리텐셔너가 전개되지 않도록 RCM을 해제해야 합니다. 차량의 모든 SRS 구성품을 재장착한 후 RCM을 다시 활성화합니다.
경고
구속 제어 모듈, 센서, 에어백 등과 같은 안전보조장치(SRS) 구성품에서 전기 하네스를 연결 해제하기 전에 1분 이상 12V/LV 전원이 연결 해제되었는지 확인하십시오. 12V/LV 배터리와 응급구조대 루프를 연결 해제합니다. 그렇지 않으면 의도하지 않은 안전 시스템 동작이 발생할 수 있습니다. SRS 예방 조치에 관한 자세한 내용은 에어백 및 안전보조장치(SRS) 사전 주의 사항의 내용을 참조하십시오.
토크 규격
| 설명 | 토크 값 | 권장 공구 | 재사용/교체 | 참고 |
|---|---|---|---|---|
| LH 커튼 에어백을 차체에 고정하는 볼트 |
 9 Nm (6.6 lbs-ft) |
|
재사용 |
탈거
- 12V 전원을 분리합니다. 참조 항목: 12V/LV 전원(연결 해제 및 연결).
- 헤드라이너를 탈거합니다. 참조 항목: 헤드라이너 (히트 펌프 이외)(탈거 및 장착).
-
LH 커튼 에어백 커넥터에서 전기 하네스를 연결 해제합니다.
-
LH 커튼 에어백 전면 및 중앙을 차체에 고정하는 볼트를 탈거합니다.
참고패스너 수는 차량 제조일자/에어백 개정 번호에 따라 다릅니다.TIp다음 공구를 사용하는 것이 좋습니다.
- 10mm 소켓
-
LH 커튼 에어백 후면을 차체에 고정하는 볼트를 탈거합니다.
참고패스너 수는 차량 제조일자/에어백 개정 번호에 따라 다릅니다.TIp다음 공구를 사용하는 것이 좋습니다.
- 10mm 소켓
-
LH 커튼 에어백을 사이드 레일에 고정하는 클립(8개)을 주의하여 분리하고 차량에서 에어백을 탈거합니다.
경고클립이 손상된 경우 에어백을 교체해야 합니다.경고에어백은 항상 점화기와 함께 취급해야 합니다. 점화기를 매달아 두지 마십시오.참고패스너 수는 차량 제조일자/에어백 개정 번호에 따라 다릅니다.
장착
-
LH 커튼 에어백을 사이드 레일에 설치한 다음 에어백을 사이드 레일에 고정하는 클립(8개)을 주의하여 조입니다.
경고클립이 손상된 경우 에어백을 교체해야 합니다.참고패스너 수는 차량 제조일자/에어백 개정 번호에 따라 다릅니다.
-
LH 커튼 에어백 후면을 차체에 고정하는 볼트를 장착하고 손으로 조입니다.
참고패스너 수는 차량 제조일자/에어백 개정 번호에 따라 다릅니다.
-
LH 커튼 에어백 전면 및 중앙을 차체에 고정하는 볼트를 장착하고 손으로 조입니다.
참고패스너 수는 차량 제조일자/에어백 개정 번호에 따라 다릅니다.
-
LH 커튼 에어백을 차체에 고정하는 볼트를 토크로 규격 토크로 조입니다.9 Nm (6.6 lbs-ft)TIp다음 공구를 사용하는 것이 좋습니다.
- 10mm 소켓
-
전기 하네스를 LH 커튼 에어백 커넥터에 연결합니다.
- 헤드라이너를 장착합니다. 참조 항목: 헤드라이너 (히트 펌프 이외)(탈거 및 장착).
- 12V 전원을 연결합니다. 참조 항목: 12V/LV 전원(연결 해제 및 연결).