2025-12-03
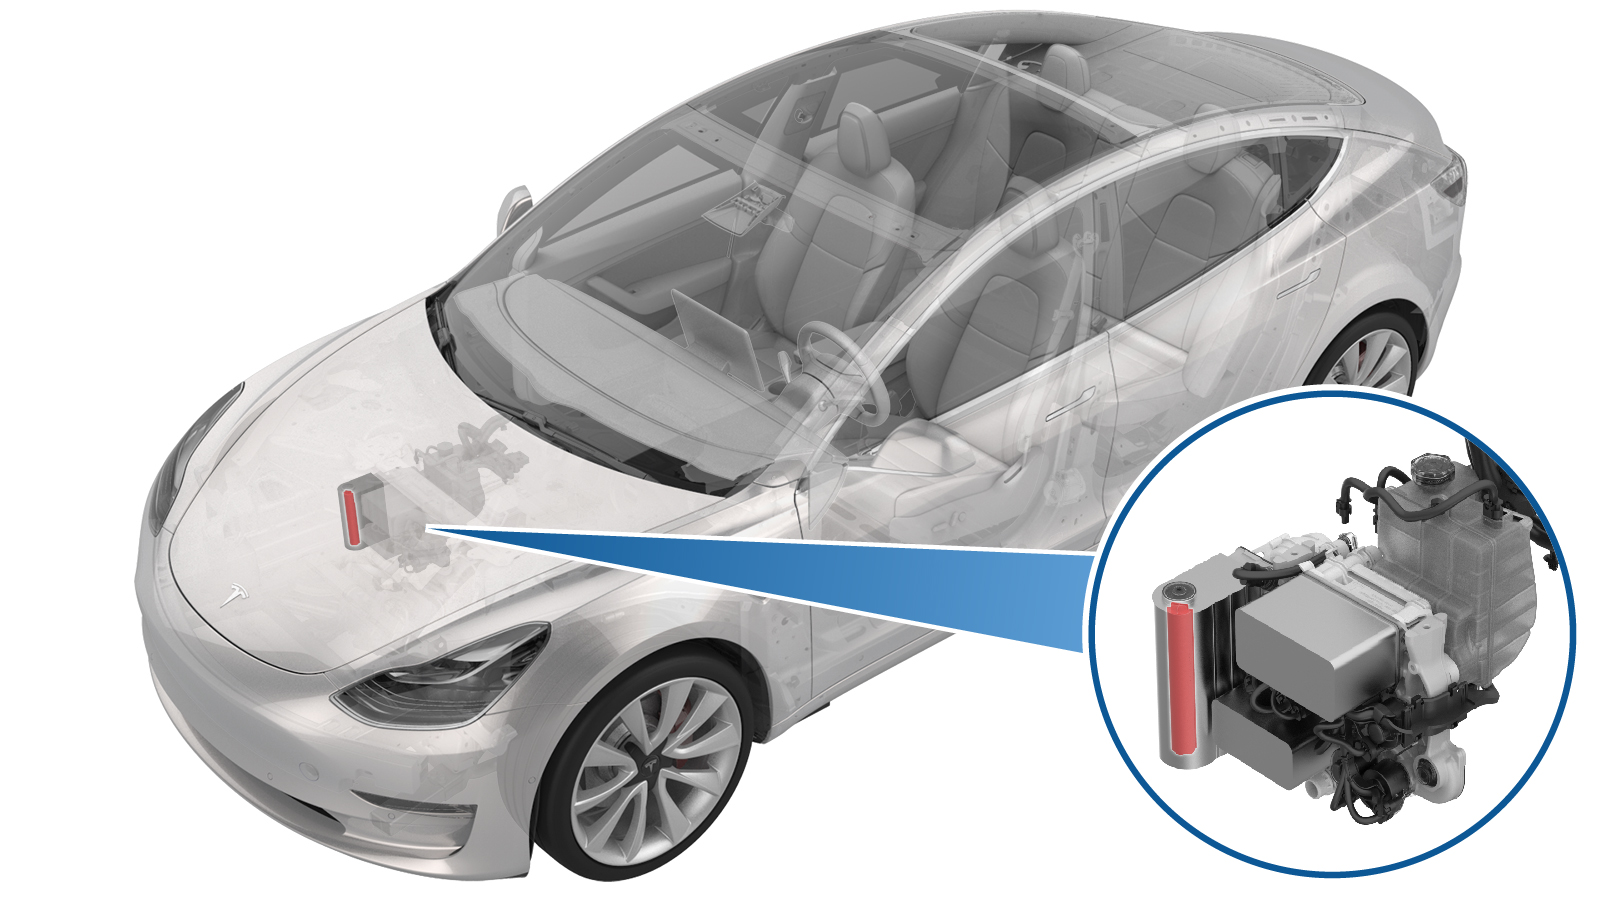
제습제(히트 펌프)(탈거 및 교체)
 교정 코드
18202012 0.36
메모: 절차에서 명시적으로 언급하지 않는 한 위 교정 코드 및 FRT는 연결된 절차를 포함하여 이 절차를 수행하는 데 필요한 모든 작업을 반영합니다. 명시적으로 지시하지 않는 한 교정 코드를 누적하지 마십시오.
참고: FRT와 그 생성 방법에 대한 자세한 내용은 표준 정비 작업시간을 참조하십시오. FRT 값에 대한 피드백을 제공하려면 ServiceManualFeedback@tesla.com으로 이메일을 보내십시오.
메모: 아래 절차를 수행할 때 개인 보호을(를) 참조하여 적절한 PPE를 착용했는지 확인하십시오. 안전하고 건강한 작업 사례는 인체공학적 주의 사항의 내용을 참조하십시오.
-
2025-11-19:
HVAC 성능 테스트
와열 성능 테스트
루틴을 삭제했습니다. - 2025-05-08: 냉매 회수 후 터치스크린에서 냉매 시스템 압력을 확인하는 추가 단계를 추가했습니다.
- 2024-09-10: 에어컨 시스템을 대상으로 작업 수행 시 안면 보호, 내열 장갑, 고무 부츠 및 에이프런 또는 전신 방수복 등 적합한 보호용 의류를 착용해야 한다는 경고를 추가했습니다.
- 2024-08-28: 냉매 회수/재충전 교정 코드 18200102를 서비스 방문에 별도의 활동으로 추가했으며 어큐뮬레이터 캡 탈거를 위한 특수 공구가 추가되었습니다.
- 2024-03-19: A/C 컴프레서 오일 밀도 참고 사항을 추가했습니다.
- 2023-04-04: A/C 오일 규격에 대한 유액 및 용량을(를) 참조하여 사용할 A/C 오일 유형을 업데이트했습니다.
- 2023-08-23: PPE를 착용하도록 알림을 추가했습니다.
- 2024-03-01: 루틴 수행 방법을 Toolbox를 사용하는 방법에서 터치스크린을 사용하는 방법으로 업데이트했습니다.
- 2024-04-02: 어큐뮬레이터를 열기 전에 A/C 시스템의 압력을 확인하라는 알림을 추가했습니다.
경고
HFO-R1234yf 및 R134a는 위험 물질로 취급되며 잘못 다룰 경우 심각한 상해를 일으킬 수 있습니다. 에어컨 시스템을 대상으로 작업 수행 시 안면 보호, 보안경, 안면 보호대, 내열 장갑, 내화학성 장갑, 고무 부츠 및 에이프런 또는 전신 방수복 등 적합한 개인 보호 장비를 착용해야 합니다.
경고
Model 3 열 관리 구성품은 매우 엄격한 규격에서 작동하며 정비 절차를 주의 깊게 따르지 않으면 오작동할 수 있습니다. 다른 열 관리 시스템에 대한 과거의 경험에 의존하지 마십시오. 정비 설명서를 읽고 지침에서 벗어나지 마십시오.
참고
이 절차에서는 A/C 냉매(회수 및 재충전) 절차가 수행되어야 합니다. 서비스 방문에 자동으로 추가되지 않은 경우 서비스 방문에 교정 코드 18200102를 별도 활동으로 추가합니다.
필요 장비:
- 1081547-00-B 소형 슬라이드 해머
- 1985068-00-A 암-암 스레드 어댑터
토크 규격
| 설명 | 토크 값 | 권장 공구 | 재사용/교체 | 참고 |
|---|---|---|---|---|
| 어큐뮬레이터 먼지 캡 | 손으로 조임 |
|
교체 |
탈거
- 후드 내 보관 유닛을 탈거합니다. 참조 항목: 후드 내 보관 유닛(탈거 및 교체).
- 터치스크린을 사용하여 차량을 정비 모드로 설정합니다. 참조 항목: 정비 모드.
- 차량 게이트웨이를 잠금 해제합니다. 참조 항목: 게이트웨이(잠금 해제).
- 터치스크린에서 정비 모드 "렌치"(터치스크린 UI 하단)를 탭한 다음 을 탭하고 Run을 클릭하여 루틴이 완료될 때까지 기다립니다.
- 12V/LV 전원을 연결 해제합니다. 참조 항목: 12V/LV 전원(연결 해제 및 연결).
-
A/C 냉매를 회수합니다. 참조 항목: 회수(히트 펌프 Model 3).
경고다음 단계를 수행하기 전에 A/C 시스템에 과압이 없는지 확인하십시오. 그렇지 않으면 구성품 손상 및/또는 상해를 입을 수 있습니다.
-
터치스크린에서 냉매 시스템 압력이 대기압 수준(약 1bar)인지 확인하십시오.
참고터치스크린에서 을 터치합니다.
- 차량에서 A/C 호스를 탈거합니다.
-
슈레이더 밸브(2개)를 조심스럽게 눌러 A/C 시스템 압력과 실제 주변 대기압 사이의 압력 차이가 없도록 맞춥니다.
경고슈레더 밸브를 모두 눌러야 합니다. 그렇지 않을 경우 상해를 입을 수도 있습니다.
-
어큐뮬레이터에 더스트 캡이 있는 경우 탈거하여 폐기합니다.
참고다음 공구를 사용하는 것이 좋습니다.
- Torx T30 소켓
-
스랩 링 플라이어를 사용하여 어큐뮬레이터 캡 스냅 링을 탈거하여 폐기합니다.
경고압력으로 인해 날아오는 이물질로부터 보호하기 위해 전체 진행 과정 동안 안면 보호대를 착용하십시오.
-
암-암 스레드 어댑터를 슬라이드 해머에 끼우고, 어댑터를 어큐뮬레이터 캡에 끼운 다음 슬라이드 해머를 사용하여 어큐뮬레이터 캡을 탈거합니다.
참고어큐뮬레이터 캡을 탈거 후 폐기합니다.
-
니들 노즐 플라이어를 사용하여 어큐뮬레이터에서 제습제 백을 탈거합니다.
- 제습제 백의 무게를 측정합니다. 이것은 "습윤 중량"으로 간주됩니다.
- 제습제 백의 "건조 중량"을 확인합니다. 백에 부품 번호(P), 일련 번호(S) 및 건조 중량(W)이 포함된 라벨이 있는지 검사합니다. 라벨이 없거나 건조 중량이 보이지 않는 경우 건조 중량을 90.4그램으로 가정합니다.
- 습윤 중량에서 건조 중량을 뺍니다. 해당 중량이 냉매 회수 도중 제거된 오일 외에 시스템에 추가해야 하는 오일의 양입니다. 나중을 위해 이 양을 기록해 둡니다.
장착
-
제습제 백을 어큐뮬레이터에 장착합니다.
참고제습제 백의 탭이 위쪽을 향하는지 확인합니다.
-
적절한 A/C 오일로 새 어큐뮬레이터 캡 O링을 윤활합니다. A/C 오일 규격은 유액 및 용량을(를) 참조하십시오. 그런 다음 캡을 어큐뮬레이터에 장착합니다.
-
스냅 링 플라이어를 사용하여 새 어큐뮬레이터 캡 스냅 링을 장착합니다.
경고압력으로 인해 날아오는 이물질로부터 보호하기 위해 전체 진행 과정 동안 안면 보호대를 착용하십시오.참고스냅 링이 어큐뮬레이터 배럴 안쪽의 홈에 완전히 안착했는지 확인하십시오.
-
새 더스트 캡을 어큐뮬레이터에 손으로 조입니다.
참고더스트 캡이 어큐뮬레이터에 닿을 때까지 나사로 조입니다.참고다음 공구를 사용하는 것이 좋습니다.
- Torx T30 소켓
- A/C 호스를 차량에 장착합니다.
- 진공 누출 테스트를 시작하고 완료한 다음 이 절차로 되돌아옵니다. 참조 항목: 진공 누출 테스트 및 오일 주입 (히트 펌프 Model 3).
- 저압 쪽 A/C 호스를 슈퍼매니폴드-HVAC A/C 라인 어셈블리에서 탈거합니다.
-
손실됐던 오일량을 주입합니다.
- 기존 제습제 백 탈거. 참조 단계: 16.
- 냉매 회수. 참조 항목: 진공 누출 테스트 및 오일 주입 (히트 펌프 Model 3).
경고기존 제습제 백을 탈거하기 위해 손실됐던 오일량 주입을 잊지 마십시오. 그렇지 않으면 열 시스템에 치명적인 손상이 발생할 수 있습니다.참고계산에 따르면 ND-11 및 RB100EV 컴프레서 오일의 밀도는 15°C에서 0.98g/ml입니다.- 그램 단위의 값이 주어지면 0.98로 나누어 ml(밀리리터 또는 cc) 단위의 값을 찾습니다.
- ml(밀리리터 또는 cc) 단위의 값이 주어지면 0.98을 곱하여 그램 단위의 값을 찾습니다.
- 저압 쪽 A/C 호스를 슈퍼매니폴드-HVAC A/C 라인 어셈블리에 장착합니다.
-
A/C 냉매를 재충전합니다. 참조 항목: 충전(히트 펌프 Model 3).
참고아직 차량에서 노트북을 연결 해제하지 마십시오.
- 12V/LV 전원을 연결합니다. 참조 항목: 12V/LV 전원(연결 해제 및 연결).
- 차량 게이트웨이를 잠금 해제합니다. 참조 항목: 게이트웨이(잠금 해제).
- 터치스크린에서 을 선택하고 Run을 클릭하여 루틴이 완료될 때까지 기다립니다.
- 정비 모드를 비활성화합니다. 참조 항목: 정비 모드.
- 후드 내 보관 유닛을 장착합니다. 참조 항목: 후드 내 보관 유닛(탈거 및 교체).