Trim Cover - Cushion - 2nd Row Seat - RH (7-Seat) (Remove and Replace)
Code de correction 1308020902 0.84 REMARQUE : À moins d’indications explicites contraires dans la procédure, le code de correction et le temps à taux fixe (FRT) connexe représentent tout le travail à accomplir pour cette procédure, y compris les procédures connexes. N’appliquez pas plusieurs codes de correction à la fois, à moins qu’il vous soit explicitement indiqué de le faire. REMARQUE : Consultez Temps forfaitaires pour en apprendre plus à propos des temps forfaitaires et de leur création. NOTE : Consultez Protection individuelle pour vous assurer de porter l’équipement de protection individuelle adéquat lorsque vous effectuez la procédure ci-dessous. REMARQUE : Voir Précautions ergonomiques pour consulter les pratiques de travail sécuritaires et saines.
Retirer
- Open all four doors.
- Lower all four windows.
- Move RH front seat forward.
- Position RH seat into easy entry mode.
-
Partially remove RH rear door seal.
RemarquePillar and sill trim have tabs seated underneath seal.
-
Remove RH C-pillar lower trim.
- Move RH seat to original position.
-
Fold 2nd row RH seatback down.
RemarqueVia seat switch or manual tether, and protect seat back upholstery if necessary.
-
Remove RH seat outboard track cover.
RemarqueSlide cover forward to release from RH seat track.
-
Remove center track cover from 2nd row seats.
RemarqueSlide covers forward to release from 2nd row seat tracks.
-
Release cabin carpet from RH seat.
RemarquePull cabin carpet towards front of vehicle.
-
Remove bolts securing RH seat podium to vehicle.
ConseilL'un ou plusieurs des outils suivants sont recommandés :
- Douille de 11mm
RemarqueDiscard bolts after removal. -
Move RH seat forward using towel bar.
RemarqueWith one hand on towel bar pull up and slide the seat forward with your other hand.
-
Remove bolts securing RH seat inner and outer tracks to vehicle.
RemarqueDiscard bolts after removal.ConseilL'un ou plusieurs des outils suivants sont recommandés :
- Douille de 11mm
-
Move RH seat fully rearward using towel bar.
RemarqueWith one hand on towel bar pull up and slide the seat rearward with your other hand.
-
Move 2nd row RH seatback to vertical position.
RemarqueVia seat switch or manual tether, remove seatback protection if necessary.
-
Disconnect 2nd row RH seat connector.
RemarqueNewer models may have red locking tab.
-
Remove RH seat from vehicle.
RemarqueIf seat that is not being replaced does not have ISOFIX flag for child locks, the seat cover will also require replacement.
-
Remove RH seat toe kick cover.
-
Remove clip securing RH seat side shield to cushion pan.
-
Remove RH seat side shield from RH seat.
RemarqueRelease rear side shield clip, then lift side shield upward to release hook from cushion pan.
-
Remove RH 2nd row inboard outer B cover.
RemarquePull inboard outer cover away from seat frame to remove.
-
Fold RH seat into up position.
-
Remove screw securing RH 2nd row inboard inner B cover to seat bottom.
ConseilL'un ou plusieurs des outils suivants sont recommandés :
- Douille Torx T25
-
Disconnect 2nd row RH seat heater connector.
-
Release 2nd row RH seat heater harness.
-
Disconnect RH seat RH floor latch connector.
-
Disconnect RH seat LH floor latch connector.
-
Disconnect RH seatbelt buckle connector.
-
Disconnect RH seat track position sensor connector.
-
Disconnect seat heating connector.
-
Release clips securing RH seat cushion harness to podium.
-
Remove bolts securing RH seat cushion pan to seat frame.
ConseilL'un ou plusieurs des outils suivants sont recommandés :
- Douille longue de 10 mm
-
Remove clip securing RH seat cushion pan to seat frame.
-
Release floor latch actuator.
ConseilL'un ou plusieurs des outils suivants sont recommandés :
- Douille de 8mm
-
Slightly lift RH seat cushion pan upward.
RemarqueLift RH seat cushion upward but do not fully remove at this time.
-
Release RH seat easy entry actuator.
ConseilL'un ou plusieurs des outils suivants sont recommandés :
- Douille de 8mm
-
Release RH seat actuator switch box.
ConseilL'un ou plusieurs des outils suivants sont recommandés :
- Douille de 8mm
-
Disconnect RH seat occupancy sensor connector .
-
Release RH seat occupancy sensor harness from cushion pan.
-
Remove RH seat bottom harness.
-
Remove RH seat cushion assembly from seat frame.
RemarqueLift cushion pan tabs upwards and remove seat cushion assembly.
-
Remove RH seat cushion trim cover from cushion pan.
-
Release Velcro securing RH seat cushion trim cover to foam pad.
RemarqueRelease Velcro approximately 11 cm until hog rings are visible.
-
Remove front hog rings securing RH seat cushion trim cover to foam pad.
-
Release remaining velcro securing RH seat cushion trim cover to foam pad.
RemarqueRelease Velcro approximately 21 cm until hog rings are visible.
-
Remove rear hooks securing RH seat cushion trim cover to foam pad and remove RH seat cushion trim cover.
Installer
-
Position RH seat cushion trim cover to foam pad and install rear hog rings securing RH seat cushion trim cover to foam pad.
-
Install velcro securing RH seat cushion trim cover to foam pad.
RemarqueInstall Velcro approximately 21 cm.
-
Install front hooks securing RH seat cushion trim cover to foam pad.
-
Install remaining Velcro securing RH seat cushion trim cover to foam pad.
-
Install RH seat cushion trim cover to cushion pan.
RemarqueProperly route occupancy sensor harness and heat pad harness through cushion pan.
-
Position RH seat cushion assembly to seat frame for installation.
RemarqueDo not fully seat cushion assembly at this time.
-
Install RH seat bottom harness.
-
Install RH seat easy entry actuator.
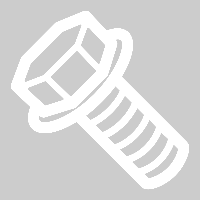 2.5 Nm (1.8 lbs-ft)ConseilL'un ou plusieurs des outils suivants sont recommandés :
- Douille de 8mm
-
Install RH seat actuator switch box.2.5 Nm (1.8 lbs-ft)ConseilL'un ou plusieurs des outils suivants sont recommandés :
- Douille de 8mm
-
Fully seat RH seat cushion assembly to seat frame.
RemarquePush downwards to full seat cushion pan to seat frame, and be cautious to not pinch actuator cables or cushion harness.
-
Install floor latch actuator.2.5 Nm (1.8 lbs-ft)ConseilL'un ou plusieurs des outils suivants sont recommandés :
- Douille de 8mm
-
Install RH seat occupancy sensor harness into cushion pan.
-
Connect RH seat occupancy sensor connector.
-
Install clip securing RH seat cushion pan to seat frame.
-
Install bolts securing RH seat cushion pan to seat frame.2.5 Nm (1.8 lbs-ft)ConseilL'un ou plusieurs des outils suivants sont recommandés :
- Douille de 10mm
-
Secure 2nd row RH seat heater harness.
RemarqueSlide up to release.
-
Connect 2nd row RH seat heater connector.
-
Connect RH seat RH floor latch connector.
-
Connect RH seat LH floor latch connector.
-
Connect RH seatbelt buckle connector.
-
Connect RH seat track position sensor connector.
-
Connect seat heating connector.
-
Install screw securing RH 2nd row inboard inner B cover onto seat bottom.1.5 Nm (1.1 lbs-ft)ConseilL'un ou plusieurs des outils suivants sont recommandés :
- Douille Torx T25
-
Install RH 2nd row inboard outer B cover.
-
Install RH seat side shield to RH seat.
RemarqueInstall side shield hook first, then secure clip.
-
Install clip securing RH seat side shield to cushion pan.
-
Install RH seat toe kick cover.
-
Install RH seat into vehicle.
RemarqueRecommend assistance, do not support RH seat by cushion pan, Support RH seat by podium.
-
Connect 2nd row RH seat connector.
RemarqueNewer models may have red locking tab.
-
Install new bolts (X2) securing RH seat podium to vehicle hand tight.37 Nm (27.3 lbs-ft)ConseilL'un ou plusieurs des outils suivants sont recommandés :
- Douille Torx T25
-
Move RH seat forward using towel bar.
RemarqueWith one hand on towel bar pull up and slide the seat forward with your other hand.
-
Install new bolts (X2) securing RH seat inner and outer tracks to vehicle.37 Nm (27.3 lbs-ft)ConseilL'un ou plusieurs des outils suivants sont recommandés :
- Douille Torx T25
- Move RH seat to original position.
-
Install cabin carpet to RH seat.
-
Torque bolts securing RH seat podium to vehicle.37 Nm (27.3 lbs-ft)
-
Install center track cover to 2nd row seats.
RemarqueSlide cover straight on to clip to 2nd row seat tracks.
-
Install RH seat outboard track cover.
-
Position RH seat into easy entry mode.
RemarquePress shoulder switch and push RH seat forward to position into easy entry mode.
-
Install RH rear sill trim.
RemarqueInstall rear edge of RH rear sill trim into trunk side trim and work your way forward securing clips.
-
Reseat RH rear door seal.
RemarqueSeat pillar and sill trim tabs underneath seal.
- Move RH seat to original position.
- Move RH front seat to original position.
- Raise all four window.
- Exécutez la routine ODIN PROC_ICE_X_ENTER-SERVICE-MODEvia Toolbox:(link)
- Exécutez la routine ODIN
- Exécutez la routine ODIN PROC_VCLEFT_X_2R-SEAT-RECLINE-CALIBRATIONvia Service Mode:Low Voltage ➜ Second Row Seats ➜ Calibratevia Toolbox:(link)
- Exécutez la routine ODIN PROC_ICE_X_EXIT-SERVICE-MODEvia Toolbox:(link)
- Close all four doors.