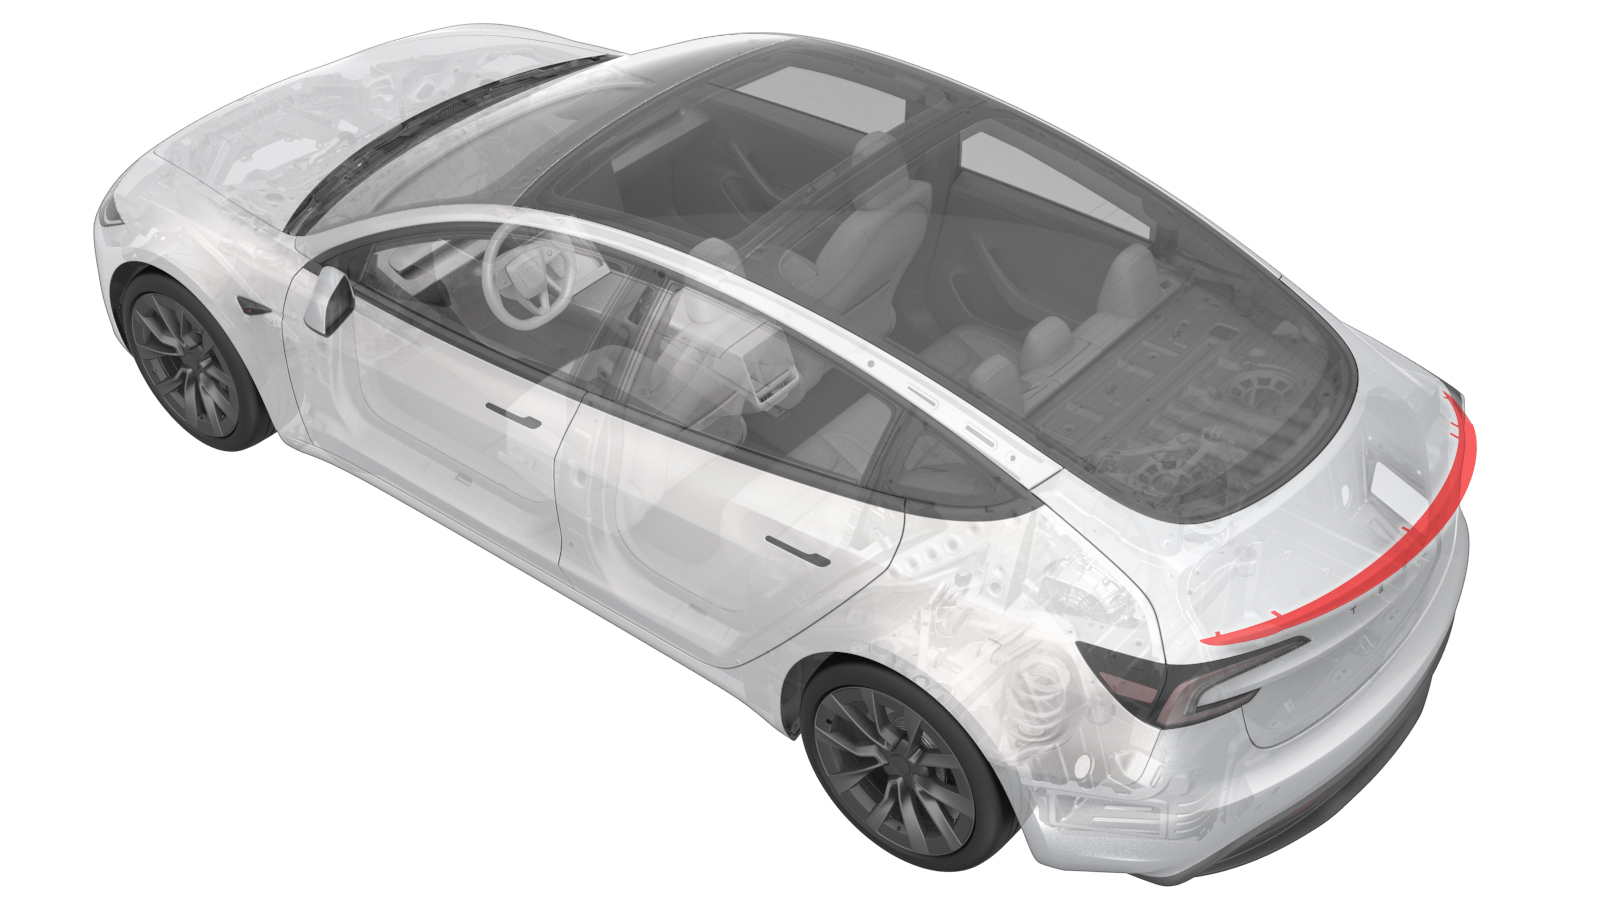
Spoiler - Carbon Fiber (Retrofit using Jig)
 Código de corrección
S028990008
FRT
0.24
NOTA: Salvo que se indique lo contrario explícitamente en el procedimiento, el código de corrección anterior y el FRT reflejan todo el trabajo necesario para realizar este procedimiento, incluidos los procedimientos vinculados. No acumule códigos de corrección a menos que se le indique explícitamente que lo haga.
NOTA: Consulte Tiempos de tarifa plana (FRT) para obtener más información sobre los FRT y cómo se crean. Para enviar sus comentarios sobre los valores de FRT, escriba a ServiceManualFeedback@tesla.com.
NOTA: Consulte Protección personal para asegurarse de llevar el EPI adecuado al realizar el siguiente procedimiento.
NOTA: Consulte Precauciones ergonómicas para ver información sobre prácticas de trabajo seguras.
-
Clean the rear carbon fiber spoiler installation surface with Isopropyl Alcohol (IPA) wipes, and allow it to dry before continuing.
NotaClean any moisture or contaminates that might be present from rain or vehicle washing, otherwise this might result in poor adhesion of the rear spoiler.NotaIf the trunk surface requires any paint correction, request assistance from the body shop or shop detailer before the installation of the rear spoiler.NotaIt is recommended to perform this procedure indoors. Acceptable ambient and part temperature for installation is 15-43 degrees Celsius (60-110 degrees Fahrenheit) for proper adhesion.
-
Position the rear carbon fiber spoiler jigs (x2) on the LH and RH edges of the trunk lid.
NotaThe spoiler jigs are secured on the trunk lid with magnets located on the jig and trunk lid mating surface.TIpSe recomienda utilizar las siguientes herramientas:
- Spoiler Jig, M3 - 1921904-00-B
-
Dry fit the rear carbon fiber spoiler between the spoiler jigs (x2).
-
Apply painter's tape to the center of the rear carbon fiber spoiler and the trunk lid, and then mark approximately 25 mm spacing between the centering lines on the tape using a marker.
TIpSe recomienda utilizar las siguientes herramientas:
- Marker
- Painter's Tape - 1042541-00-A
-
Cut the painter's tape to allow removal of the rear carbon fiber spoiler.
PRECAUCIÓNDo not damage the surfaces of the trunk lid or rear spoiler while using a plastic trim tool.TIpSe recomienda utilizar las siguientes herramientas:
- Plastic Trim Tool - 1115421-00-B
-
Remove the rear carbon fiber spoiler jigs (x2) from the trunk lid.
- Remove the rear carbon fiber spoiler from the trunk lid.
-
Remove the adhesive backing from the rear carbon fiber spoiler.
TIpSe recomienda utilizar las siguientes herramientas:
- Pick Miniature Soft Grip 90 degree Tip 6 in - 1115191-00-A
-
Align the two marks on the painter's tape on the rear carbon fiber spoiler with the two marks on the tape on the trunk lid. Hold the corners of the rear spoiler away from the trunk lid to install the center section of the spoiler first.
-
Secure each end of the rear carbon fiber spoiler to the trunk lid.
-
Perform the wet out of the adhesive: Starting at the center, firmly push downward and in towards the front of the vehicle, and then continue outwards towards both ends of the spoiler.
-
Apply painter's tape as required to secure the rear carbon fiber spoiler to the trunk lid.
-
Remove the painter's tape from the vehicle, and then clean the work area.
NotaMake sure that the rear carbon fiber spoiler corners are laid flat to the trunk lid and symmetrical.
-
Connect a laptop with Toolbox to the vehicle. See Toolbox (Conexión y desconexión).
NotaFor Tesla employees attempting to access the internal Toolbox application, please visit https://toolbox.tesla.com while connected to Tesla's network as required.NotaFor independent repairers and Tesla approved body shops, please visit https://toolbox.tesla.com to submit external Toolbox application access requests as required.
-
Upon successful connection to Toolbox, Service Mode Plus will be enabled and the "Service Mode Plus" watermark will appear on the touchscreen.
-
Click the Dashboards tab, search for “infotainment”, click Infotainment Dashboard > Vehicle Configuration, and then click Read Config.
-
Click Run and allow the routine to complete. Click X at the top right of the window to exit once the routine is complete.
-
Scroll down to “spoilerType” and confirm the configuration is “Not Installed”.
-
Select "Passive" from the drop down menu.
-
Click Apply Changes and Run to save the updated spoiler configuration. Click X at the top right of the window to exit once the routine is complete.
-
Verify the spoiler configuration change by checking that the vehicle avatar displays the rear carbon fiber spoiler on the trunk lid.
- Disconnect the laptop from the vehicle. See Toolbox (Conexión y desconexión).