2026-11-04
Side Shield - Outboard - Driver Seat (Remove and Replace)
 교정 코드
1307010502
FRT
0.18
메모: 절차에서 명시적으로 언급하지 않는 한 교정 코드 및 해당 관련 FRT는 연결된 절차를 포함하여 이 절차를 수행하는 데 필요한 모든 작업을 반영합니다. 명시적으로 지시하지 않는 한 교정 코드를 누적하지 마십시오.
참고: FRT와 그 생성 방법에 대한 자세한 내용은 표준 정비 작업시간의 내용을 참조하십시오.
참고: 아래 절차를 수행할 때 개인 보호의 내용을 참조하여 적절한 PPE를 착용했는지 확인하십시오.
참고: 안전하고 건강한 작업 사례는 인체공학적 주의 사항의 내용을 참조하십시오.
- 2026-11-04: Added information about the tab that attaches the side shield to the front seat.
- 2025-10-29: Added information for Performance model.
Equipment:
- 1133787-00-A - KEY, SEAT BELT RELEASE, MODEL 3
토크 규격
| 설명 | 토크 값 | 권장 공구 | 재사용/교체 | 참고 |
|---|---|---|---|---|
| 운전석 시트 외측 사이드 실드를 시트 프레임에 고정하는 볼트 |
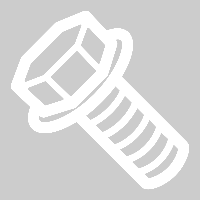 5 Nm (3.7 lbs-ft) |
|
재사용 | |
| 8방향 및 허리 지지대 스위치 어셈블리를 LH 전면 외측 실드에 고정하는 나사(3개) |
0.7 Nm (6 lbs-in) |
|
재사용 |
탈거
- Open the LH doors and lower the LH windows.
-
Move the driver's seat fully forward, and adjust the seat cushion height to
maximum.
CAUTIONDo not allow the seat headrest to compress the sun visor as it might crack the mirror.
-
안전벨트 릴리스 키(1133787-00-A)를 안전벨트 프리텐셔너 커플링에 삽입하여 안전벨트를 프리텐셔너에서 분리합니다.
-
Remove the bolt that attaches the
driver seat outboard side shield to the seat frame.
NoteEnsure the front of the seat is high enough to access the bolt.Tip다음 공구를 사용하는 것이 좋습니다.
- 래칫/토크 렌치
- 2인치 익스텐션
- 8mm 소켓
-
Pull the driver seat outboard side
shield away from the seat frame to release the clip that attaches the side shield to the
front of the seat frame.
NoteDo not fully remove at this time to avoid damage to the trim/switch pack/harness.
-
Pull the driver seat outboard side
shield away from the seat frame to release the clips (x3) that attach the side shield to
the upper part of the seat frame.
CAUTIONDo not fully remove at this time to avoid damage to the trim/switch pack/harness.NoteRemove the lower clips first, and then remove the upper positioning clip.
-
Disconnect the electrical harness from
the backrest and cushion adjust switch connector and the thigh extension switch on
Performance models.
Figure 1. Model Y Premium Figure 2. Model Y Performance -
Pull the rear of the outboard side
shield outward and then upward to release the clips (x5) that attach the driver seat
outboard side shield to the vehicle.
-
Performance models only: remove the thigh extension switch button.
CAUTIONMake sure that the trim and the switch are not damaged during removal.
Figure 3. Model Y Performance -
Remove the clips (x5) that attach the
seat cushion button switch and the recliner button switch to the driver seat outboard
shield.
CAUTIONMake sure that the trim and the switch are not damaged during removal.
-
Performance models only: remove the screws (x2) that attach the thigh extension
switch to the driver seat outboard side shield.
-
Remove the screws (x2 or x3) that
attach the 8 way and lumbar switch assembly to the driver seat outboard side
shield.
Tip다음 공구를 사용하는 것이 좋습니다.
- Torx T20 비트
- 2인치 익스텐션
- 래칫/토크 렌치
-
Remove the driver seat outboard side shield.
Figure 4. Model Y Premium Figure 5. Model Y Performance
장착
-
Install the screws (x2 or x3) that
attach the 8 way and lumbar switch assembly to the LH front outboard side shield.0.7 Nm (6 lbs-in)Tip다음 공구를 사용하는 것이 좋습니다.
- Torx T20 비트
- 2인치 익스텐션
- 래칫/토크 렌치
-
Performance models only: install the screws (x2) that attach the thigh extension
switch to the driver seat outboard side shield.0.7 Nm (6 lbs-in)Tip다음 공구를 사용하는 것이 좋습니다.
- Torx T20 비트
- 2인치 익스텐션
- 래칫/토크 렌치
-
Install the clips (x5) that attach the
seat cushion button switch and the recliner button switch to the driver seat outboard
side shield.
-
Performance models only: install the thigh extension switch button.
-
Align the side shield with the contour of the seatback, and then apply light pressure
to the rear of the side shield to seat it fully on the seat frame.
-
Connect the electrical harness to the backrest and cushion adjust switch
connector.
Figure 6. Model Y Premium Figure 7. Model Y Performance -
Install the clips (x3) that attach the side shield to the upper part of the seat
frame.
NoteInstall the upper positioning clip first, and then install the lower clips.NoteEnsure the trim and the switch are not damaged.
-
Push inward to secure the outboard
side shield assembly tab to the front seat assembly, and then install the bolt that
attaches the driver seat outboard side shield to the seat frame.5 Nm (3.7 lbs-ft)CAUTIONCarefully push the outboard side shield assembly to avoid damage.Tip다음 공구를 사용하는 것이 좋습니다.
- 래칫/토크 렌치
- 2인치 익스텐션
- 8mm 소켓
- Move the driver seat to original position.
- Insert the seat belt retractor to the driver seat pretensioner, and perform a push-pull-push test to make sure it is fully secured.
- Raise the LH windows and close the LH doors.