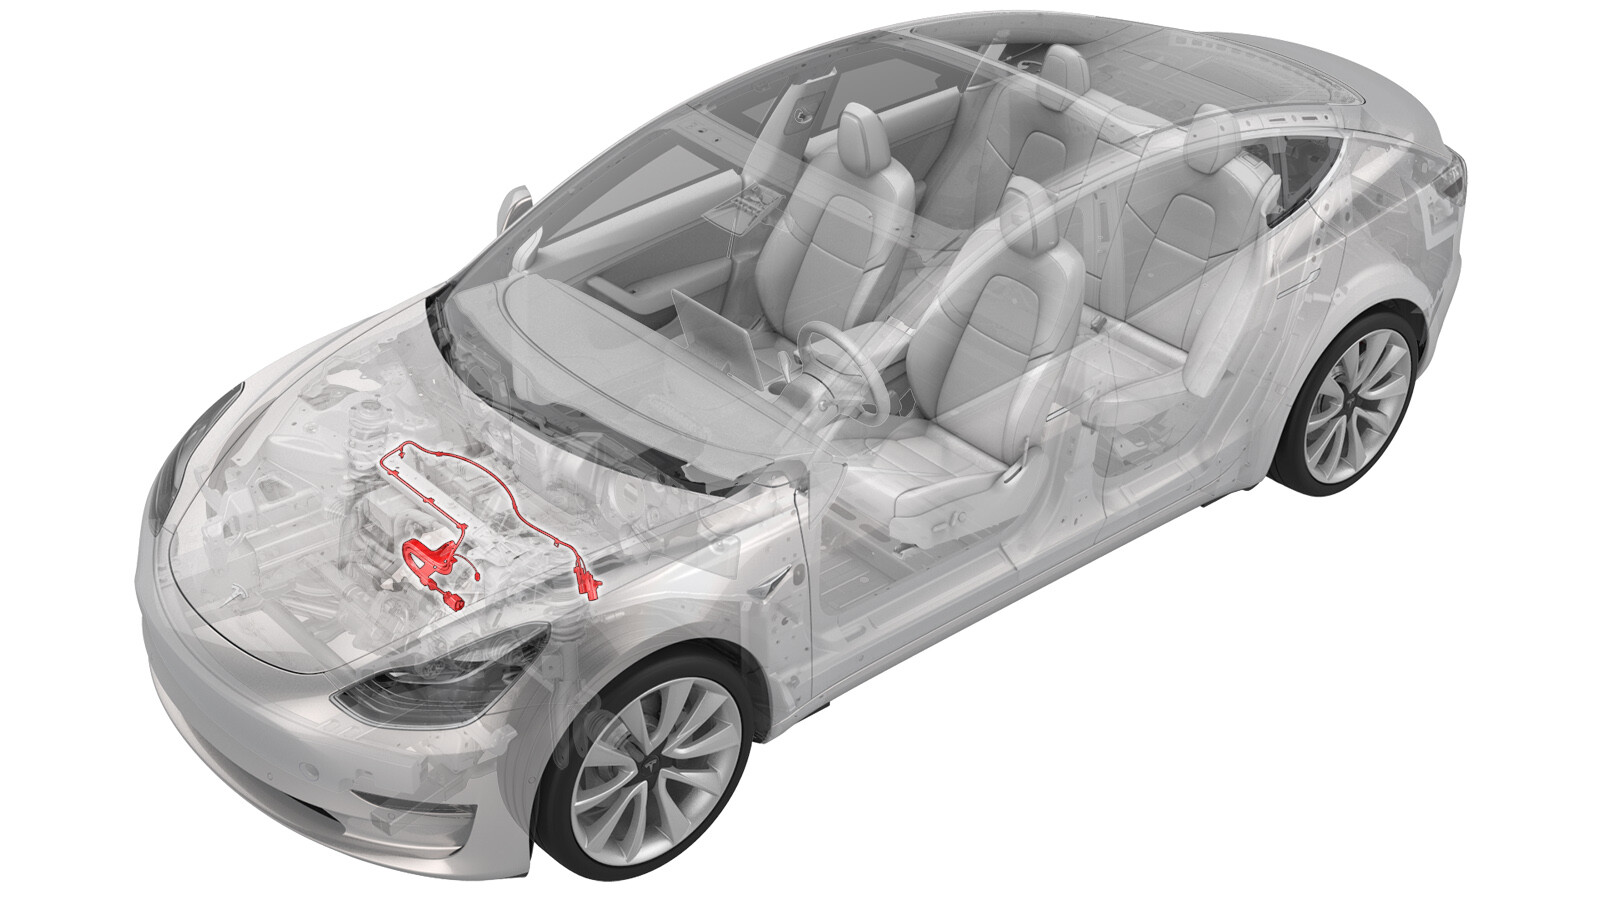
2021-01-29
高压线束 - 中间滑板至空调压缩机(拆卸和更换)
 校正代码
44501302 0.66
注意:除非本程序中另有明确规定,否则上述校正代码和 FRT 反映的是执行本程序(包括关联程序)所需的所有工作。除非明确要求,否则请勿堆叠校正代码。
注意:请参阅平均维修工时,深入了解 FRT 及其创建方式。要提供有关 FRT 值的反馈,请发送电子邮件至 ServiceManualFeedback@tesla.com。。
注意:请参阅人员保护,确保在执行以下程序时穿戴适当的个人防护装备 (PPE)。请参阅人体工程学注意事项查看安全健康的作业规程。
警告
只有完成全部所需认证的技术人员才能执行此程序。Tesla 特斯拉建议第三方服务提供商技术人员在执行此程序之前接受同等培训。有关 Tesla 技术人员要求的更多信息,或第三方主题说明,请参阅高压认证要求。处理高压线缆、母排或接头时,务必全程穿戴最低防护等级为 0(1000V) 的适当个人防护装备 (PPE)及高压绝缘手套。有关其他安全信息,请参阅技术注意事项 TN-15-92-003,
高压安全意识注意事项。
拆卸
- 举升并支撑车辆。请参阅举升车辆 - 双柱举升机。
- 拆下新鲜空气进气槽。请参阅槽 - 新鲜空气进气(拆卸和更换)。
- 断开 12V 电源。请参阅12V/低压电源(断开和连接)。
- 执行车辆电气绝缘程序。请参阅车辆高压禁用程序。
- 拆下前流线型护板。请参阅面板 - 流线型护板 - 前(拆卸和更换)。
-
将中央滑板至空调压缩机线束连接器 (x2) 置于靠近高压电池前部的位置。
-
在每个连接器(共 2 个)上,将红色锁片拉离连接器主体,然后向下按绿色锁片,以断开连接器。
-
从隔热板 LH 侧附近的支柱上分开高压连接器支架。
-
松开将中央滑板至空调压缩机线束固定到隔热板 RH 侧支柱的夹子 (x2)。
- 将车辆降低至舒适的作业高度。
-
松开将中央滑板至空调压缩机线束固定到前线束导盖的夹子。
警告松开此夹子时,不要拉扯高压线束。TIp此夹子靠近 RH 支柱塔。
-
松开将空调压缩机高压线束固定到支柱塔支架的夹子。
警告请勿拉扯高压线束
-
松开连接器锁片,然后断开 LH 前支柱塔附近的高压互锁回路连接器。
警告切勿向下按压红色锁片。将锁片拉离连接器,直至连接器解锁,然后继续拉动连接器主体以使其完全断开。
-
松开连接器锁片,然后断开空调压缩机上的低压电气连接器。
警告切勿向下按压红色锁片。将锁片拉离连接器,直至连接器解锁,然后继续拉动连接器主体以使其完全断开。
-
松开将空调压缩机低压线束固定到空调压缩机高压线束支架的夹子。
-
拆下将高压线束支架固定到空调压缩机的螺栓。
TIp推荐使用以下工具
-
将空调压缩机高压连接器黑色锁片拉离空调压缩机。
-
使用 45 度起子,推中央锁片的同时拉外侧锁片,然后从空调压缩机上拆下高压连接器。
- 将中央滑板至空调压缩机线束支架向前、向上移动,从空调压缩机上松开线束支架,然后小心地从车上拆下线束。
安装
-
将空调压缩机高压线束支架放置在空调压缩机上。
注确保高压线束支架与空调压缩机顶部的线束支座接合,如图所示。
-
使空调压缩机高压连接器在空调压缩机上完全就位,然后将锁片向空调压缩机方向推以接合该锁片。
注执行推拉测试,以确认连接器已完全固定。
-
安装将高压线束支架固定到空调压缩机的螺栓。
TIp推荐使用以下工具
-
安装将空调压缩机低压线束固定到空调压缩机高压线束支架的夹子。
-
将低压电气连接器连接到空调压缩机,然后接合锁片。
警告将红色锁片推向连接器以接合锁止机构。切勿向下按压或向上拉动红色锁片。
-
连接 LH 前支柱塔附近的高压互锁回路连接器,然后接合锁片。
警告将红色锁片推向连接器以接合锁止机构。切勿向下按压或向上拉动红色锁片。
-
安装将空调压缩机高压线束固定到支柱塔支架的夹子。
-
将中央滑板至空调压缩机线束靠着隔板向下铺设,然后安装将该线束固定到前线束导盖的夹子。
- 升起车辆。
-
安装将中央滑板至空调压缩机线束固定到隔热板 RH 侧支柱的夹子 (x2)。
-
将高压连接器支架安装在隔热板 LH 侧附近的支柱上。
-
将中央滑板至空调压缩机线束连接器 (x2) 连接到中央滑板线束。听到咔嗒声即可确认绿色锁定机制已接合。
- 将红色锁片朝连接器主体方向推,以完全锁定连接器 (x2)。
- 安装前流线型护板。请参阅面板 - 流线型护板 - 前(拆卸和更换)。
- 安装第二排下部座垫。请参阅座椅座垫 - 下部 - 第二排(拆卸和更换)。
- 重新连接 12V 电源。请参阅12V/低压电源(断开和连接)。
- 安装前备箱后部挡板。请参阅前备箱挡板 - 后部(拆卸和更换)。