2025-12-03
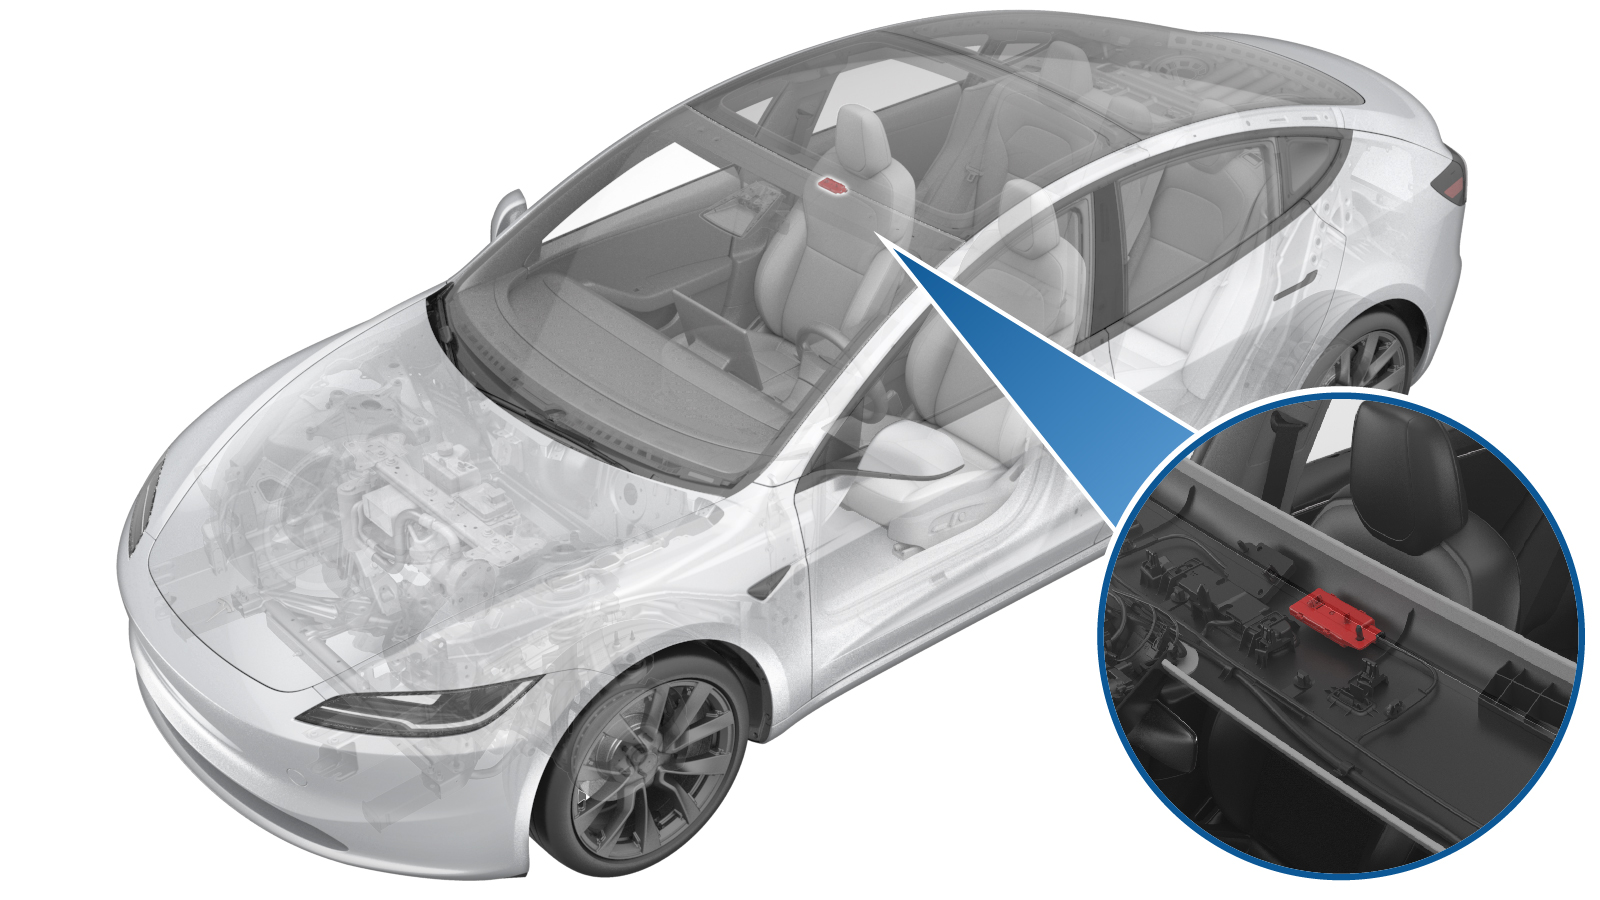
内部低功耗蓝牙模块 ((拆卸和更换))
 校正代码
1745020022
FRT
0.90
注意:除非本程序中另有明确规定,否则上述校正代码和 FRT 反映的是执行本程序(包括关联程序)所需的所有工作。除非明确要求,否则请勿堆叠校正代码。
注意:请参阅平均维修工时,深入了解 FRT 及其创建方式。要提供有关 FRT 值的反馈,请发送电子邮件至ServiceManualFeedback@tesla.com。
注意:请参阅人员保护,确保在执行以下程序时穿戴适当的个人防护装备 (PPE)。
注意:请参阅人体工程学注意事项查看安全健康的作业规程。
设备:
- 1137568-00-A 以太网诊断线缆,Model 3
- 1773092-00-A 诊断线束适配器(适用于所有车型)
- 1773595-00-A RJ45 以太网线缆
| 描述 | 扭矩值 | 推荐工具 | 重复使用/更换 | 备注 |
|---|---|---|---|---|
| 将内部低能耗蓝牙 (BLE) 模块固定到车辆的螺栓 |
 10 Nm (7.4 lbs-ft) |
|
重复使用 |
拆卸
-
打开所有车门,降下所有车窗。
注如果车辆正在断电,请锁定后车门以防意外锁闭。
- 拆卸仪表板左侧端盖。请参阅 仪表板端盖,左 ((拆卸和更换))。
- 拆下 A 柱 LH 上部饰板。请参阅 A 柱上部总成,左 ((拆卸和更换))。
- 拆下 LH 遮阳板。请参阅 左遮阳板总成 ((拆卸和更换))。
- 拆卸摄像头下盖。请参阅 车内后视镜,摄像头下盖 ((拆卸和更换))。
- 拆卸后视镜。请参阅 车内后视镜总成 ((拆卸和更换))。
- 重复第2步至第4步,完成车辆右侧相关操作。
- 拆下第二排座椅左侧侧部承梁。请参阅 第二排肘板 - 左 ((拆卸和更换))。
- 拆下第二排座椅下部座垫。请参阅 第二排座椅坐垫 ((拆卸和更换))。
- 拆下 LH A 柱下部饰板。请参阅 A 柱下部总成,左 ((拆卸和更换))。
- 拆下 LH B 柱下部饰板。请参阅 B 柱下部总成,左 ((拆卸和更换))。
- 拆下左侧 B 柱中部饰板。请参阅 B 柱中部总成,左 ((拆卸和更换))。
- 拆卸左侧 B 柱上饰板。请参阅 B 柱上部总成,左 ((拆卸和更换))。
- 对车辆右侧重复第8步和第10至13步。
-
松开将顶篷前部固定到车辆的卡子(6 个)和定位销。
注
松开卡子时,注意请勿弯折顶篷。
如果松开金属卡子时不慎将其损坏,需更换新的金属卡子。
- 断开低压电池电源。请参阅 低压电池 - 锂离子(断开和连接)。
-
拉动红色锁片松开锁片,然后再次拉动以松开连接器。
-
拆卸将低能耗蓝牙 (BLE) 模块固定到车辆的螺栓,然后松开卡子,取下低能耗蓝牙 (BLE) 模块。
TIp推荐使用以下工具
- 10 毫米套筒
安装
-
将低能耗蓝牙 (BLE) 模块放置在正确位置,紧固卡子,然后紧固将低能耗蓝牙 (BLE) 模块固定到车辆的螺栓。
 10 Nm (7.4 lbs-ft)TIp推荐使用以下工具
- 10 毫米套筒
-
接合红色锁片以连接连接器。
-
将顶篷前部定位销与卡槽对齐,然后安装将顶篷前部固定到车辆的卡子(6 个)。
注确保车门密封条正确覆盖在左侧 B 柱上饰板上。
- 安装后视镜。请参阅 车内后视镜总成 ((拆卸和更换))。
- 安装摄像头下盖。请参阅 车内后视镜,摄像头下盖 ((拆卸和更换))。
-
安装 LH 遮阳板。请参阅 左遮阳板总成 ((拆卸和更换))。
警告本程序所含视频仅作为补充材料予以概括说明。请遵循本程序所列的所有步骤,以避免部件损坏和/或人身伤害。
- 安装左侧 A 柱上饰板。请参阅 A 柱上部总成,左 ((拆卸和更换))。
- 对车辆右侧重复第7步和第6步。
- 连接低压电池电源。请参阅 低压电池 - 锂离子(断开和连接)。
- 将前排两个座椅向前移动。
- 安装 LH B 柱上部饰板。请参阅 B 柱上部总成,左 ((拆卸和更换))。
- 安装左侧 B 柱中部饰板。请参阅 B 柱中部总成,左 ((拆卸和更换))。
- 安装 LH B 柱下部饰板。请参阅 B 柱下部总成,左 ((拆卸和更换))。
- 安装 LH A 柱下部饰板。请参阅 A 柱下部总成,左 ((拆卸和更换))。
- 安装左侧仪表板端盖板。请参阅 仪表板端盖,左 ((拆卸和更换))。
- 重复第11步至第15步,完成车辆右侧相关操作。
- 安装第二排座椅下部座垫。请参阅 第二排座椅坐垫 ((拆卸和更换))。
- 安装第二排座椅左侧和右侧侧部承梁。请参阅 第二排肘板 - 左 ((拆卸和更换))。
- 将前排两个座椅移回原位。
- 将本地装有 Toolbox 的笔记本电脑与车辆相连。请参阅 Toolbox(连接和断开)。
-
在笔记本电脑上,选择Actions/Autodiag选项卡,然后搜索 “Service_Redeploy”。选择UPDATE_CAN-REDEPLOYvia Toolbox: (link)via Service Mode Plus:
- Drive Inverter Replacement ➜ Drive Inverter DIRE1L Replacement ➜ CAN Redeploy
- Drive Inverter Replacement ➜ Drive Inverter DIRE1R Replacement ➜ CAN Redeploy
- Drive Inverter Replacement ➜ Drive Inverter DIRE2 Replacement ➜ CAN Redeploy
- Drive Inverter ➜ Front Drive Inverter Replacement ➜ CAN Redeploy
- Drive Inverter ➜ Rear Drive Inverter Replacement ➜ CAN Redeploy
- Drive Inverter ➜ Rear Left Drive Inverter Replacement ➜ CAN Redeploy
- Drive Inverter ➜ Rear Right Drive Inverter Replacement ➜ CAN Redeploy
- Drive Unit ➜ Front Drive Unit Replacement ➜ CAN Redeploy
- Drive Unit ➜ Rear Drive Unit Replacement ➜ CAN Redeploy
- Thermal ➜ HVAC ➜ CAN Redeploy
- chassis ➜ DPB Post Replacement ➜ CAN Redeploy
- chassis ➜ ESP Post Replacement ➜ CAN Redeploy
- chassis ➜ IDB Post Replacement ➜ CAN Redeploy
- chassis ➜ RCU Post Replacement ➜ CAN Redeploy
- chassis ➜ ESP Replacement Panel ➜ CAN Redeploy
- chassis ➜ IBST Replacement Panel ➜ CAN Redeploy
-
确认能在触摸屏上看到发行说明。
注如果重新部署程序失败,触摸屏上会弹出错误提示。
- 禁用“维护模式”。请参阅 维护模式。
-
将 NFC 卡片钥匙(2 个)放置在无线充电器垫顶部。
警告将手机或 NFC 卡片放置在无线充电器上可能会导致卡片损坏。
- 在笔记本电脑上,选择Actions 选项卡,然后搜索“NFC 配对”。选择PROC_VCSEC_C_PAIR-NFC-CARD-V2via Toolbox: (link)via Service Mode: Low Voltage ➜ Keys ➜ Pair Key,点击 “Run”,添加卡片数量后进行配对,点击 “submit”,然后等待例行程序完成。
-
确保已编程 NFC 钥匙的以下功能可正常运行:
- 使用 NFC 钥匙贴近驾驶位侧 B 柱外部,以锁定/解锁车辆。
- 使用 NFC 钥匙贴近杯托后的中控台区,以启动车辆。
- 断开装有 Toolbox 的笔记本电脑与车辆的连接。请参阅 Toolbox(连接和断开)。
- 升起所有车窗并关闭所有车门。