2025-12-03
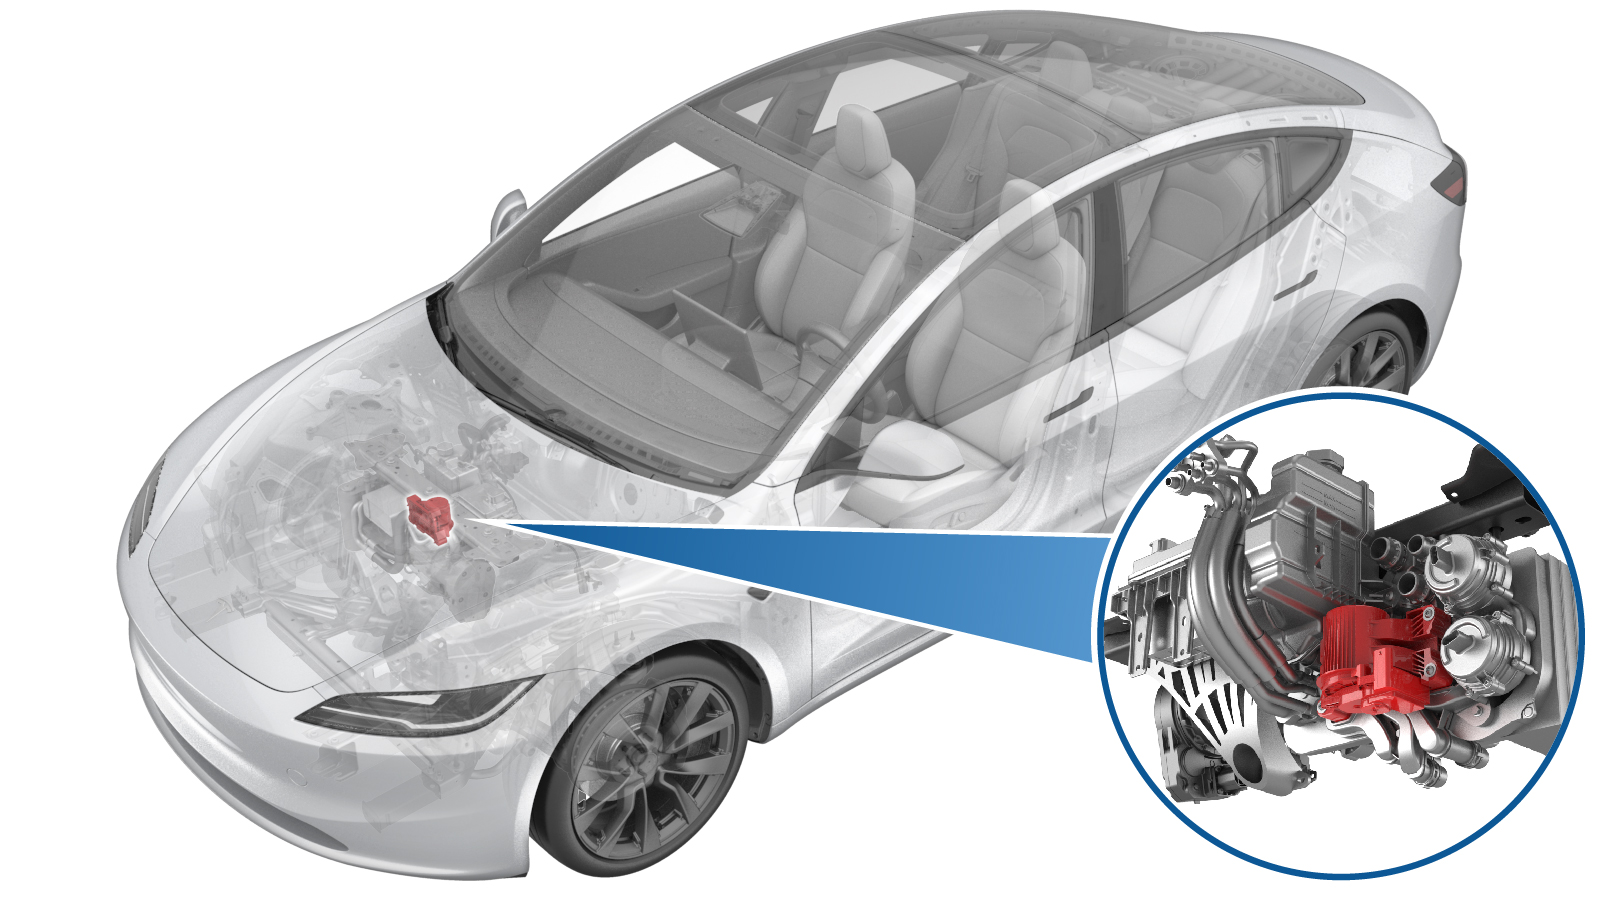
八通阀总成 ((拆卸和更换))
 校正代码
1840010042
FRT
1.08
注意:除非本程序中另有明确规定,否则上述校正代码和 FRT 反映的是执行本程序(包括关联程序)所需的所有工作。除非明确要求,否则请勿堆叠校正代码。
注意:请参阅平均维修工时,深入了解 FRT 及其创建方式。要提供有关 FRT 值的反馈,请发送电子邮件至ServiceManualFeedback@tesla.com。
注意:请参阅人员保护,确保在执行以下程序时穿戴适当的个人防护装备 (PPE)。
注意:请参阅人体工程学注意事项查看安全健康的作业规程。
扭矩规格
| 描述 | 扭矩值 | 推荐工具 | 重复使用/更换 | 备注 |
|---|---|---|---|---|
| 将八通阀固定到超级歧管的螺钉(4 个) |
 5 Nm (3.7 lbs-ft) |
|
重复使用 |
拆卸
- 举升并支撑车辆请参阅 举升车辆 - 双柱举升机。
- 拆卸前备箱储物单元。请参阅 前备箱总成 ((拆卸和更换))。
- 拆卸新鲜空气进气槽。请参阅 HVAC,新鲜空气进气口 ((拆卸和更换))。
- 断开低压电池电源。请参阅 低压电池 - 锂离子(断开和连接)。
- 拆下低压电池。请参阅 16V 锂离子电池包 ((拆卸和更换))。
- 拆卸前流线型护板。请参阅 前流线型护板 ((拆卸和更换))。
- 拆卸冷却液罐。请参阅 维修套件,冷却液罐,热泵 ((拆卸和更换))。
-
松开锁片,然后断开八通阀上的电气连接器。
警告切勿向下按压红色锁片。将锁片拉离连接器,直至连接器解锁,然后继续拉动连接器主体以使其完全断开。
-
拆卸将八通阀固定到超级歧管的螺钉(4 个),然后将八通阀从车上拆下。
TIp推荐使用以下工具
- T25 梅花套筒
- 4 英寸加长件
- 回旋头棘轮/回旋头扭矩扳手
- 1/4 英寸至 1/4 英寸六角头快装适配器(仅适用于安装程序)
- 1/4 英寸钻头六角扭矩扳手 - 1060071-00-A(仅适用于安装程序)
安装
-
将八通阀放置到超级歧管上,然后安装将八通阀固定到超级歧管的螺钉(4 个)。
 5 Nm (3.7 lbs-ft)注安装螺钉前,确保八通阀上的暗销与超级歧管接合。TIp推荐使用以下工具
- T25 梅花套筒
- 4 英寸加长件
- 回旋头棘轮/回旋头扭矩扳手
- 1/4 英寸至 1/4 英寸六角头快装适配器(仅适用于安装程序)
- 1/4 英寸钻头六角扭矩扳手 - 1060071-00-A(仅适用于安装程序)
-
将电气连接器与八通阀相连。
警告将红色锁片推向连接器以接合锁止机构。切勿向下按压或向上拉动红色锁片。
- 安装冷却液罐。请参阅 维修套件,冷却液罐,热泵 ((拆卸和更换))。
- 拆下低压电池。请参阅 16V 锂离子电池包 ((拆卸和更换))。
- 连接低压电池电源。请参阅 低压电池 - 锂离子(断开和连接)。
-
取走放置在车辆前部下方的液体收集器。
- 安装前部流线型护板。请参阅 前流线型护板 ((拆卸和更换))。
- 向冷却液罐加注适当的冷却液,直至 MAX 线处。
- 将装有 Toolbox 的笔记本电脑与车辆相连
- 在 Toolbox 中,选择Actions选项卡,然后搜索 "Thermal"。
-
点击TEST-SELF_VCFRONT_X_FIVE-WAY-VALVEvia Toolbox: (link)via Service Mode: Thermal ➜ Coolant System ➜ Coolant Valve Test,然后点击Run。
注待例行程序完成后,点击提示窗口右上角的 “X” 关闭页面。
- 选择Actions选项卡,然后搜索 "Purge"。
-
点击TEST_VCFRONT_X_THERMAL-COOLANT-AIR-PURGEvia Toolbox: (link)via Service Mode:
- Thermal ➜ Actions ➜ Coolant Purge Stop or Coolant Purge Start
- Thermal ➜ Coolant System ➜ Coolant Purge Start
- Drive Inverter ➜ Front Drive Inverter Replacement ➜ Coolant Air Purge
- Drive Inverter ➜ Rear Drive Inverter Replacement ➜ Coolant Air Purge
- Drive Inverter ➜ Rear Left Drive Inverter Replacement ➜ Coolant Air Purge
- Drive Inverter ➜ Rear Right Drive Inverter Replacement ➜ Coolant Air Purge
- Drive Unit ➜ Front Drive Unit Replacement ➜ Coolant Air Purge
- Drive Unit ➜ Rear Drive Unit Replacement ➜ Coolant Air Purge
注确保车辆未处于行驶状态。注测试将持续约 10 分钟。测试运行期间,监测并保持超级瓶注满。 - 排空空气后,点击窗口右上角的 “X” 关闭页面。
- 检查冷却液罐液位,必要时进行加注。
-
安装冷却液罐罐盖。
- 在 Toolbox 中,选择Actions选项卡,然后搜索 "Thermal System Performance Test"。
-
点击TEST-SELF_VCFRONT_X_THERMAL-PERFORMANCEvia Toolbox: (link)via Service Mode: Thermal ➜ Actions ➜ Test Thermal Performancevia Service Mode Plus:
- Drive Inverter ➜ Front Drive Inverter Replacement ➜ Thermal System Test
- Drive Inverter ➜ Rear Drive Inverter Replacement ➜ Thermal System Test
- Drive Inverter ➜ Rear Left Drive Inverter Replacement ➜ Thermal System Test
- Drive Inverter ➜ Rear Right Drive Inverter Replacement ➜ Thermal System Test
- Drive Unit ➜ Front Drive Unit Replacement ➜ Thermal System Test
- Drive Unit ➜ Rear Drive Unit Replacement ➜ Thermal System Test
- 待例行程序完成后,点击提示窗口右上角的 “X” 关闭页面。
- 断开笔记本电脑与车辆的连接
- 安装新鲜空气进气槽。请参阅 HVAC,新鲜空气进气口 ((拆卸和更换))。
- 安装前备箱储物单元请参阅 前备箱总成 ((拆卸和更换))。