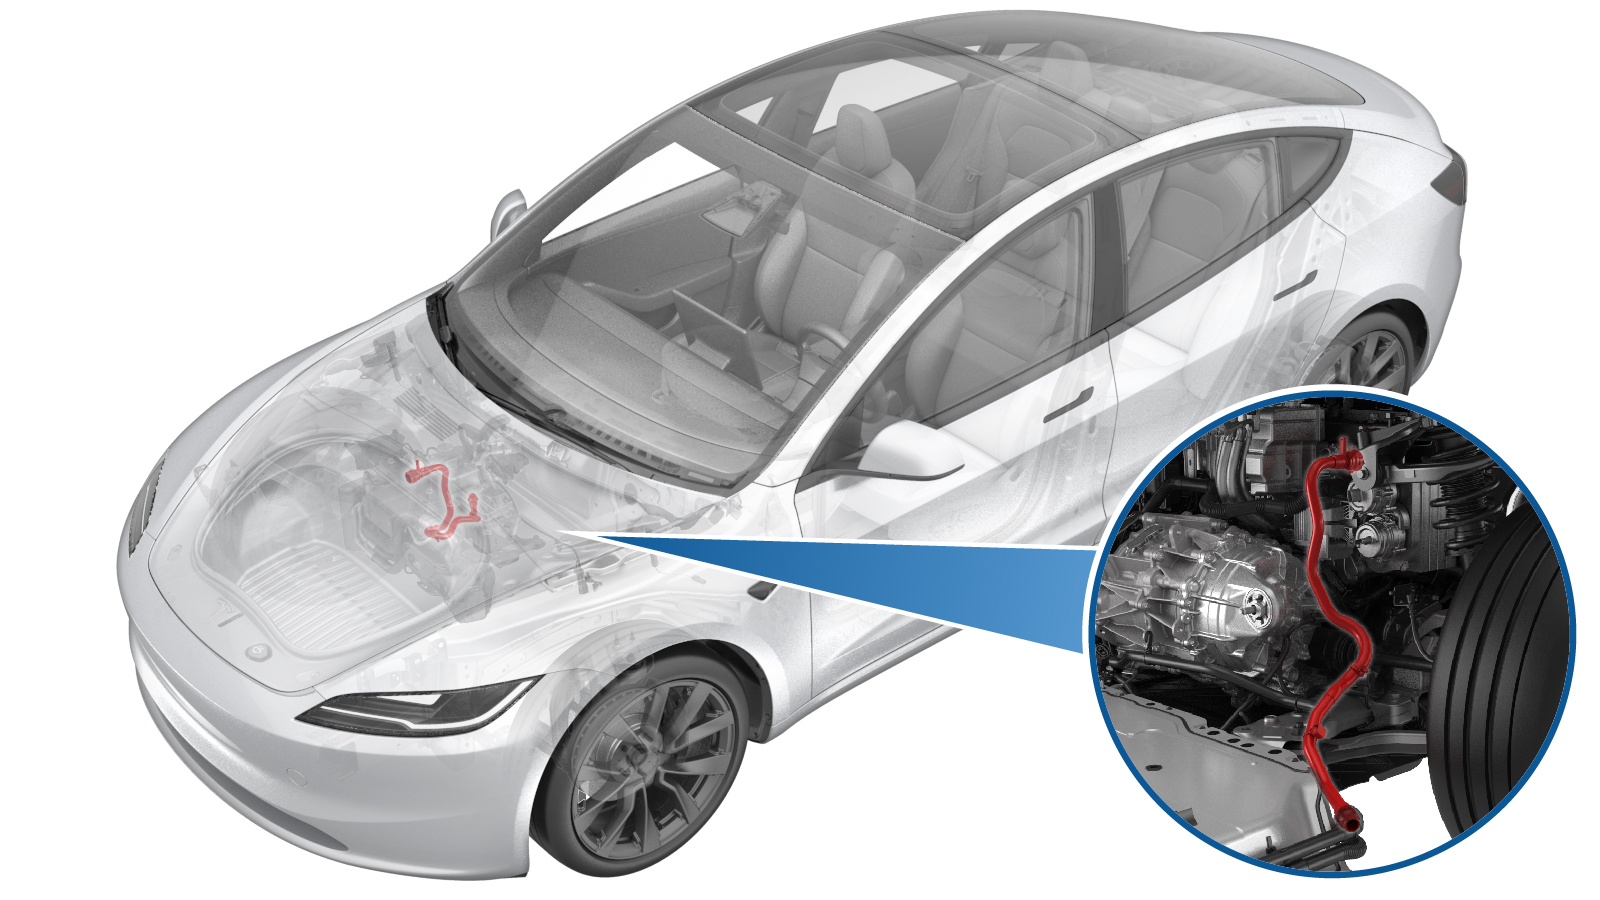
软管 - 软管,动力总成供应 ((拆卸和更换))
 校正代码
1830020112
FRT
0.72
注意:除非本程序中另有明确规定,否则上述校正代码和 FRT 反映的是执行本程序(包括关联程序)所需的所有工作。除非明确要求,否则请勿堆叠校正代码。
注意:请参阅平均维修工时,深入了解 FRT 及其创建方式。要提供有关 FRT 值的反馈,请发送电子邮件至ServiceManualFeedback@tesla.com。
注意:请参阅人员保护,确保在执行以下程序时穿戴适当的个人防护装备 (PPE)。
注意:请参阅人体工程学注意事项查看安全健康的作业规程。
设备:
- 1080568-00-A Fluid Catcher
- 1135762-00-A 冷却软管维修堵头套件,Model 3
- 1065131-00-A Kit, Battery Coolant Drain
| 描述 | 扭矩值 | 推荐工具 | 重复使用/更换 | 备注 |
|---|---|---|---|---|
| 将右前车轮内衬固定到滑板的螺栓 |
 5 Nm (3.7 lbs-ft) |
|
重复使用 |
拆卸
- Raise and support the vehicle. See 举升车辆 - 双柱举升机.
- Disconnect the LV battery power. See 低压电池 - 锂离子(断开和连接).
- Remove the underhood storage unit. See 前备箱总成 ((拆卸和更换)).
-
Raise the vehicle fully and lower the lift onto locks.
警告
Make sure there is an audible click of the locks on both sides before lowering, otherwise the vehicle may tilt to one side.
Make sure that the doors are clear of surrounding objects.
- Remove the front aero shield panel. See 前流线型护板 ((拆卸和更换)).
-
Remove the bolt that secures the RH front wheel liner to the skid plate.
TIp推荐使用以下工具
- 1/4 英寸无绳棘轮钻头
- 1/4 英寸钻头 6 英寸套筒X 10 毫米深磁性套筒
- 10 毫米深套筒
- 棘轮/扭矩扳手
-
Remove the push clips (x3) that secure the lower rear edge of the RH front wheel liner to the vehicle for access to the coolant hose.
- Use a bungee strap to pull back the RH front wheel liner and secure it to the subframe.
- Position the coolant drain container underneath the RH front of the HV battery.
-
Release the spring clip and the plugs (x2) to disconnect the powertrain supply hose from the powertrain supply tube, and then plug the ends of both fittings as soon as possible to avoid coolant loss.
注Coolant loss greater than 1L requires vacuum fill.
-
Release the powertrain supply hose clips (x2) from the vehicle.
- Remove the coolant drain container from underneath the vehicle.
- Lower the vehicle to a comfortable working height and set the lift onto locks.
- Position the fluid catcher underneath the front of the vehicle.
- Remove the fresh intake duct. See HVAC,新鲜空气进气口 ((拆卸和更换)).
- Pull the red locking tab to disengage the lock, and then hold and pull it again to release the electrical connector, so that the powertrain supply hose sensor is disconnected.
-
Release the spring clip and the plugs (x2) to disconnect the powertrain supply hose from the supermanifold, and then plug the ends of both fittings as soon as possible to avoid coolant loss.
注Coolant loss greater than 1L requires vacuum fill.
-
Remove the powertrain supply hose from the vehicle.
安装
- Install the powertrain supply hose to the vehicle and place a coolant plug on the lower end of the hose to avoid coolant loss.
-
Remove the plugs on the ends of fittings as quickly as possible to avoid coolant loss, and then secure the spring clip and the plug to connect the powertrain supply hose to the supermanifold.
注Perform a push-pull-push test to make sure that the hose is fully secured.
-
Engage the locking tab to connect the powertrain supply hose sensor.
注The harness and the coolant hose are color coded. Match the color of the harness to the color of the coolant hose.
- Install the fresh intake duct. See HVAC,新鲜空气进气口 ((拆卸和更换)).
- Remove the fluid catcher from underneath the vehicle.
-
Raise the vehicle fully and lower the lift onto locks.
警告
Make sure there is an audible click of the locks on both sides before lowering, otherwise the vehicle may tilt to one side.
Make sure that the doors are clear of surrounding objects.
- Position the coolant drain container underneath the RH front of the HV battery.
-
Remove the plugs on the ends of fittings as quickly as possible to avoid coolant loss, and then secure the spring clip and the plugs (x2) to connect the powertrain supply hose to the powertrain supply tube.
注
Perform a push-pull-push test to make sure that the hose is fully secured.
Coolant loss greater than 1L requires vacuum fill.
-
Secure the powertrain supply hose clips (x2) to the vehicle.
- Remove the coolant drain container from underneath the vehicle.
- Release the RH front wheel liner from the bungee strap, and remove the strap from the vehicle.
-
Install the push clips (x3) that secure the lower rear edge of the RH front wheel liner to the vehicle.
-
Install the bolt that secures the RH front wheel liner to the skid plate.
 5 Nm (3.7 lbs-ft)TIp推荐使用以下工具
- 1/4 英寸无绳棘轮钻头
- 1/4 英寸钻头 6 英寸套筒X 10 毫米深磁性套筒
- 10 毫米深套筒
- 棘轮/扭矩扳手
- Install the front aero shield panel. See 前流线型护板 ((拆卸和更换)).
- Lower the vehicle fully.
- Connect the LV battery power. See 低压电池 - 锂离子(断开和连接).
- Remove the coolant bottle cap and fill the coolant to the "MAX" line.
- Unlock the vehicle gateway. See 网关解锁.
-
On the touchscreen, tap the Service Mode "wrench" (at the bottom of the touchscreen UI), and then tap to start the coolant air purge.
注
- The routine will last for a while after the stop message displays. The coolant pumps are audible.
- The test lasts for approximately 10 mins. Do not start another routine during this time.
- Make sure that the vehicle is not in Drive. Putting the vehicle into Drive will stop this routine.
- The speed in the test varies from 3500-6500 RPM (idle speed = ~1500 RPM) and the actuated valve varies between SERIES and PARALLEL.
- 如果速度在 7000 RPM 左右徘徊,则说明泵存在气锁状况。请重新执行真空加注。继续添加冷却液并排空空气,直至冷却液液位介于罐上的 NOM 与 MAX 线之间。
-
Inspect the coolant level, top off as necessary, and then install the coolant bottle cap.
注Ensure that the coolant level is at the "Max" line.
- Install the underhood storage unit. See 前备箱总成 ((拆卸和更换)).
- Raise the LH front window and close the LH front door.
- Remove the lift arms from below the vehicle.