2024-02-06
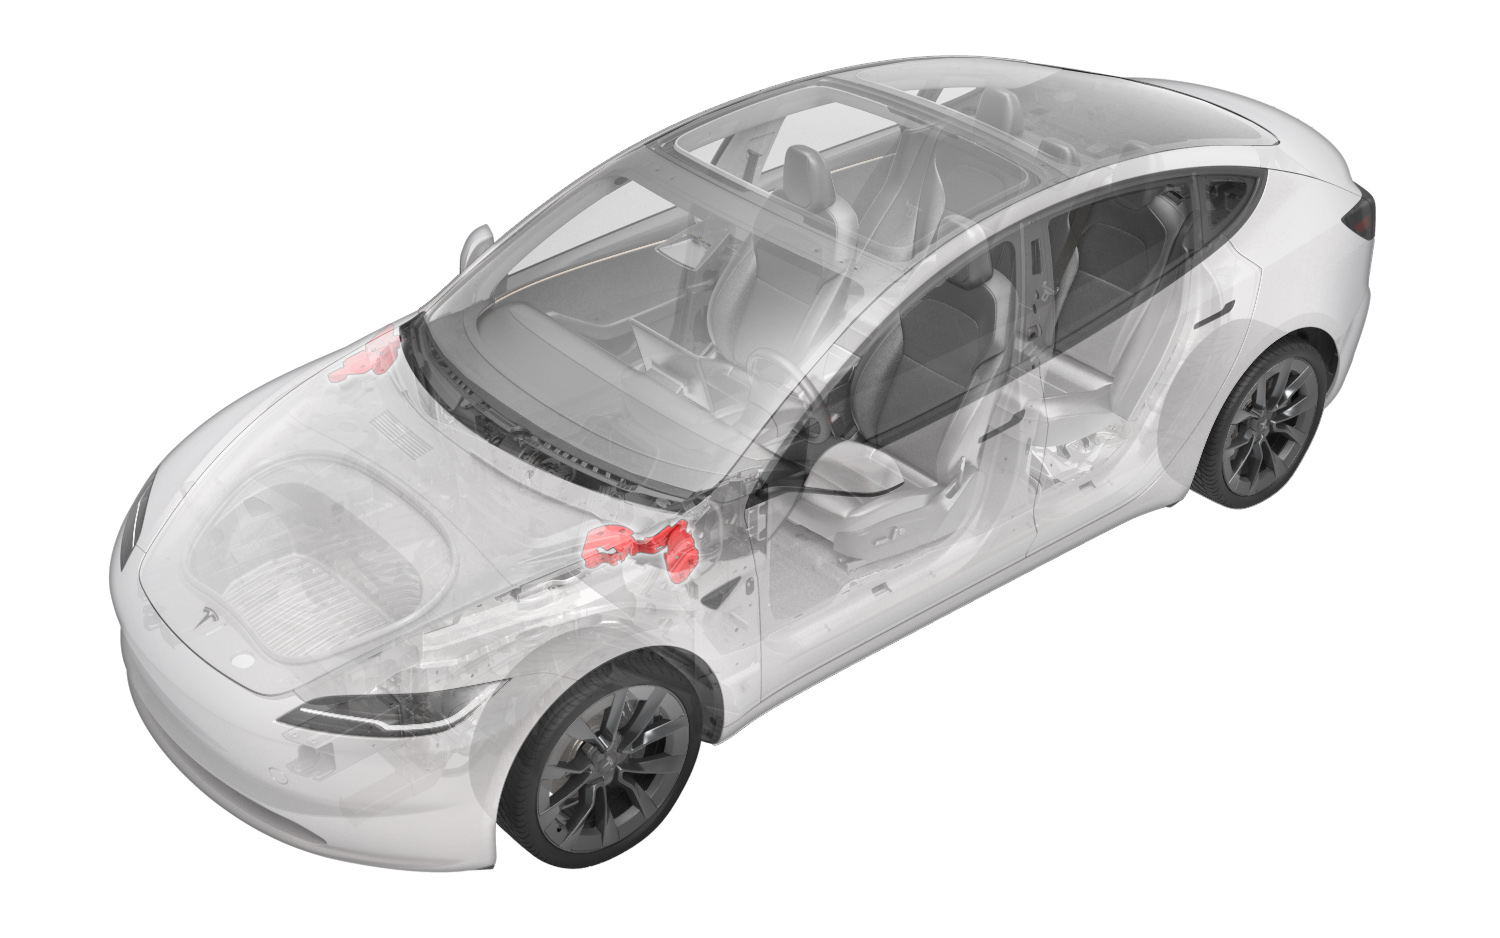
Hinge - Active Hood - LH (Remove and Replace)
 교정 코드
1133030072
FRT
0.72
메모: 절차에서 명시적으로 언급하지 않는 한 위 교정 코드 및 FRT는 연결된 절차를 포함하여 이 절차를 수행하는 데 필요한 모든 작업을 반영합니다. 명시적으로 지시하지 않는 한 교정 코드를 누적하지 마십시오.
참고: FRT와 그 생성 방법에 대한 자세한 내용은 표준 정비 작업시간을 참조하십시오. FRT 값에 대한 피드백을 제공하려면 ServiceManualFeedback@tesla.com으로 이메일을 보내십시오.
참고: 아래 절차를 수행할 때 개인 보호의 내용을 참조하여 적절한 PPE를 착용했는지 확인하십시오.
참고: 안전하고 건강한 작업 사례는 인체공학적 주의 사항의 내용을 참조하십시오.
교정 코드
1133030072
FRT
0.72
메모: 절차에서 명시적으로 언급하지 않는 한 위 교정 코드 및 FRT는 연결된 절차를 포함하여 이 절차를 수행하는 데 필요한 모든 작업을 반영합니다. 명시적으로 지시하지 않는 한 교정 코드를 누적하지 마십시오.
참고: FRT와 그 생성 방법에 대한 자세한 내용은 표준 정비 작업시간을 참조하십시오. FRT 값에 대한 피드백을 제공하려면 ServiceManualFeedback@tesla.com으로 이메일을 보내십시오.
참고: 아래 절차를 수행할 때 개인 보호의 내용을 참조하여 적절한 PPE를 착용했는지 확인하십시오.
참고: 안전하고 건강한 작업 사례는 인체공학적 주의 사항의 내용을 참조하십시오.
토크 규격
| 설명 | 토크 값 | 권장 공구 | 재사용/교체 | 참고 |
|---|---|---|---|---|
| LH 후드 힌지를 차체에 고정하는 볼트(2개) |
 24 Nm (17.7 lbs-ft) |
|
재사용 |
탈거
- 후면 후드 내 에이프런을 탈거합니다. 참조 항목: Underhood Apron - Rear (Remove and Replace).
- 실내 흡기 덕트를 탈거합니다. 참조 항목: Assembly - Fresh Air Gutter - HVAC (Remove and Replace).
- 접근 패널을 탈거합니다. 참조 항목: Cover - Hood Latch (Remove and Replace).
- 후드 내 보관 유닛을 탈거합니다. 참조 항목: Underhood Storage Unit (Remove and Replace).
- LH 및 RH 와이퍼 암과 블레이드를 탈거합니다. 참조 항목: Wiper Arm - Driver Side (Remove and Replace).
- LH 및 RH 후드 힌지 커버를 탈거합니다. 참조 항목: Cover - Hood Hinge - LH (Remove and Replace)
- LH 및 RH 쇼크 타워 커버를 탈거합니다. 참조 항목: Cover - Shock Tower - LH (Remove and Install).
- 카울 스크린 패널을 탈거합니다. 참조 항목: Panel - Cowl Screen (Remove and Replace).
- 와이퍼 모터를 탈거합니다. 참조 항목: Wiper Module (LHD) (Remove and Replace).
- 후드를 탈거합니다. 참조 항목: Hood Assembly (Remove and Replace).
-
테이프를 사용하여 차체에 힌지 장착 위치를 표시합니다.
경고이 절차에 포함되어 있는 비디오는 보충 목적의 개요로만 제공됩니다. 구성품의 손상 및/또는 신체 상해를 방지하려면 절차에 나열된 모든 단계를 따르십시오.
-
LH 후드 힌지를 차체에 고정하는 볼트(2개)를 분리한 다음 차량에서 힌지를 탈거합니다.
참고다음 공구를 사용하는 것이 좋습니다.
- 13mm 소켓
- 래칫/토크 렌치
장착
- LH 후드 힌지를 차량에 배치합니다.
-
LH 후드 힌지를 차체에 고정하는 볼트(2개)를 장착합니다.24 Nm (17.7 lbs-ft)참고쉽게 장착할 수 있도록 마스킹 테이프를 사용합니다. 필요에 따라 후드 힌지를 조정합니다.참고다음 공구를 사용하는 것이 좋습니다.
- 13mm 소켓
- 래칫/토크 렌치
경고이 절차에 포함되어 있는 비디오는 보충 목적의 개요로만 제공됩니다. 구성품의 손상 및/또는 신체 상해를 방지하려면 절차에 나열된 모든 단계를 따르십시오. - LH 힌지 위치에서 마스킹 테이프를 떼어냅니다.
- 보조 작업자와 함께 후드를 장착합니다. 참조 항목: Hood Assembly (Remove and Replace).
- 와이퍼 모터를 장착합니다. 참조 항목: Wiper Module (LHD) (Remove and Replace).
- 카울 스크린 패널을 장착합니다. 참조 항목: Panel - Cowl Screen (Remove and Replace).
- LH 및 RH 쇼크 타워 커버를 장착합니다. 참조 항목: Cover - Shock Tower - LH (Remove and Install).
- LH 및 RH 후드 힌지 커버를 장착합니다. 참조 항목: Cover - Hood Hinge - LH (Remove and Replace)
- LH 및 RH 와이퍼 암과 블레이드를 장착합니다. 참조 항목: Wiper Arm - Driver Side (Remove and Replace).
- 후드 내 보관 유닛을 장착합니다. 참조 항목: Underhood Storage Unit (Remove and Replace).
- 접근 패널을 장착합니다. 참조 항목: Cover - Hood Latch (Remove and Replace).
- 실내 흡기 덕트를 장착합니다. 참조 항목: Assembly - Fresh Air Gutter - HVAC (Remove and Replace).
- 후면 후드 내 에이프런을 장착합니다. 참조 항목: Underhood Apron - Rear (Remove and Replace).