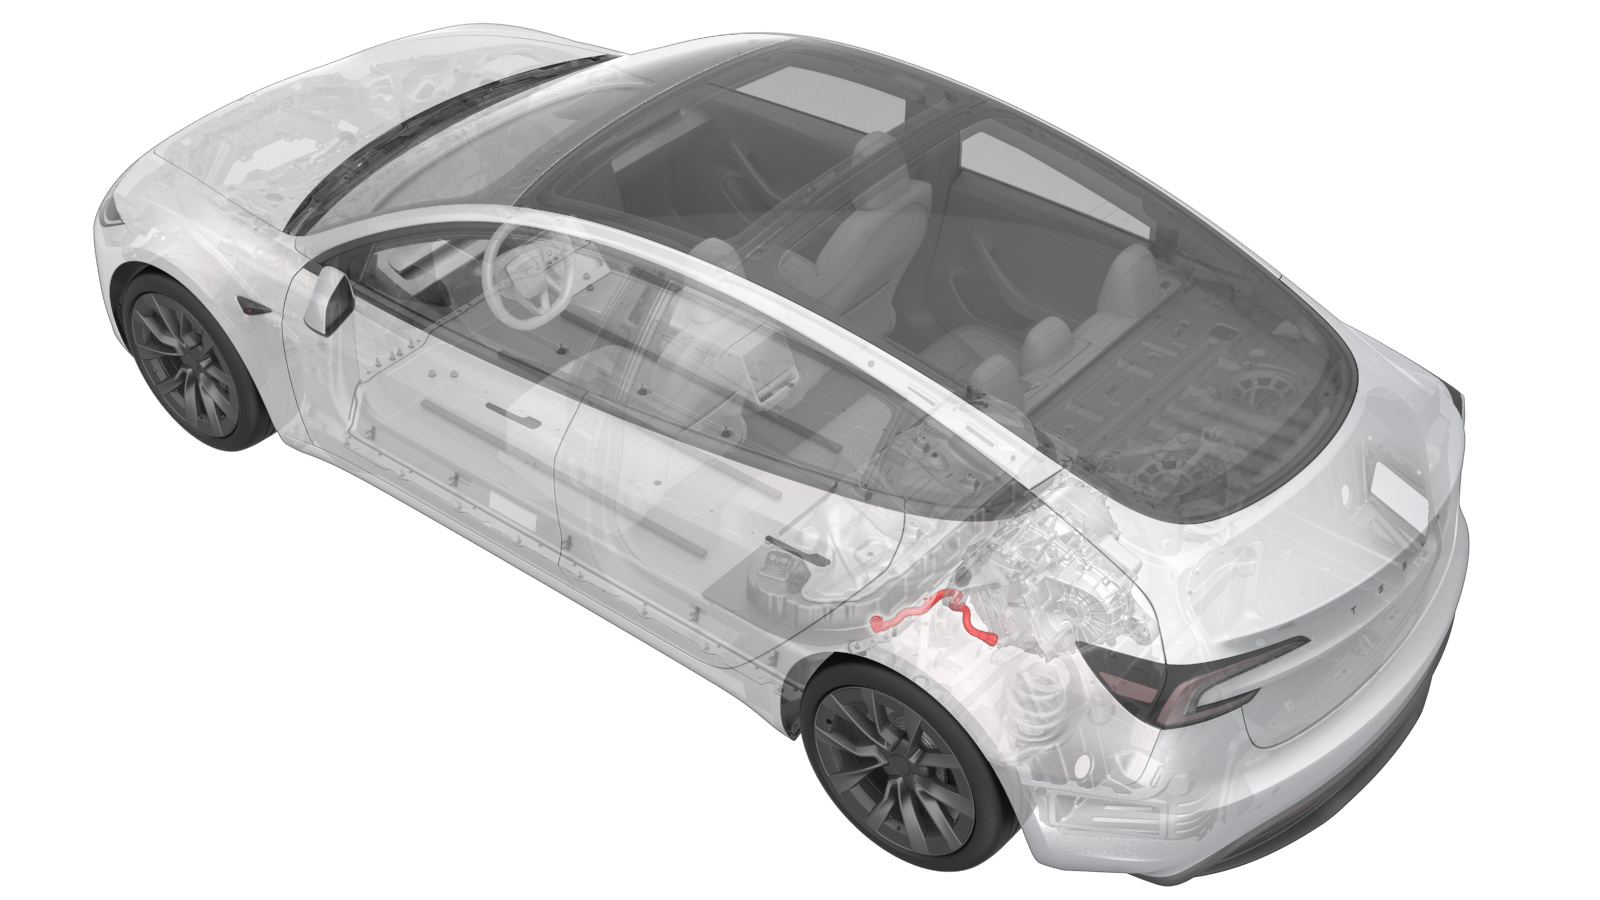
2025-12-03
Hose - Inlet - Rear Drive Unit Inverter (Remove and Replace)
 교정 코드
1830020032
FRT
0.42
메모: 절차에서 명시적으로 언급하지 않는 한 위 교정 코드 및 FRT는 연결된 절차를 포함하여 이 절차를 수행하는 데 필요한 모든 작업을 반영합니다. 명시적으로 지시하지 않는 한 교정 코드를 누적하지 마십시오.
참고: FRT와 그 생성 방법에 대한 자세한 내용은 표준 정비 작업시간을 참조하십시오. FRT 값에 대한 피드백을 제공하려면 ServiceManualFeedback@tesla.com으로 이메일을 보내십시오.
참고: 아래 절차를 수행할 때 개인 보호의 내용을 참조하여 적절한 PPE를 착용했는지 확인하십시오.
참고: 안전하고 건강한 작업 사례는 인체공학적 주의 사항의 내용을 참조하십시오.
탈거
- Raise and support the vehicle. See 차량 올리기 - 2 포스트 리프트.
- Remove the rear underhood apron. See Underhood Apron - Rear (Remove and Replace).
- Disconnect the LV power. See LV Power (Disconnect and Connect).
- Remove the rear aero shield panel. See Panel - Aero Shield - Rear (Remove and Replace).
- Remove the rear skid plate. See Skid Plate - HV Battery - Rear (Remove and Replace).
- Position a coolant drain container underneath the LH rear of the HV battery.
-
Release the clip, disconnect the rear drive unit inverter inlet hose from the HV battery, and then immediately plug both fittings.
-
Release the clip, disconnect the rear drive unit inverter inlet hose from the rear drive unit inverter, and then immediately plug both fittings.
-
Release the clip that attaches the rear drive unit inverter inlet hose to the rear drive unit HV harness.
-
Remove the rear drive unit inverter inlet hose down and out from between the rear subframe and the HV battery.
장착
-
Install the rear drive unit inverter inlet hose in and up between the rear subframe and the HV battery.
-
Fasten the clip that attaches the rear drive unit inverter inlet hose to rear drive unit HV harness.
-
Remove the plugs from the fittings, immediately connect the rear drive unit inverter inlet hose to the rear drive unit inverter, fasten the clip, and then perform a Push-Pull-Push check of the fitting.
-
Remove the plugs from the fittings, immediately connect the rear drive unit inverter inlet hose to the HV battery, fasten the clip, and then perform a Push-Pull-Push check of the fitting.
- Remove the coolant drain collector from under the vehicle.
- Install the HV battery rear skid plate. See Skid Plate - HV Battery - Rear (Remove and Replace).
- Install the rear shield panel. See Panel - Aero Shield - Rear (Remove and Replace).
- Connect LV power. See LV Power (Disconnect and Connect).
-
Remove the coolant bottle cap, and then fill the coolant to the proper level.
참고Ensure that the coolant level is at the "Max" line.
- Connect the vehicle to a laptop with Toolbox. See Toolbox(연결 및 연결 해제).
-
In Toolbox, click Actions/Autodiag, type "Purge" into the search field, click TEST_VCFRONT_X_THERMAL-COOLANT-AIR-PURGE, click Run, and allow the routine to complete.
참고Make sure vehicle is not in Drive, shifting the vehicle into Drive will stop this routine. The test will last approximately 10 mins. The test will vary speeds from 3500-6500 RPM (idle speed = ~1500 RPM) and actuate the valve between series and parallel. If speed hovers at 7000 RPM, it indicates the pump is air locked, perform the vacuum fill again. Continue to add coolant and purge until the coolant level reaches between the NOM and MAX Lines on the bottle.
-
Inspect the coolant level and top off as necessary, and then install the coolant bottle cap.
참고Ensure that the coolant level is at the "Max" line.
- Install the rear underhood apron. See Underhood Apron - Rear (Remove and Replace).
- Remove the vehicle from the 2 post lift. See 차량 올리기 - 2 포스트 리프트.