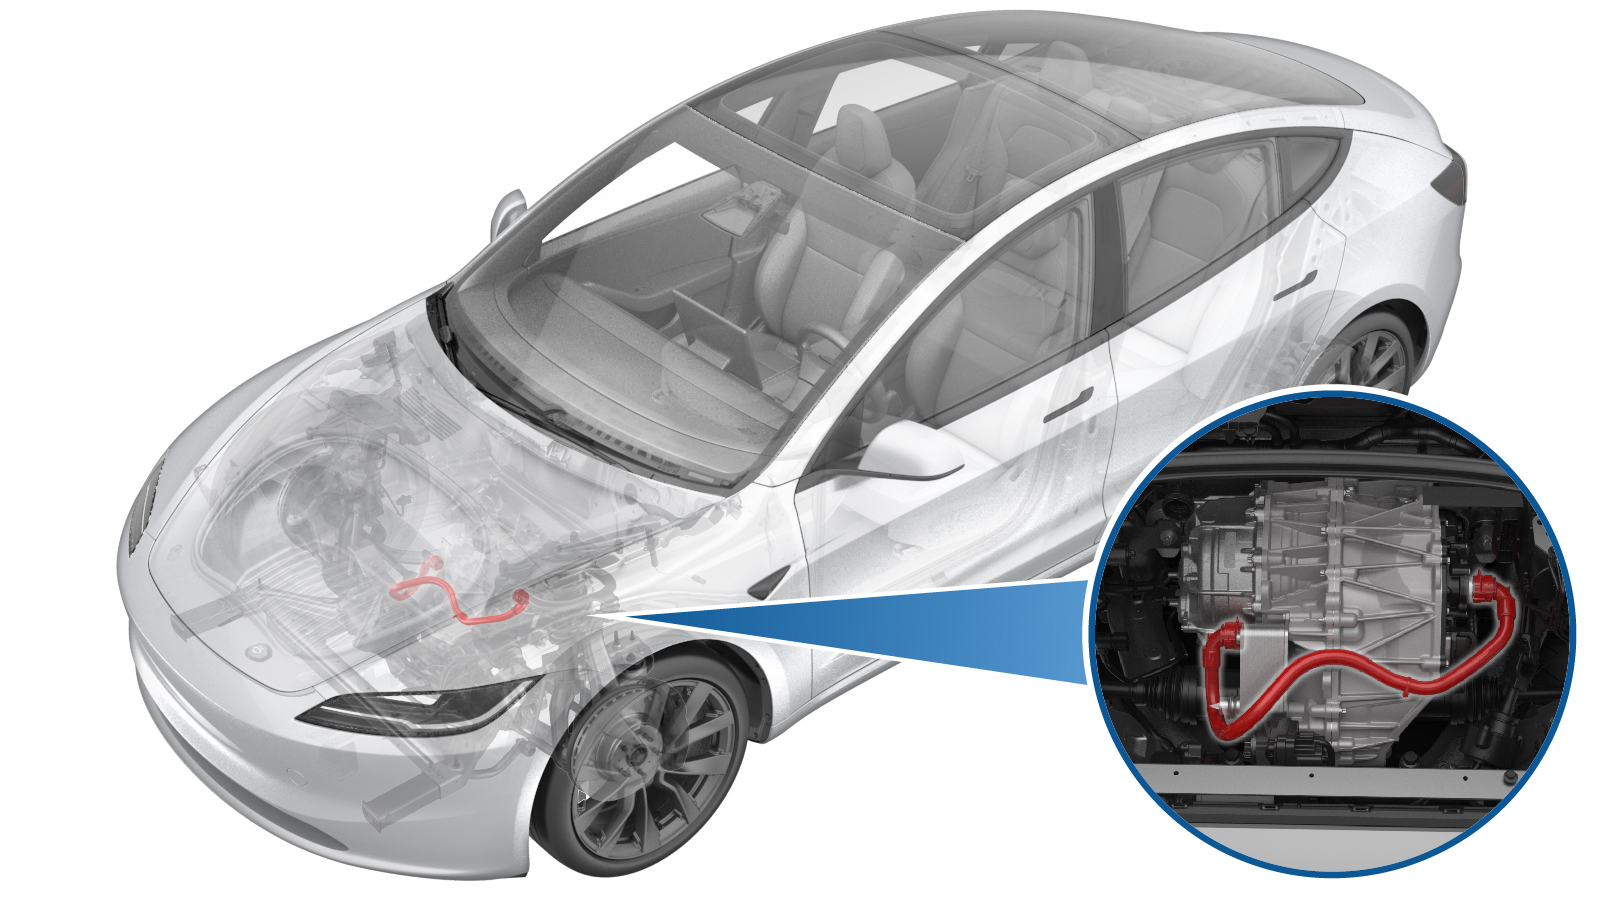
Hose - Front Drive Unit to Oil Cooler (Remove and Replace)
 교정 코드
1830020122
FRT
0.42
메모: 절차에서 명시적으로 언급하지 않는 한 위 교정 코드 및 FRT는 연결된 절차를 포함하여 이 절차를 수행하는 데 필요한 모든 작업을 반영합니다. 명시적으로 지시하지 않는 한 교정 코드를 누적하지 마십시오.
참고: FRT와 그 생성 방법에 대한 자세한 내용은 표준 정비 작업시간을 참조하십시오. FRT 값에 대한 피드백을 제공하려면 ServiceManualFeedback@tesla.com으로 이메일을 보내십시오.
참고: 아래 절차를 수행할 때 개인 보호의 내용을 참조하여 적절한 PPE를 착용했는지 확인하십시오.
참고: 안전하고 건강한 작업 사례는 인체공학적 주의 사항의 내용을 참조하십시오.
교정 코드
1830020122
FRT
0.42
메모: 절차에서 명시적으로 언급하지 않는 한 위 교정 코드 및 FRT는 연결된 절차를 포함하여 이 절차를 수행하는 데 필요한 모든 작업을 반영합니다. 명시적으로 지시하지 않는 한 교정 코드를 누적하지 마십시오.
참고: FRT와 그 생성 방법에 대한 자세한 내용은 표준 정비 작업시간을 참조하십시오. FRT 값에 대한 피드백을 제공하려면 ServiceManualFeedback@tesla.com으로 이메일을 보내십시오.
참고: 아래 절차를 수행할 때 개인 보호의 내용을 참조하여 적절한 PPE를 착용했는지 확인하십시오.
참고: 안전하고 건강한 작업 사례는 인체공학적 주의 사항의 내용을 참조하십시오.
- 1135762-00-A 키트, 서비스 플러그, 냉각 호스, Model 3
- 1080568-00-A Fluid Catcher
- 1065131-00-A Battery Coolant Drain Kit
탈거
- Raise and support the vehicle. See 차량 올리기 - 2 포스트 리프트.
- Disconnect the LV power. See LV Power (Disconnect and Connect).
- Remove the underhood storage unit. See Underhood Storage Unit (Remove and Replace).
-
Raise the vehicle fully and lower the lift onto locks.
경고
Make sure there is an audible click of the locks on both sides before lowering, otherwise the vehicle may tilt to one side.
Make sure that the doors are clear of surrounding objects.
- Remove the front aero shield panel. See Panel - Aero Shield - Front (Remove and Replace).
-
Position a coolant drain container underneath LH front of the HV battery.
-
Disconnect the front drive unit inverter inlet hose from the fluid coupling, and plug the ends of both fittings as soon as possible to avoid coolant loss.
참고Coolant loss greater than 1L requires vacuum fill.
-
Position the coolant drain underneath RH front of the front drive unit.
-
Disconnect the front drive unit inverter inlet hose from the heat exchanger, and plug the ends of both fittings as soon as possible to avoid coolant loss.
참고Coolant loss greater than 1L requires vacuum fill.
- Remove the coolant drain container from underneath the vehicle.
- Raise the lift off locks, hold the lock release lever to keep locks free while the vehicle is lowered, and then set the vehicle to a comfortable working height, then set the lift onto locks.
-
Release the inverter to oil cooler hose clip, and then remove the inverter to oil cooler hose from the front drive unit.
장착
-
Install the inverter to oil cooler hose to the front drive unit by securing the inverter to oil cooler hose clip.
-
Raise the vehicle fully and lower the lift onto locks.
경고
Make sure there is an audible click of the locks on both sides before lowering, otherwise the vehicle may tilt to one side.
Make sure that the doors are clear of surrounding objects.
-
Position a coolant drain container underneath the LH front of the HV battery.
-
Remove the plugs from the ends of both fittings, and then connect the front drive unit inverter inlet hose to the fluid coupling.
참고
Perform a push-pull-push test to make sure the hose is fully engaged. Coolant loss greater than 1L requires vacuum fill.
-
Position the coolant drain underneath the RH front of the front drive unit.
-
Remove the plugs from the ends of both fittings, and then connect the front drive unit inverter inlet hose to the heat exchanger.
참고
Perform a push-pull-push test to make sure the hose is fully engaged. Coolant loss greater than 1L requires vacuum fill.
- Remove the coolant drain container from underneath the vehicle.
- Install the front aero shield panel. See Panel - Aero Shield - Front (Remove and Replace).
- Raise the lift off locks, hold the lock release lever to keep locks free while the vehicle is lowered, and then fully lower the vehicle.
- Connect the LV power. See LV Power (Disconnect and Connect).
-
Remove the coolant cap and fill the coolant to MAX line.
- Unlock the gateway. See 게이트웨이 잠금 해제.
-
Tap the Service Mode "wrench" (at the bottom of the touchscreen UI), and then tap to perform the Coolant Air Purge.
참고
- Make sure that the vehicle is not in Drive. Putting the vehicle into Drive will stop this routine.
- The pumps will still run for some time after the Routine Passed message displays. Do not start another routine before the coolant pumps stop running.
- The speed in the test varies from 3500-6500 RPM (idle speed = ~1500 RPM) and the actuated valve varies between SERIES and PARALLEL.
- 속도가 7000RPM 전후에 있는 경우 펌프가 에어록 상태임을 나타냅니다. 진공 충전을 다시 수행하십시오. 냉각수 수위가 보틀의 NOM과 MAX 선 사이에 도달하도록 계속해서 냉각수를 추가하고 배출합니다.
- Inspect the coolant level and top off as necessary, make sure that the fluid level is at the MAX line, and then install the coolant bottle cap.
- Install the underhood storage unit. See Underhood Storage Unit (Remove and Replace).
- Install the rear underhood apron. See Underhood Apron - Rear (Remove and Replace).
- Raise the LH front window and close the LH front door.
- Remove the lift arms from below the vehicle.