2024-02-06
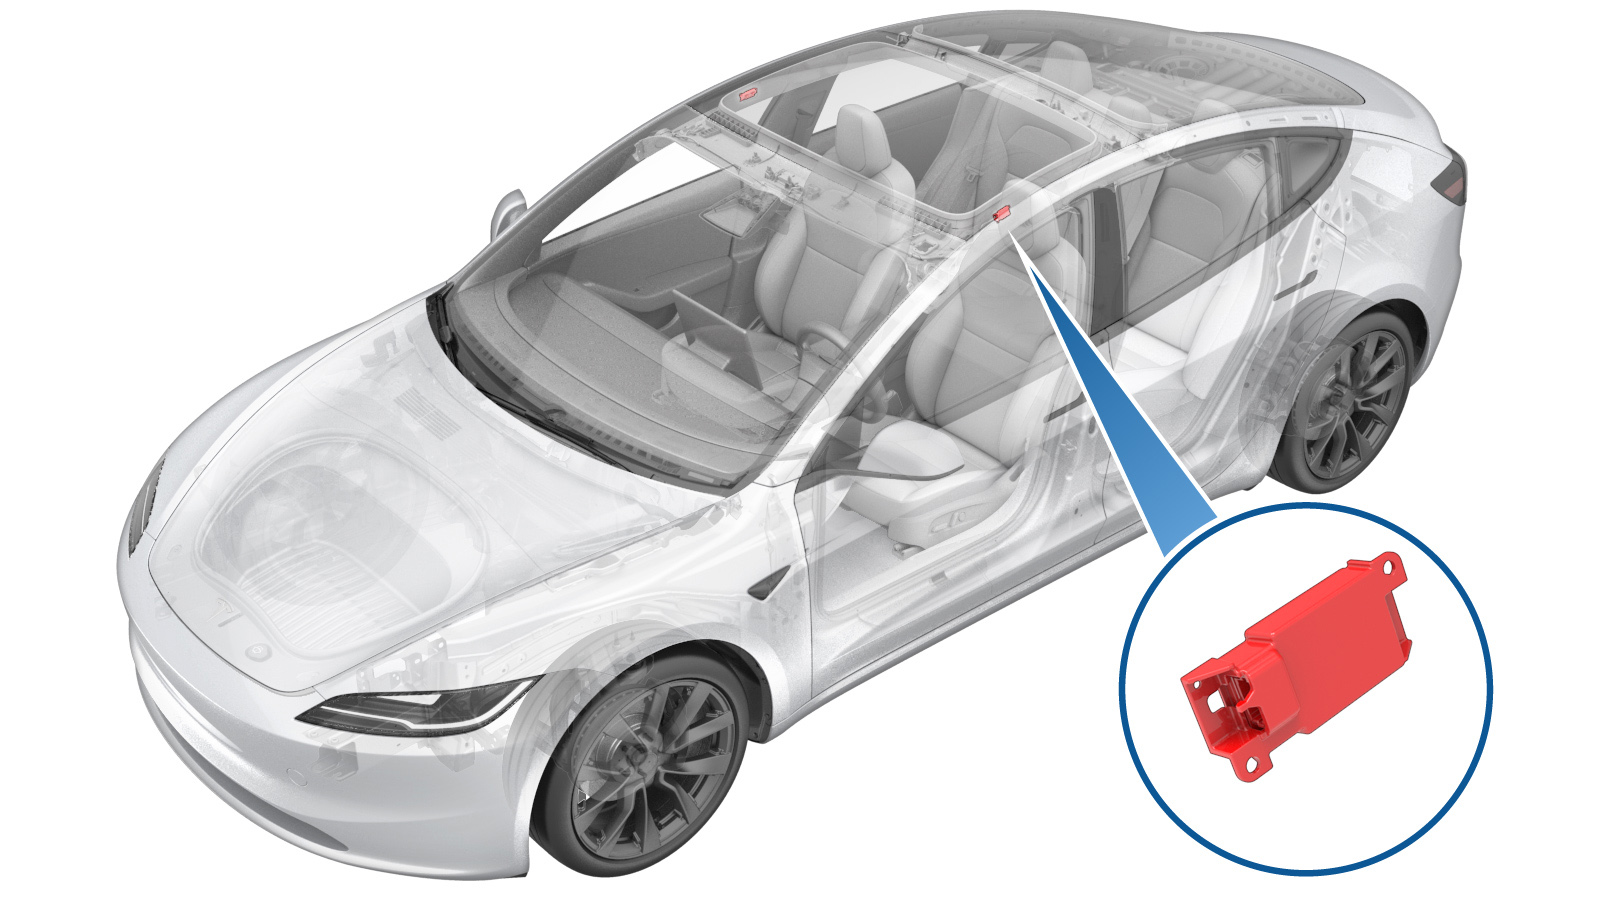
Microphone - Telephony Audio - Headliner (Remove and Replace)
 교정 코드
1520010072
FRT
0.78
메모: 절차에서 명시적으로 언급하지 않는 한 위에 나열된 교정 코드 및 FRT는 연결된 절차를 포함하여 이 절차를 수행하는 데 필요한 모든 작업을 반영합니다. 명시적으로 지시하지 않는 한 교정 코드를 누적하지 마십시오.
참고: FRT와 그 생성 방법에 대한 자세한 내용은 표준 정비 작업시간의 내용을 참조하십시오.
메모: 아래 절차를 수행할 때 개인 보호의 내용을 참조하여 적절한 PPE를 착용했는지 확인하십시오.
참고: 안전하고 건강한 작업 사례는 인체공학적 주의 사항의 내용을 참조하십시오.
교정 코드
1520010072
FRT
0.78
메모: 절차에서 명시적으로 언급하지 않는 한 위에 나열된 교정 코드 및 FRT는 연결된 절차를 포함하여 이 절차를 수행하는 데 필요한 모든 작업을 반영합니다. 명시적으로 지시하지 않는 한 교정 코드를 누적하지 마십시오.
참고: FRT와 그 생성 방법에 대한 자세한 내용은 표준 정비 작업시간의 내용을 참조하십시오.
메모: 아래 절차를 수행할 때 개인 보호의 내용을 참조하여 적절한 PPE를 착용했는지 확인하십시오.
참고: 안전하고 건강한 작업 사례는 인체공학적 주의 사항의 내용을 참조하십시오.
토크 규격
| 설명 | 토크 값 | 권장 공구 | 재사용/교체 | 참고 |
|---|---|---|---|---|
| LH 전면 헤드라이너 마이크를 헤드라이너에 고정하는 볼트(2개) |
 0.3 Nm (3 lbs-in) |
|
교체 |
탈거
- LH 계기판 엔드캡을 탈거합니다. 참조 항목: End Cap - Instrument Panel - LH (Remove and Replace).
- LH 상단 A필러 트림을 탈거합니다. 참조 항목: Trim - A-Pillar - Upper - LH (Remove and Replace).
- LH 선바이저를 탈거합니다. 참조 항목: Sun Visor Assembly, LH (Remove and Replace).
- 하단 카메라 커버를 탈거합니다. 참조 항목: Camera Cover - Lower (Remove and Replace).
- 리어 뷰 미러를 탈거합니다. 참조 항목: Mirror - Rear View (Remove and Replace).
- 차량 RH에 대해 1단계~3단계를 반복합니다.
- LH 2열 시트 사이드 볼스터를 탈거합니다. 참조 항목: Bolster - Side - Seat - 2nd Row - LH (Remove and Replace).
- 2열 하단 시트 쿠션을 탈거합니다. 참조 항목: Seat Cushion - 2nd Row (Remove and Replace).
- LH 하단 A필러 트림을 탈거합니다. 참조 항목: Trim - A-Pillar - Lower - LH (Remove and Replace).
- LH 하단 B필러 트림을 탈거합니다. 참조 항목: Trim - B-Pillar - Lower - LH (Remove and Replace).
- LH 중간 B필러 트림을 탈거합니다. 참조 항목: Trim - B-Pillar - Middle - LH (Remove and Replace).
- LH 상단 B필러 트림을 탈거합니다. 참조 항목: Trim - B-Pillar - Upper - LH (Remove and Replace).
- 차량 RH에 대해 7단계 및 9단계~12단계를 반복합니다.
-
헤드라이너 전면을 차량에 고정하는 클립(6개) 및 로케이터 핀을 풉니다.
참고클립을 풀 때 헤드라이너가 휘지 않도록 주의하십시오.참고푸는 중에 금속 클립이 손상된 경우 새 금속 클립으로 교체합니다.
-
LH 전면 헤드라이너 마이크에서 전기 커넥터를 연결 해제합니다.
-
LH 전면 헤드라이너 마이크를 헤드라이너에 고정하는 볼트(2개)를 탈거한 다음 차량에서 마이크를 탈거합니다.
TIp다음 공구를 사용하는 것이 좋습니다.
- Torx T10 비트
- 디지털 토크 스크루드라이버 0.10Nm - 2.0Nm
- 래칫/토크 렌치
장착
-
LH 전면 헤드라이너 마이크를 헤드라이너에 배치한 다음 마이크를 헤드라이너에 고정하는 볼트(2개)를 장착합니다.0.3 Nm (3 lbs-in)TIp다음 공구를 사용하는 것이 좋습니다.
- Torx T10 비트
- 디지털 토크 스크루드라이버 0.10Nm - 2.0Nm
- 래칫/토크 렌치
-
전기 커넥터를 LH 전면 헤드라이너 마이크에 연결합니다.
-
헤드라이너 전면에 있는 위치 지정 핀을 슬롯에 맞춘 다음 헤드라이너 전면을 차량에 고정하는 클립(6개)을 장착합니다.
참고도어 씰이 LH 상단 B필러 트림과 정확히 겹치게 하십시오.
- 리어 뷰 미러를 장착합니다. 참조 항목: Mirror - Rear View (Remove and Replace).
- 하단 카메라 커버를 장착합니다. 참조 항목: Camera Cover - Lower (Remove and Replace).
- LH 상단 A필러 트림을 장착합니다. 참조 항목: Trim - A-Pillar - Upper - LH (Remove and Replace).
- LH 선바이저를 장착합니다. 참조 항목: Sun Visor Assembly, LH (Remove and Replace).
- 차량 RH에 대해 6단계 및 7단계를 반복합니다.
- LH 상단 B필러 트림을 장착합니다. 참조 항목: Trim - B-Pillar - Upper - LH (Remove and Replace).
- LH 중간 B필러 트림을 장착합니다. 참조 항목: Trim - B-Pillar - Middle - LH (Remove and Replace).
- LH 하단 B필러 트림을 장착합니다. 참조 항목: Trim - B-Pillar - Lower - LH (Remove and Replace).
- LH 하단 A필러 트림을 장착합니다. 참조 항목: Trim - A-Pillar - Lower - LH (Remove and Replace).
- LH 계기판 엔드캡을 장착합니다. 참조 항목: End Cap - Instrument Panel - LH (Remove and Replace).
- 차량 RH에 대해 9단계~13단계를 반복합니다.
- 2열 하단 시트 쿠션을 장착합니다. 참조 항목: Seat Cushion - 2nd Row (Remove and Replace).
- 2열 LH 및 RH 시트 사이드 볼스터를 장착합니다. 참조 항목: Bolster - Side - Seat - 2nd Row - LH (Remove and Replace).