Front Frame Rail
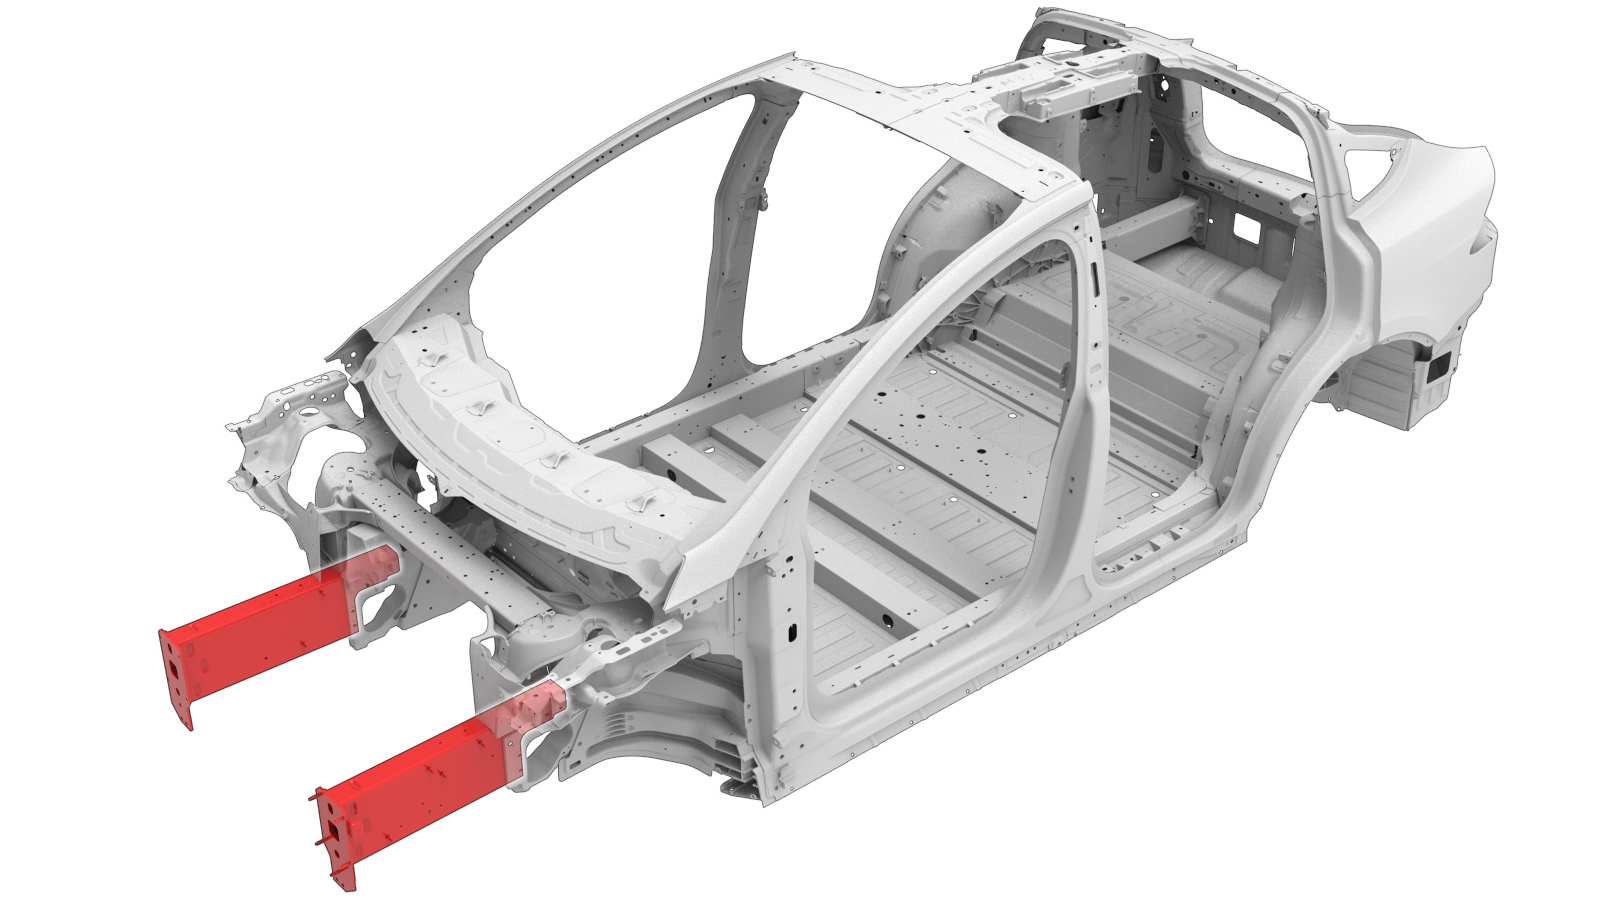 Correction code:
10101006302
10101020202
NOTE:
Unless explicitly stated in the procedure, the above
correction code includes all Collision Repair and Service
repair work required to perform this procedure, including
the linked Collision Repair procedures and linked Service
procedures. Do not stack Collision Repair correction
codes unless explicitly told to do so. Depending
on the damage to the vehicle, additional repairs may be
required.
Repair Information
- Review all collision repair general practices and safety documentation and wear the appropriate PPE (Personal Protective Equipment) before beginning this procedure.
- Properly mount the vehicle on a frame bench when performing this procedure.
Parts List
| Quantity | Description | Image / Notes |
|---|---|---|
| 1 | ASY-MEMBER RAIL (Front Frame Rail) | |
| 7 | Bolt, Torx-head , M8x20 PC98 ADH MAT | Tesla part number 1014747-00-B. |
When ordering parts, refer to the Parts Catalog and enter the VIN of the vehicle being repaired to find the correct parts (and the part numbers) for the vehicle. Alternatively, use the search function in the Parts Catalog to find a specific part for the vehicle.
Repair Procedure
- Remove the Bumper Assembly - Front (Remove and Replace).
- Remove the Bracket - Headlamp Support - LH (Remove and Replace).
- Remove the Wheel Arch Liner - Front - LH (Remove and Replace).
- LH Component only: Remove the Chiller and EXV Assembly (Remove and Replace).
- LH Component only: Remove the Reservoir Assembly - Windshield Washer (Remove and Replace).
- RH Component only: Remove the Compressor - Air Suspension (Remove and Replace).
- Remove the Brake Lines - 4 Tube Bundle - ABS to Wheels (Remove and Replace).
- Remove the Drive Unit - Front (2nd Generation) (Remove and Install).
- Remove the Knuckle - Suspension - Front - LH (Remove and Replace).
- LH Component only: Remove the Air Spring Module - Front - LH (Remove and Replace).
- RH Component only: Remove the Air Spring Module - Front - RH (Remove and Replace).
-
Remove the Front Shock Tower Support.
-
Remove the original component.
or Bolt, Torx-head
GMA Weld
-
Prepare for installation.
or Bolt, Torx-headNoteIf necessary, trim the Front Shock Tower to achieve the proper fit for the new component.
- Apply structural adhesive to the mating surfaces on the vehicle and the new component or components.
-
Install the new component or components.
Torque the bolts to 30 Nm.
-
Perform GMA welding.
GMA WeldWarningFailure to follow all welding safety precautions, including the use of personal protective equipment, could result in serious injury or property damage. Only technicians who have completed Tesla’s approved welding training are authorized to weld structural components on Tesla vehicles.WarningTo maintain vehicle crash integrity, use only approved welding wire and an approved GMA welder to perform GMA welding on Tesla vehicles. Refer to Approved Gas Metal Arc (GMA) Welders and Welding Wire for information on approved GMA welders and welding wire.CAUTIONDo not weld on a Tesla vehicle before performing the Vehicle HV Disablement Procedure (refer to the vehicle-specific Service Manual for more information on the Vehicle HV Disablement Procedure). Welding on a Tesla vehicle with an energized high or low voltage system might damage vehicle components.NoteBefore GMA welding, a test weld using material of the same gauge and type should be performed to make sure that the welding equipment settings produce a satisfactory joint.
-
Install the Front Shock Tower Support.
- Perform any necessary post-repair operations.
- RH Component only: Install the Air Spring Module - Front - RH (Remove and Replace).
- LH Component only: Install the Air Spring Module - Front - LH (Remove and Replace).
- Install the Knuckle - Suspension - Front - LH (Remove and Replace).
- Install the Drive Unit - Front (2nd Generation) (Remove and Install).
- Install the Brake Lines - 4 Tube Bundle - ABS to Wheels (Remove and Replace).
- RH Component only: Install the Compressor - Air Suspension (Remove and Replace).
- LH Component only: Install the Reservoir Assembly - Windshield Washer (Remove and Replace).
- LH Component only: Install the Chiller and EXV Assembly (Remove and Replace).
- Install the Wheel Arch Liner - Front - LH (Remove and Replace).
- Install the Bracket - Headlamp Support - LH (Remove and Replace).
- Install the Bumper Assembly - Front (Remove and Replace).