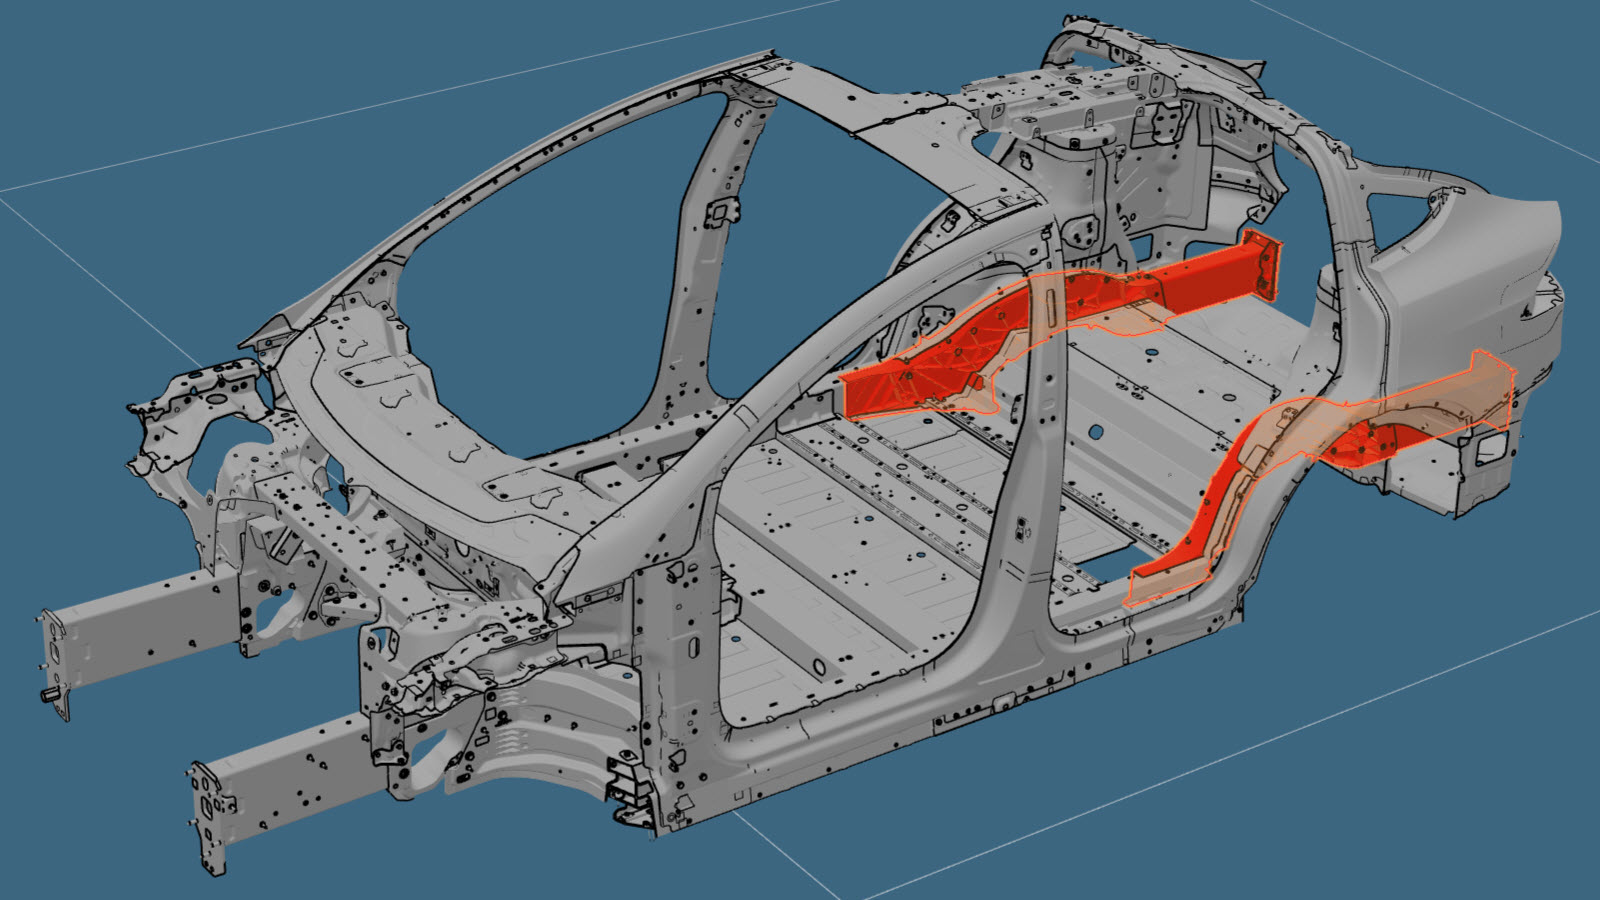
Rear Node (Complete)
 Correction code:
10101819202
10101822502
NOTE:
Unless explicitly stated in the procedure, the above
correction code includes all Collision Repair work required
to perform this procedure, including the linked Collision
Repair procedures. Do not stack Collision Repair
correction codes unless explicitly told to do
so. Add any associated mechanical procedures
needed to perform this procedure.
Repair Information
- Depending on the damage to this component, it may be possible to repair this component. Refer to Cast Rear Node Repair Guidelines (Vehicles Built Through October 12, 2022) for more information.
- Review all collision repair general practices and safety documentation and wear the appropriate PPE (Personal Protective Equipment) before beginning this procedure.
- Properly mount the vehicle on a frame bench when performing this procedure.
Parts List
| Quantity | Description | Image / Notes |
|---|---|---|
| 1 | MODEL X, ASY-MEMBER RAIL RR (Rear Node – Complete) | |
| 1 | MX REINF-RR TORQUE BOX LWR (Rear Lower Torque Box Reinforcement) | |
|
LH
component: 24 RH component: 26 |
High Strength Structural Rivet, 6.5 mm | |
| 3 | Structural Countersunk Rivet, 6.5 mm | |
| 1 | Bolt, hex-head , M8x20 | Tesla part number 1007580-00-A. |
| 1 | Bolt, hex-head , M8x50 | Tesla part number 1046838-00-A. |
| 2 | Bolt, Torx-head , M8x20 | Tesla part number 1014747-00-B. |
|
LH component: 11 RH component: 8 |
Bolt, Torx-head , M8-1.25X16 | Tesla part number 1008833-01-A. |
|
LH component: 11 RH component: 8 |
Nut , M8-1.25,HF,STEEL[10],ZNAL,BLACK | Tesla part number 1006628-01-A. |
When ordering parts, refer to the Parts Catalog and enter the VIN of the vehicle being repaired to find the correct parts (and the part numbers) for the vehicle. Alternatively, use the search function in the Parts Catalog to find a specific part for the vehicle.
Repair Procedure
-
Remove the Rear Seat Floor Panel Section.
-
Remove the Rear Panel Assembly.
-
Remove the Rear Node Inner Reinforcements (Front).
-
Remove the Rear Node Inner Reinforcements (Rear).
-
Remove the Rear Trunk Floor Panel Extension.
-
Remove the Rear Node Outer Reinforcement.
-
Remove the Rear Shock Tower Reinforcement.
-
Remove the Rear Lower Torque Box Reinforcement.
or Factory Structural Rivets
-
Remove the original component.
or RIVTAC
or Factory Structural Rivets
or Factory SPRsNoteThe LH component of vehicles built after September 1, 2019 has 8 mm. rivets instead of SPRs in the area circled in red. -
Use structural adhesive to
attach the nuts in position on the Rear Torque Box Lower Crossmember and the
new Rear Node.
NutNoteIf necessary, grind the edges of the nuts to make them flush with the mounting location.
-
Prepare for installation.
NoteA red X indicates a location where a factory-installed fastener is not being replaced.
or High Strength Structural Rivets, 6.5 mm
or Structural Countersunk Rivets, 6.5 mm
or Bolt, Torx-headNoteInstall 3 bolts in the LH component only.NutNoteIf necessary, grind the edges of the nuts to make them flush with the mounting location. - Apply structural adhesive to the mating surfaces on the vehicle and the new component or components.
-
Install the new component or components.
NoteApply threadlocker to the bolts before installation.
Torque all bolts and nuts to 25 Nm.
CAUTIONIf the specified torque cannot be achieved, remove the new Rear Node Assembly and use structural adhesive to re-secure any nuts that have broken loose inside the Rear Rear Node. -
Install the Rear Lower
Torque Box Reinforcement.
or Bolt, Torx-headNoteApply threadlocker to the bolts before installation.Torque all bolts to 25 Nm.CAUTIONIf the specified torque cannot be achieved, remove the new Rear Node Assembly and re-secure any nuts that have broken loose inside the Rear Torque Box Lower Crossmember with structural adhesive.
-
Install the Rear Shock Tower Reinforcement.
-
Install the Rear Node Outer Reinforcement.
-
Install the Rear Trunk Floor Panel Extension.
-
Install the Rear Node Inner Reinforcements (Rear).
-
Install the Rear Node Inner Reinforcements (Front).
-
If the vehicle is equipped with bumper plate shims: Install new LH
and RH Rear Bumper Plate Shims.
-
Install the Rear Panel Assembly.
-
Install the Rear Seat Floor Panel Section.
- Perform any necessary post-repair operations.