Repairing Aluminum Cosmetic Damage
Repair guidelines for exterior aluminum body panels.
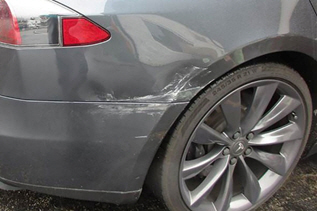
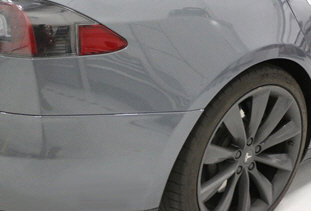
In most cases, dents and tears on the aluminum outer panels can be successfully repaired by a technician with the appropriate skills and dedicated aluminum hand tools. As shown below, even significant cosmetic damage can be successfully repaired.
|
|
Common Repairable Situations
Many instances of non-structural aluminum damage can be repaired to avoid panel replacement. The sections below provide instructions on repairing three common situations:
- Tears in the quarter panel
- Dents in the quarter panel
- Puncture tears
Tears in the Quarter Panel
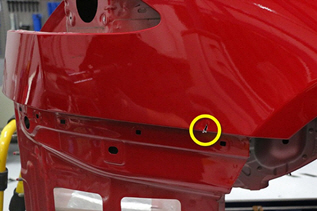
When there is an impact on the rear fascia, the force of the impact often causes a tear on the quarter panel near the fascia. These tears can usually be successfully repaired.
- Inspect the back side of the panel being repaired before starting and remove any sound-absorbing material, sensors, or modules that are in the immediate area of the repair.
- Disconnect high and low voltage power using the "Vehicle Electrical Isolation Procedure" as described in the Service Manual.
- Remove the paint from the area
around the tear and from the area where the ground clamp will be attached.
Figure 4. Remove paint from the damaged area 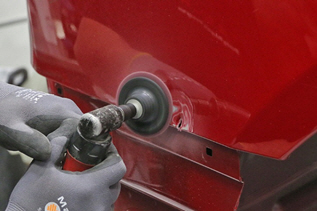
Figure 5. Remove paint from the ground clamp attachment area 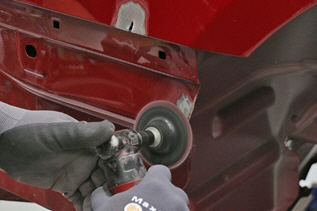
- Use a stainless steel brush to
remove any remaining paint from the repair area.
Figure 6. Use a stainless steel brush to remove paint from the repair area 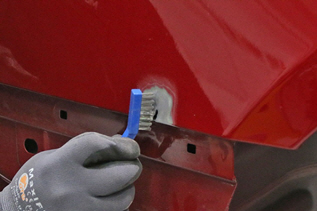
- Attach the ground clamp.
Figure 7. Attach the ground clamp 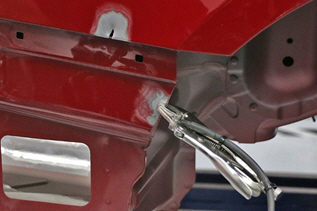
- Assess where to attach the first pull tab.Tip: This is usually at the deepest point of the repair area.
- Use an aluminum dent repair
system to weld a pull tab.
Figure 8. Weld on a pull tab 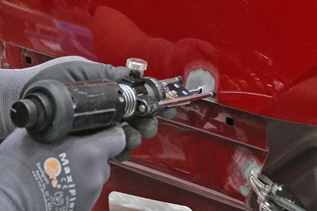
- Use the appropriate tool to pull
on the pull tab.
Figure 9. Pull on the pull tab 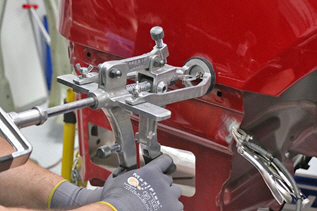
If necessary, use a heat gun to heat the panel to make it easier to pull the panel back into its original shape.
Figure 10. Heat the panel 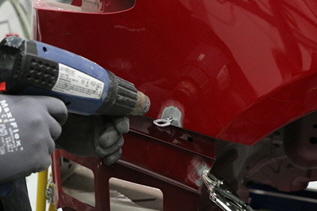
- Repeat steps 7 and 8 until the panel has been returned to its original shape.
- Remove all pull tabs and grind
down any remaining pull tab material.
Figure 11. Remove pull tabs 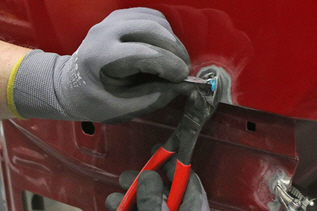
Figure 12. Grind down remaining pull tab material 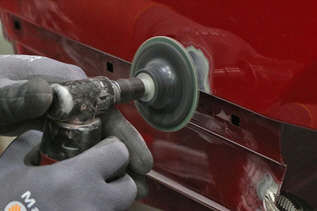
- Use the appropriate welding
technique for a thin aluminum panel to weld the tear.
Figure 13. Weld the tear (1/2) 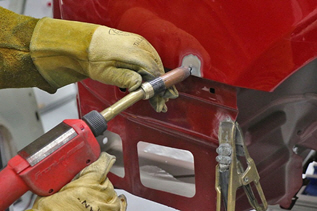
Figure 14. Weld the tear (2/2) 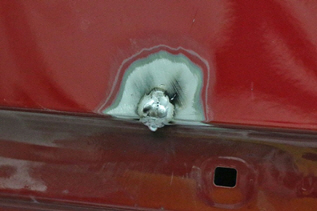
- Use a stainless steel brush to
clean the repair area.
Figure 15. Clean the repair area 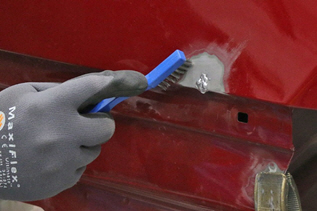
- Grind down the welds to restore
all components to their original dimensions.
Figure 16. Grind down the welds 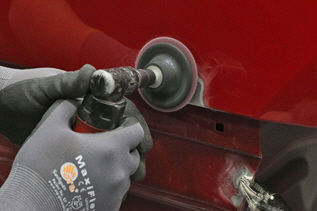
- Use an appropriate tool to
identify any high spots, and then file down the high spots.
Figure 17. Identify any high spots 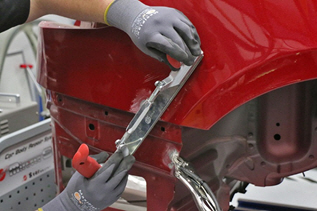
Figure 18. File down high spots 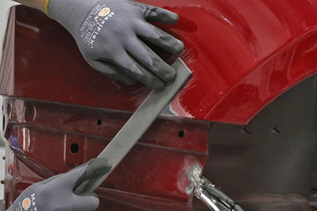
- Put the rear fascia into position to make sure the fit matches the undamaged side of the vehicle.
- If necessary, apply glazing putty to any deep scratches.
- Prime and paint the repaired area according to the paint manufacturer’s recommendations.
- Apply a suitable cavity wax or body filler to the back side of the repair area to help prevent corrosion.
Dents in the Quarter Panel
- Inspect the back side of the panel being repaired before starting and remove any sound-absorbing material, sensors, or modules that are in the immediate area of the repair.
- Disconnect high and low voltage power using the "Vehicle Electrical Isolation Procedure" as described in the Service Manual.
- Remove the paint from the repair area and from the area where the ground clamp will be attached.
- Use a stainless steel brush to remove any remaining paint from the repair area.
- Attach the ground clamp.
- Assess where to attach the first pull tab.Tip: This is usually at the deepest point of the repair area.NoteIf a bodyline is present, it might be necessary to pull on that location to relieve stress on the other areas of the dent.
- Use an aluminum dent repair
system to weld a pull tab.
Figure 19. Weld on a pull tab (1/2) 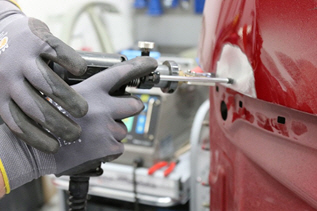
Figure 20. Weld on a pull tab (2/2) 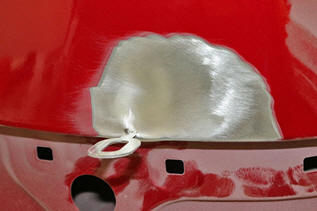
- Use the appropriate tool to pull
on the pull tab.
Figure 21. Pull on the pull tab 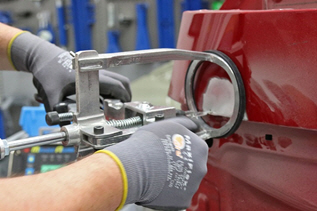
If necessary, heat the panel to make it easier to pull the panel back into its original shape.
Figure 22. Heat the panel 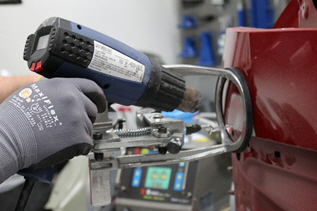 Tip: Use a hammer to tap around the edge of the tab to release tension while pulling.
 - If necessary, use a hammer to
flatten the bottom edge of the dent.
Figure 23. Flatten the bottom edge of the dent 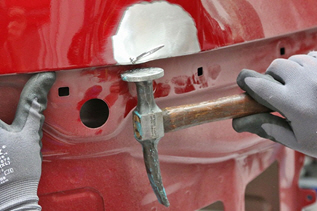
- Repeat steps 7–9 until the panel is back to its original shape.Tip: Work from the deepest point of the dent, and then move outwards.
- Remove all pull tabs and grind
down any remaining pull tab material.
Figure 24. Grind down remaining pull tab material 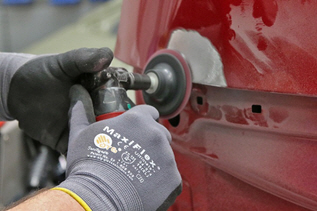
- Use an appropriate tool to
identify any high spots, and then file down the high spots.
Figure 25. File down high spots 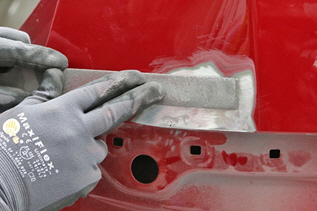
- If necessary, apply glazing putty to any deep scratches.
- Prime and paint the repaired area according to the paint manufacturer’s recommendations.
- Apply a suitable cavity wax or body filler to the back side of the repair area to help prevent corrosion.
Puncture Tears
- Inspect the back side of the panel being repaired before starting and remove any sound-absorbing material, sensors, or modules that are in the immediate area of the repair.
- Disconnect high and low voltage power using the "Vehicle Electrical Isolation Procedure" as described in the Service Manual.
- Use a sanding block over the repair area to identify low spots.
- Use a paintless dent removal
(PDR) bar and a hammer to remove any dents from the tear area until the area is
as close to its original shape as possible.
Figure 26. Restore the area to shape (1/2) 
Figure 27. Restore the area to shape (2/2) 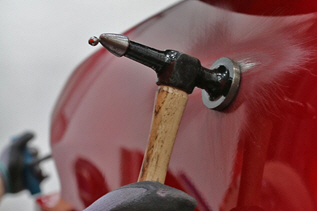
- Use a wire wheel to remove any
remaining paint from the repair area and the area where the ground clamp will be
attached.
Figure 28. Remove remaining paint from the repair area 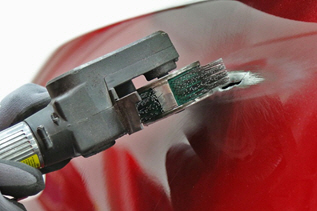
- Attach the ground clamp.
- Use the appropriate welding
technique for a thin aluminum panel to weld the tear.NoteBefore MIG welding, a test weld using material of the same gauge and type should be performed to make sure that the welding equipment settings produce a satisfactory joint.
Figure 29. Weld the tear 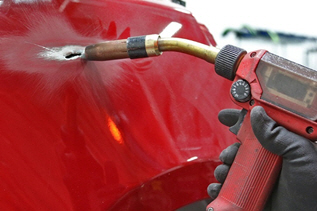
- Use a stainless steel brush to clean the repair area.
- Grind down welds to restore all components to their original dimensions.
- Use an appropriate tool to
identify any high spots, and then file down the high spots.
Figure 30. High spots removed 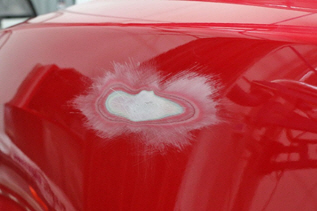
- If necessary, apply glazing putty to any deep scratches.
- Prime and paint the repaired area according to the paint manufacturer’s recommendations.
- Apply a suitable cavity wax or body filler to the back side of the repair area to help prevent corrosion.