2024-08-21
LV Battery - Recover (Restore)
 교정 코드
17010008 0.12
참고: 절차에서 명시적으로 언급하지 않는 한 위 교정 코드 및 FRT는 연결된 절차를 포함하여 이 절차를 수행하는 데 필요한 모든 작업을 반영합니다. 명시적으로 지시하지 않는 한 교정 코드를 누적하지 마십시오.
참고: FRT에 대한 자세한 내용과 FRT가 만들어진 방법은 표준 정비 작업시간을(를) 참조하십시오. FRT 값에 대한 피드백을 제공하려면 LaborTimeFeedback@tesla.com으로 이메일을 보내십시오.
참고: 아래 절차를 수행할 때 적절한 PPE를 착용했는지 확인하려면 개인 보호의 내용을 참조하십시오.
경고
이 절차는 초안입니다. 따라서 검증은 되었지만 경고 및 주의 사항이 누락되었을 수 있습니다. 고전압 시스템 및 구성 요소에서 또는 그 근처에서 작업하는 경우에는 안전 요구 사항을 준수하고 최고 수준의 주의를 기울여야 합니다. 수정 사항 및 기타 의견이 있으면 ServiceDevelopment@teslamotors.com으로 알려 주십시오.
- Remove the rear underhood apron. See 후드 내 에이프런 - 후면(탈거 및 교체).
-
Disconnect LV battery connector and keep FRL connected
참고2x connectors, Lift up and release green locking tab, Pull black connector lock outwards to release connection, Keep FRL connected
-
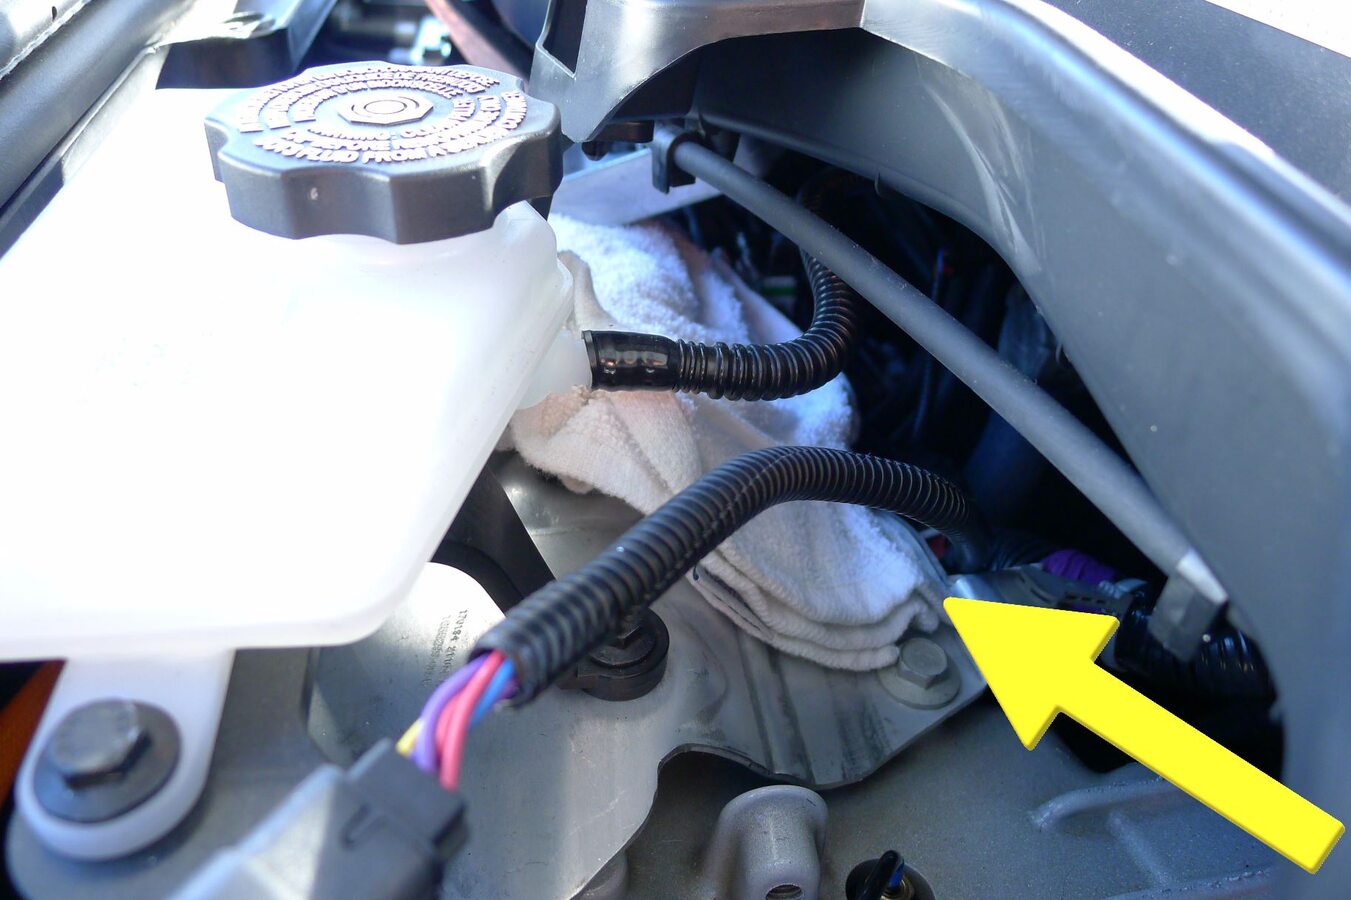
Connect 12V maintainer while LV battery is connected and cycle contactors on
참고1x tab, Connect 12V support while LV battery is connected, Release jump post cover behind wiper module, Place rag between multisystem beam and jump post, Prevent shorting positive cable to ground, Route positive clamp between brake fluid reservoir and wiper module, Secure positive terminal to jump post, Secure negative terminal to multisystem beam, Connect maintainer to power supply, Contactors will turn on and there will be an audible click
-
Secure LV battery connector
참고1x connector, Seat LV battery connection and push black connector lock inwards to secure, Engage upper locking tab when fully seated
- Open the LH front door.
- Lower both front windows.
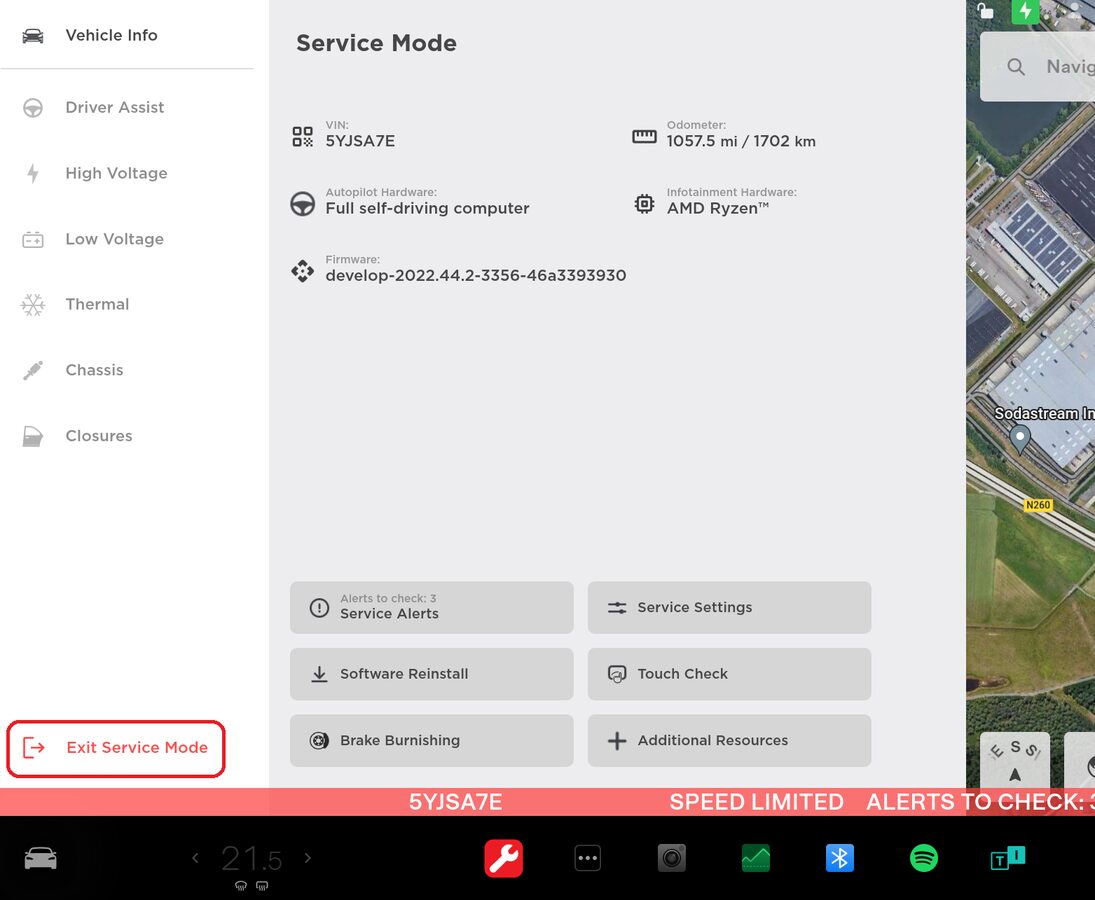
- Activate Service Mode using the touchscreen.
-
Remove 12V maintainer
참고Remove 12V support after firmware is completed, Unplug maintainer first and then remove from posts, Return cap to positive post
-
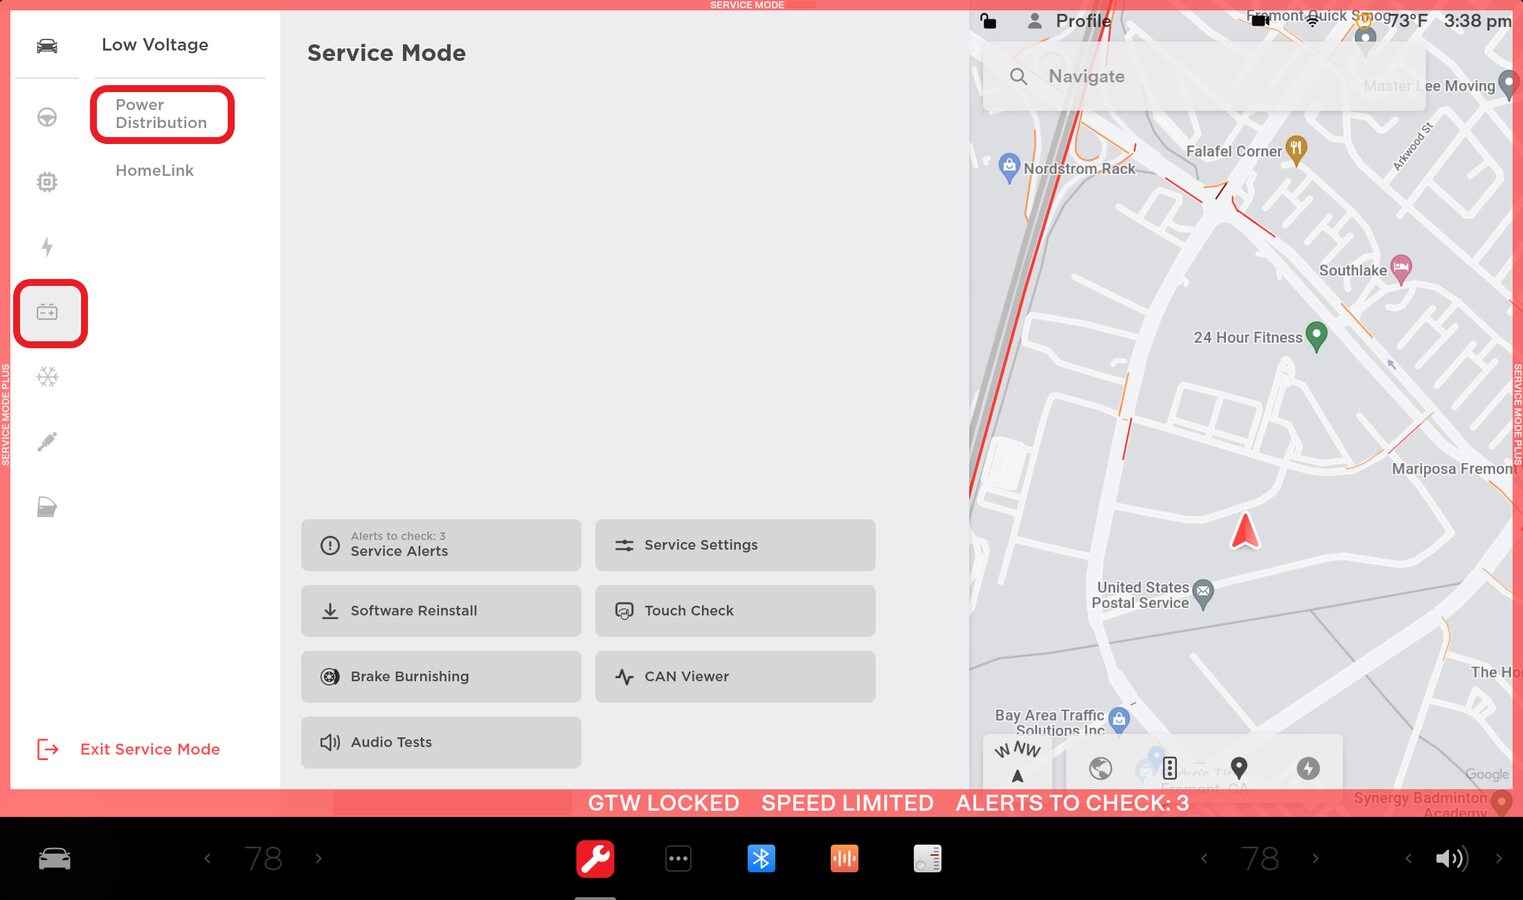
Navigate to Power Distribution
참고Via Service UI select Low Voltage > Power Distribution
-
LV 배터리 상태를 확인합니다.
참고PCS 지원이 시작된 후 2분 후에 VCLEFT_a478_LVBMS_MOSFET_Open 또는 VCBATT_a478_LVBMS_MOSFET_Open경고가 있으면 LV 배터리는 자동으로 복구되지 않습니다. 자동 복구는 터치스크린이나 Toolbox를 통해 수동으로 시도할 수 있습니다.
- 터치스크린:
- Toolbox:Action을 Run 합니다.PROC_VCFRONT_X_RECONNECT-LV-BATTERYvia Toolbox: (link)via Service Mode: Low Voltage ➜ Power Distribution ➜ Close MOSFET
참고위의 단계를 수행해도 LV 자동 복구가 성공하지 않으면 Tesla 리튬 이온 배터리 충전기를 사용하여 배터리를 복구합니다(아직 개발 중).- 배터리가 고전류에서 방전되지 않고 자체 보호가 되지 않는지 확인합니다.
- Service Mode > Low Voltage > Power Distribution > LV Battery로 이동하여 LV 배터리 SoC가 증가하는지 확인합니다.
- LV 배터리 MOSFET 상태가 Closed인지 확인합니다.
-
Exit Service mode
참고Press and hold the Exit Service Mode button for 3 seconds
- Install the rear underhood apron. See 후드 내 에이프런 - 후면(탈거 및 교체).


