13/09/2023 09:12:53
카메라 - 후방(HW4)(탈거 및 교체)
 교정 코드
17222012
참고: 절차에서 명시적으로 언급하지 않는 한 위 교정 코드 및 FRT는 연결된 절차를 포함하여 이 절차를 수행하는 데 필요한 모든 작업을 반영합니다. 명시적으로 지시하지 않는 한 교정 코드를 누적하지 마십시오.
참고: FRT와 그 생성 방법에 대한 자세한 내용은 표준 정비 작업시간을 참조하십시오. FRT 값에 대한 피드백을 제공하려면 LaborTimeFeedback@tesla.com으로 이메일을 보내십시오.
참고: 아래 절차를 수행할 때 개인 보호을(를) 참조하여 적절한 PPE를 착용했는지 확인하십시오.
- 2023-06-20: Switch the steps so that DAS Reset occurs directly before the Camera Connection Test.
경고
이 절차는 초안입니다. 따라서 검증은 되었지만 경고 및 주의 사항이 누락되었을 수 있습니다. 고전압 시스템 및 구성 요소에서 또는 그 근처에서 작업하는 경우에는 안전 요구 사항을 준수하고 최고 수준의 주의를 기울여야 합니다. 수정 사항 및 기타 의견이 있으면 ServiceDevelopment@teslamotors.com으로 알려 주십시오.
탈거
- LH 전면 도어를 열고 LH 전면 창문을 내립니다.
- 정비 모드를 활성화합니다. 참조 항목: 정비 모드(활성화 및 비활성화).
-
Partially open the liftgate.
참고Allow the liftgate to open fully, and then pull the liftgate back to a comfortable working height.
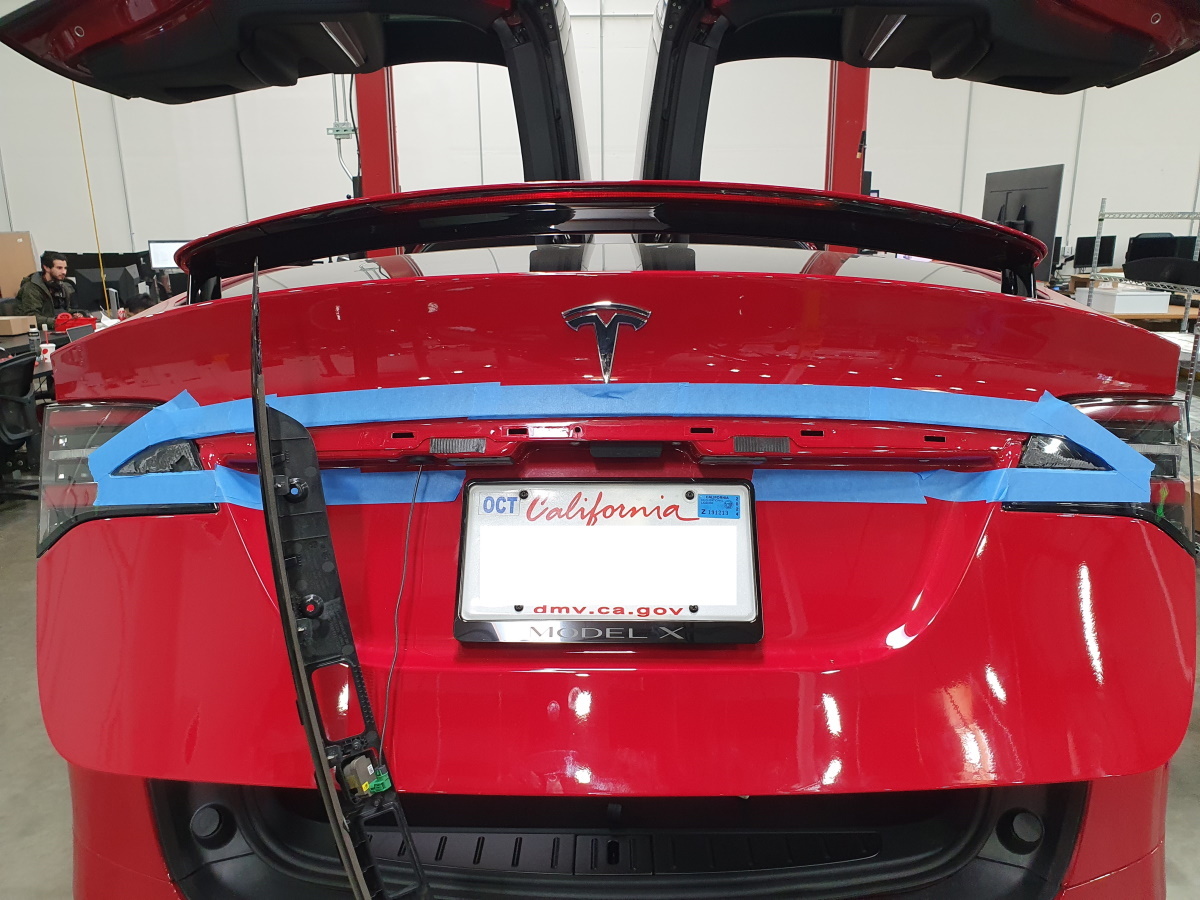
- Apply masking tape around the liftgate applique to protect the painted surrounding area.
-
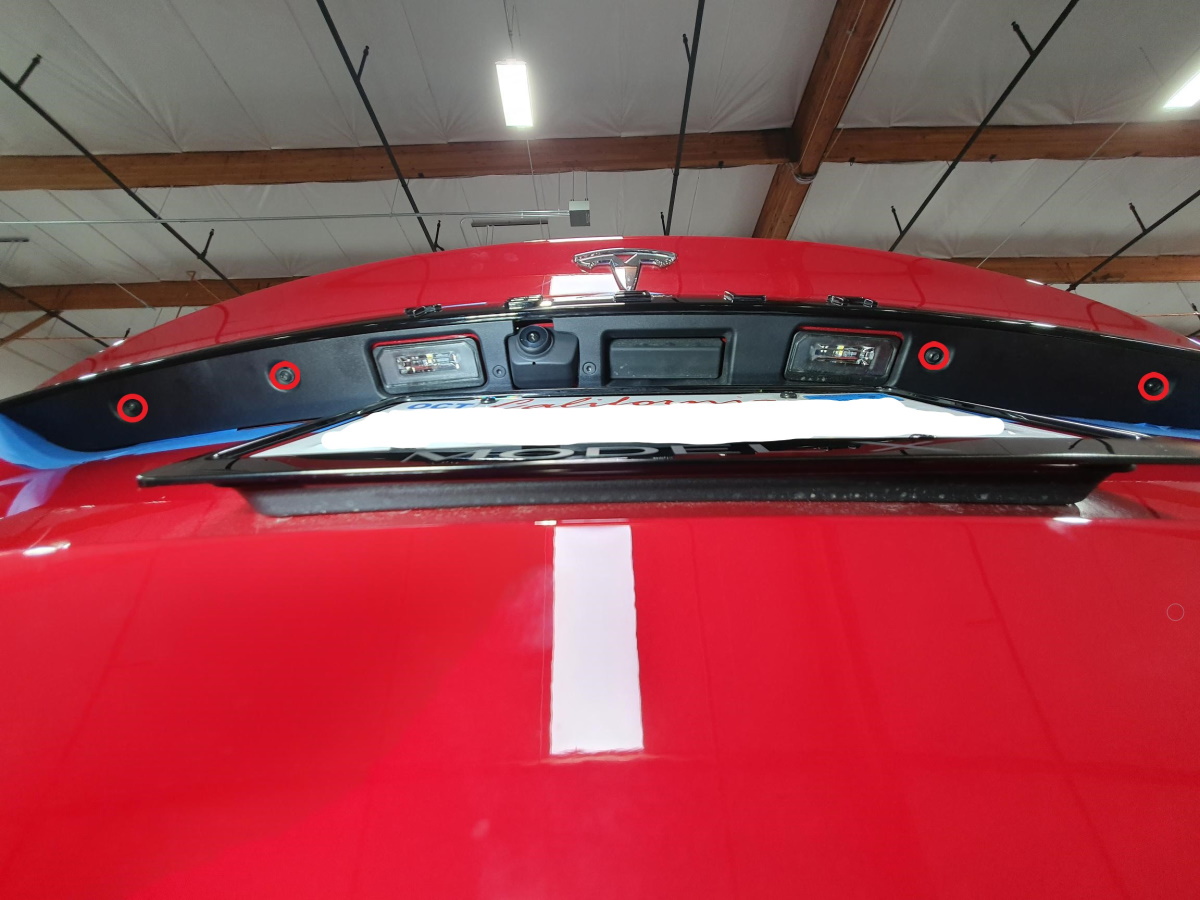
Remove the bolts (x4)
that attach the liftgate applique bracket to the liftgate.
 2 Nm (1.5 lbs-ft)팁: 다음 공구 사용을 권장합니다.
- TP20 bit (Mini ratchet bit set - 1450424-00-A)
-
Release the clips (x6) that attach the liftgate applique bracket to the
liftgate.
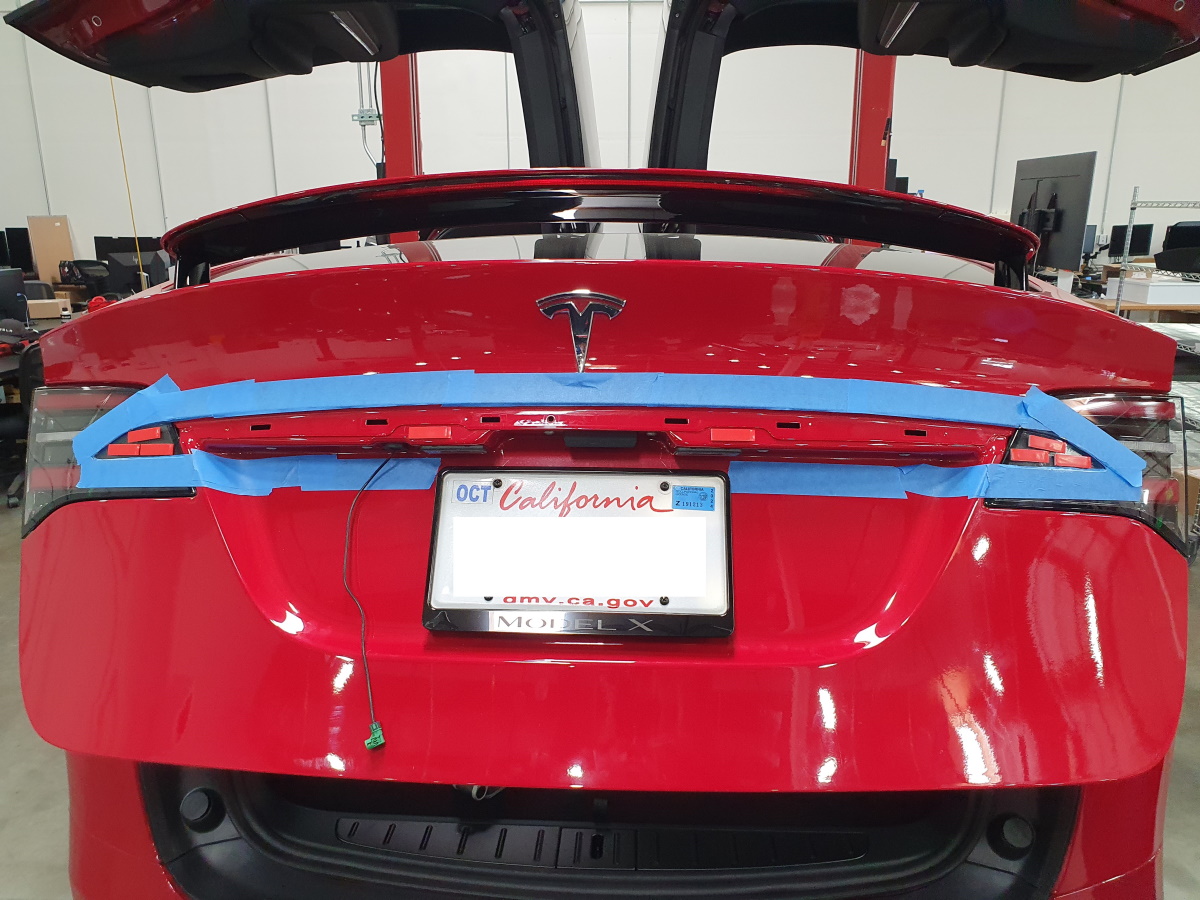
경고Take care not to damage the body of the vehicle.참고Double-sided tape was used on each end where the applique overlaps the liftgate taillights.
-
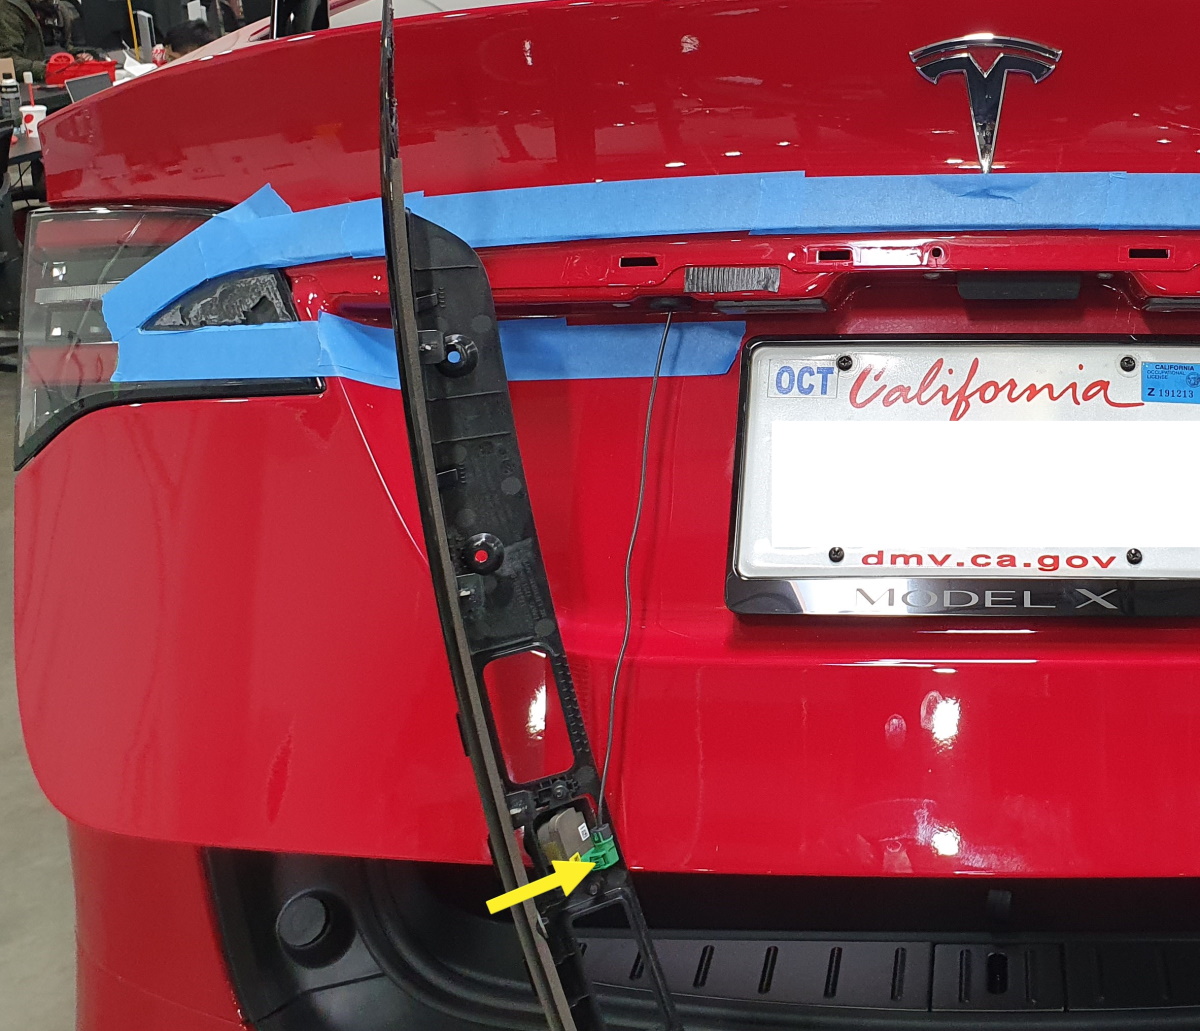
Disconnect the rear facing camera
electrical connector.
참고Push to lift the tab, and then disconnect the electrical connector.
-
Remove the bolts (x2) that attach the
rear facing camera to the liftgate applique bracket, and then remove the camera from the
bracket.
 0.8 Nm (7 lbs-in)팁: 다음 공구 사용을 권장합니다.
- TP20 bit (Mini ratchet bit set - 1450424-00-A)
장착
- Carefully remove the old double sided tape, clean the body surface with Isopropyl Alcohol (IPA) wipes, and then install new double sided tape.
-
Install the bolts (x2) that attach the
rear facing camera to the liftgate applique bracket.
 0.8 Nm (7 lbs-in)팁: 다음 공구 사용을 권장합니다.
- TP20 bit (Mini ratchet bit set - 1450424-00-A)
- Secure the rear facing camera electrical connector on the liftgate applique bracket, and then connect the camera electrical connector.
-
드라이버 어시스턴스 시스템(DAS)을 리셋합니다.
-
HW4 카메라에만 해당: 카메라 연결 테스트를 실행하여 새 카메라의 펌웨어를 업데이트합니다.
참고DAS 카메라는 CAN 모듈이 아니며 펌웨어 재설치 또는 "부품 교체 배포"로 업데이트할 수 없습니다.
- Disconnect the laptop with Toolbox 3 from the vehicle. See Toolbox 3(연결 및 연결 해제).
-
Install the liftgate applique
bracket.
- Peel off the new double sided tape.
- Align the tabs to the liftgate holes, and then push the bracket into position.
- Apply pressure on the applique to help with the tape and bracket mating.
-
Install the bolts (x4) that attach the liftgate applique bracket to
the liftgate.
 2 Nm (1.5 lbs-ft)팁: 다음 공구 사용을 권장합니다.
- TP20 bit (Mini ratchet bit set - 1450424-00-A)
- Remove all masking tape from the vehicle after 5 minutes for the applique to properly adhere to the liftgate.
- Close the liftgate.
- Exit Service Mode. See 정비 모드(활성화 및 비활성화).
- LH 전면 창문을 올리고 LH 전면 도어를 닫습니다.


