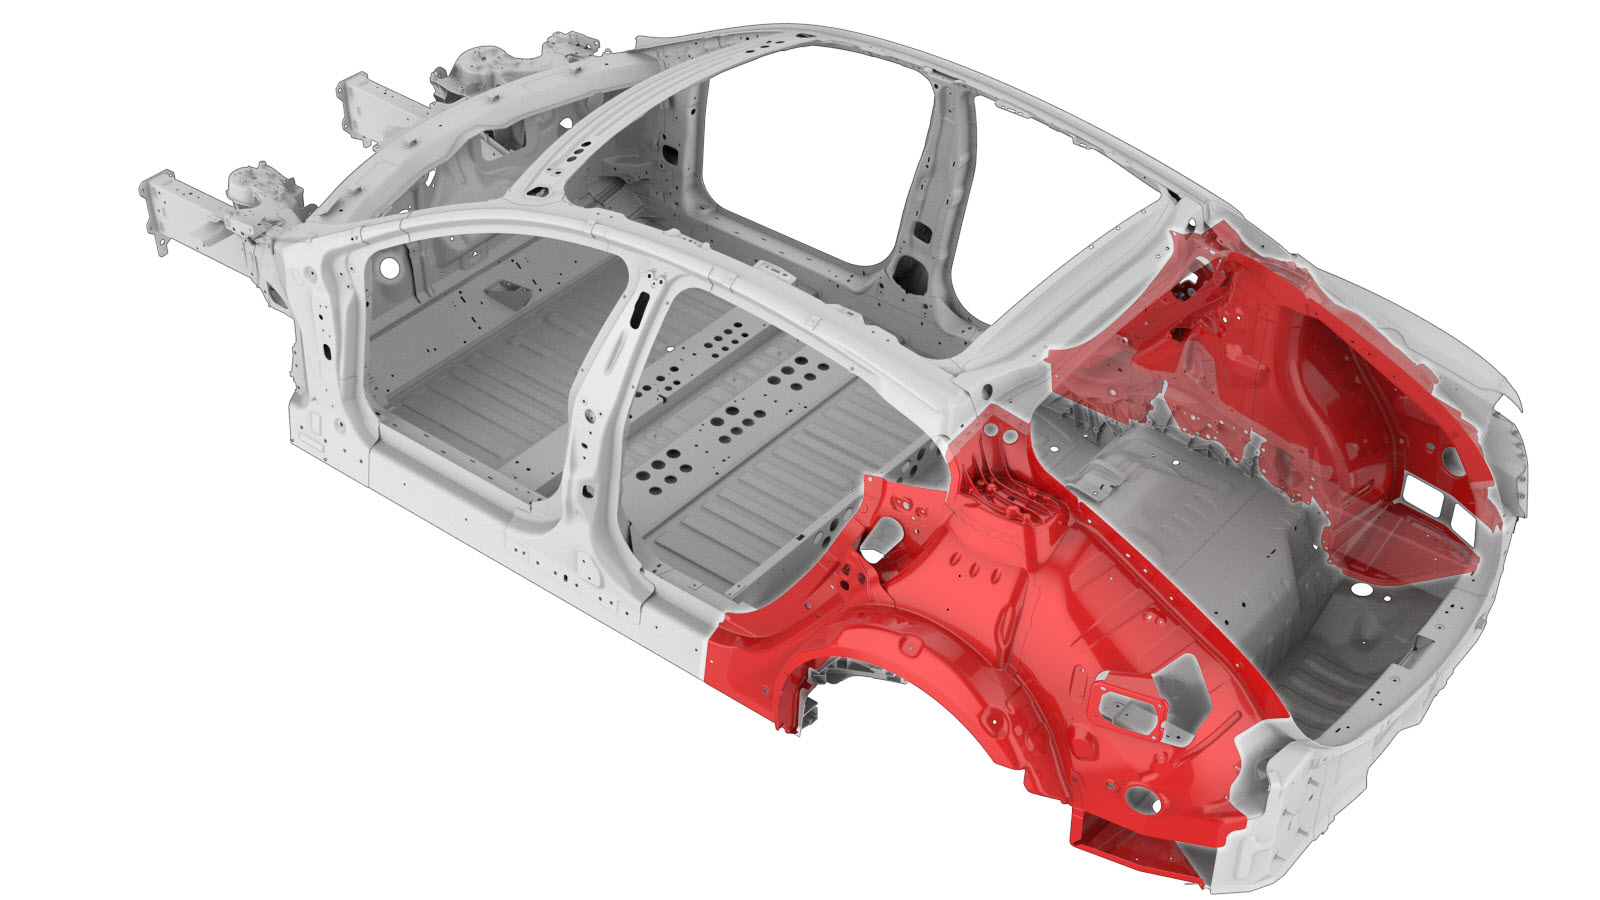
Quarter Inner Complete Assembly
 Correction code:
10101901502
10101901702
NOTE:
Unless explicitly stated in the procedure, the above
correction code includes all Collision Repair work required
to perform this procedure, including the linked Collision
Repair procedures. Do not stack Collision Repair
correction codes unless explicitly told to do
so. Add any associated mechanical procedures
needed to perform this procedure.
Repair Information
- Review all collision repair general practices and safety documentation and wear the appropriate PPE (Personal Protective Equipment) before beginning this procedure.
- Properly mount the vehicle on a frame bench when performing this procedure.
Parts List
| Quantity | Description | Image / Notes |
|---|---|---|
| 1 | ASSY - RR QTR INR COMP (Quarter Inner Complete Assembly) | |
| 18 | High Strength Structural Rivet, 6.5 mm | |
| 12 | Structural Bulb Rivet, 6.5 mm | |
| 2 | Structural Countersunk Rivet, 6.5 mm | |
| 2 | Structural Rivet, 6.5 mm Medium | |
| 2 | Structural Rivet, 6.5 mm Short | |
| 1 | Rivet, 4.8 mm | |
| 10 | Bolt , M8-1.25x27,[109],G0110,M | Tesla part number 1621820-00-A. |
| 2 | Bolt, Torx-head , PF M8x20 PC 98 ADH MAT | Tesla part number 1014747-00-B. |
When ordering parts, refer to the Parts Catalog and enter the VIN of the vehicle being repaired to find the correct parts (and the part numbers) for the vehicle. Alternatively, use the search function in the Parts Catalog to find a specific part for the vehicle.
Repair Procedure
-
Remove the necessary portion of the Body Side Outer (Vehicles Built Through February 17, 2022) to expose the underlying component being replaced.
-
Remove the original component.
-
Prepare to install C-Pillar Reinforcement to the Shock Tower.
or High Strength Structural Rivets, 6.5 mm
- A = 27 mm.
- B = 9 mm.
NoteSpace the rivets evenly, as shown. - Apply structural adhesive to the mating surfaces of the C-Pillar Reinforcement and the Shock Tower.
- Attach the C-Pillar Reinforcement to the Shock Tower.
-
Prepare for installation.
or High Strength Structural Rivets, 6.5 mm
or Structural Bulb Rivets, 6.5 mm- C = 96 mm.
- D = 12 mm.
or Structural Countersunk Rivets, 6.5 mm
or Structural Rivets, 6.5 mm Medium
or Structural Rivets, 6.5 mm Short
or Bolts
- Apply structural adhesive to the mating surfaces on the vehicle and the new component or components.
-
Install the new component or components.
Torque the hex head bolts to 24 Nm.
Torque the torx head bolts to 24 Nm.
-
Install the necessary portion of the Body Side Outer (Vehicles Built Through February 17, 2022) that was removed to expose the component being replaced.
- Perform any necessary post-repair operations.