2024-10-23

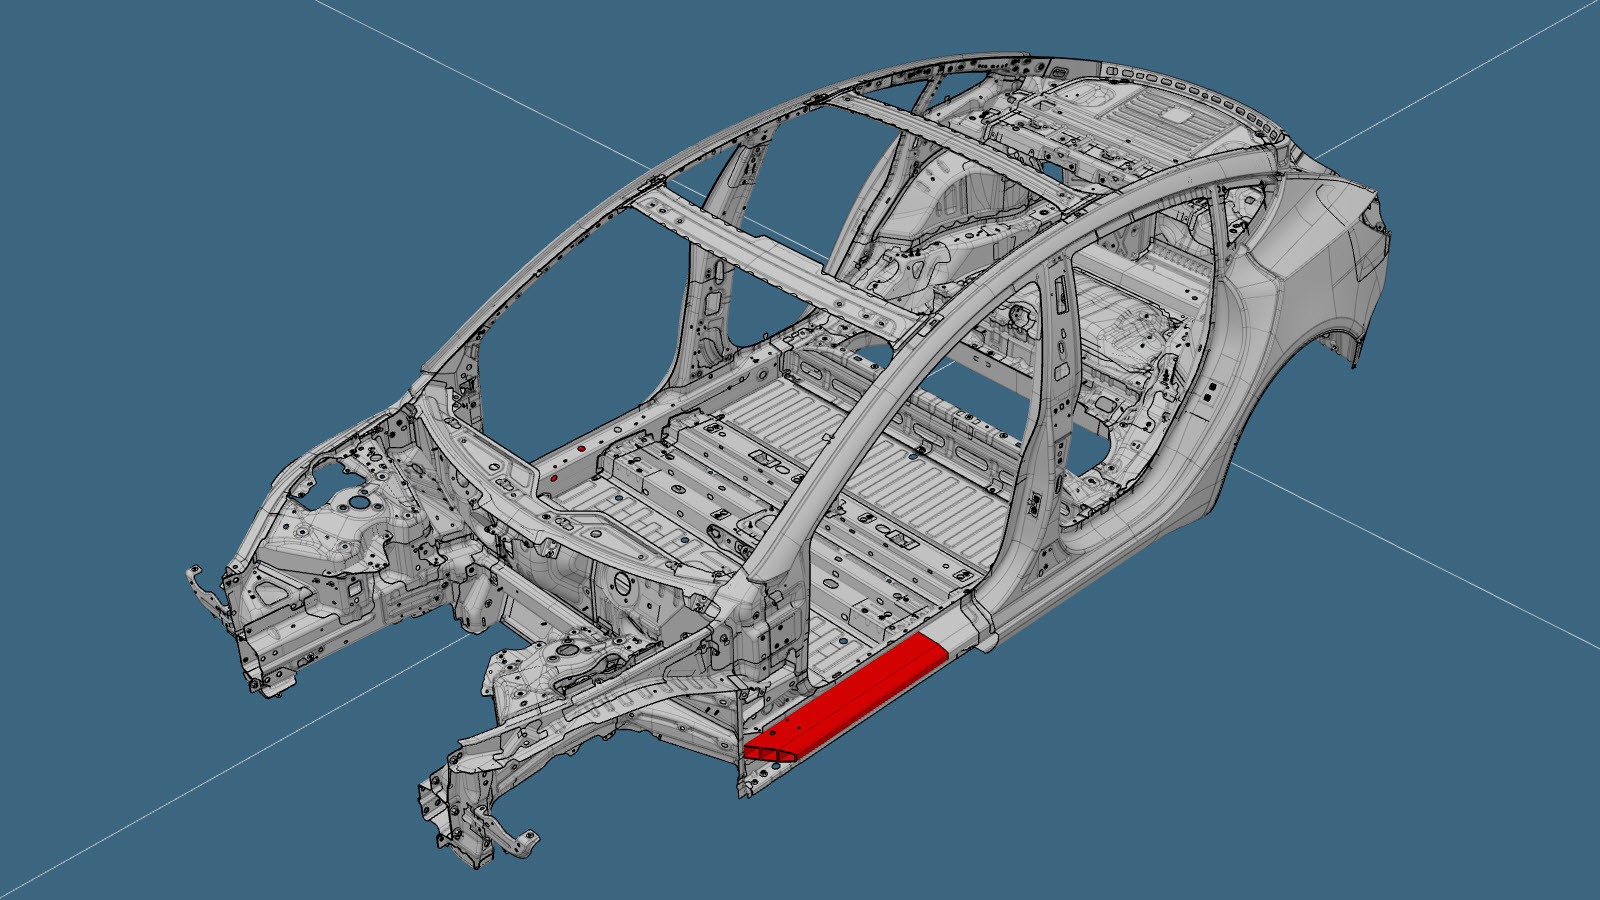
门槛插件(前区块)

Parts List

Quantity Description Image / Notes
1 SIDE SILL INSERT(侧门槛插件)
1 BRACKET-SILL INSERT MOUNT SERVICE(门槛插件安装支架)
1 焊接螺母 Tesla 零件号 1078311-00-A。
1 Model 3 前门槛插件区块套件
套件包括:
  • 电池 1 加固板插件 (x1)
  • 电池 2 加固板插件 (x1)
  • 电池 3 加固板插件板 (x2)
  • Bolt (x6)
  • SPAC Nut,M8x2.8-3.5,STL[10] (x6)
  • High Strength Structural Rivet, 6.5 mm (x8)
  • 焊接螺母,HF,PRJ,M8,[10],TEF (x1)

When ordering parts, refer to the Parts Catalog and enter the VIN of the vehicle being repaired to find the correct parts (and the part numbers) for the vehicle. Alternatively, use the search function in the Parts Catalog to find a specific part for the vehicle.

Repair Procedure

  1. 拆卸门槛外件(前区块)
  2. Cut the original component at the indicated locations.

    Cut Line

    Reference Line/Point

    • A = 186 mm

  3. Remove the original component.
  4. 在指定位置切割新组件。

    Cut Line

    Reference Line/Point

    • B = 645 mm
    • C = 738 mm
  5. 在门槛插件区块的指定位置标记门槛插件安装支架的安装位置。

    Reference Line/Point

    • D = 12 mm
    • E = 167 mm
    • F = 260 mm
  6. 利用已给的测量值在门槛插件安装支架上标记铆钉位置。

    High Strength Structural Rivet, 6.5 mm

    Reference Line/Point

    • G = 66 mm
    • H = 23 mm
  7. 在门槛插件安装支架和新门槛插件的接合面涂抹结构型粘合剂
  8. 将门槛插件安装支架安装到新门槛插件上
  9. 从门槛内件上拆下焊接螺母。
  10. 在门槛插件区块钻 8 毫米螺栓孔。
    Informational PurposesAn informational icon, calling your attention
    以外侧电池 3 加固板上的现有孔为参考,在车辆门槛插件部分钻 8 毫米螺栓通孔。
  11. 将电池 3 加固板插件板的一个孔扩大至 12 毫米,以便安装 SPAC 螺母。
    Informational PurposesAn informational icon, calling your attention
    SPAC 螺母将旋入安装在门槛插件内的加固板。
  12. 使用结构型粘合剂将 SPAC 螺母安装到电池 3 加固板插件板的扩大孔中。
    Informational PurposesAn informational icon, calling your attention
    请参阅安装新组件,了解如何将 SPAC 螺母安装到内侧加固板上。
    Informational PurposesAn informational icon, calling your attention
    粘合剂凝固后,检查内侧电池 3 加固板插件板上的 SPAC 螺母螺纹,并使用螺纹梳刀清理已干燥的粘合剂。
  13. Prepare for installation.
    • I = 114 mm

    Reference Line/Point

    Bolt
    Informational PurposesAn informational icon, calling your attention
    将外侧电池 3 加固板上现有孔作为参考,在车辆门槛插件部分为螺栓钻通 8 毫米孔(切勿损坏内侧电池 3 加固板上的 SPAC 螺母)。

    High Strength Structural Rivet, 6.5 mm

  14. Apply structural adhesive to the mating surfaces on the vehicle and the new component or components.
  15. Install the new component or components.
    Informational PurposesAn informational icon, calling your attention
    将这些螺栓拧紧至 25 Nm。
  16. 安装新的焊接螺母。
    GMA Weld
  17. Perform GMA welding.
    GMA Weld
    Warning IconA warning icon, calling your attention to a possibly risky situation
    警告
    Failure to follow all welding safety precautions, including the use of personal protective equipment, could result in serious injury or property damage. Only technicians who have completed Tesla’s approved welding training are authorized to weld structural components on Tesla vehicles.
    Warning IconA warning icon, calling your attention to a possibly risky situation
    警告
    To maintain vehicle crash integrity, use only approved welding wire and an approved GMA welder to perform GMA welding on Tesla vehicles. Refer to 已批准的气体保护金属极弧 (GMA) 焊接器和焊丝 for information on approved GMA welders and welding wire.
    Warning IconA warning icon, calling your attention to a possibly risky situation
    警告
    Do not weld on a Tesla vehicle before performing the Vehicle Electrical Isolation Procedure (refer to the vehicle-specific Service Manual for more information on the Vehicle Electrical Isolation Procedure). Welding on a Tesla vehicle with an energized high or low voltage system might damage vehicle components.
    Informational PurposesAn informational icon, calling your attention
    Before GMA welding, a test weld using material of the same gauge and type should be performed to make sure that the welding equipment settings produce a satisfactory joint.
  18. 安装新门槛外件(前区块)
  19. Perform any necessary post-repair operations.