2024-07-17

A 柱和 B 柱完整总成(2016 年 10 月 11 日后制造的车辆)
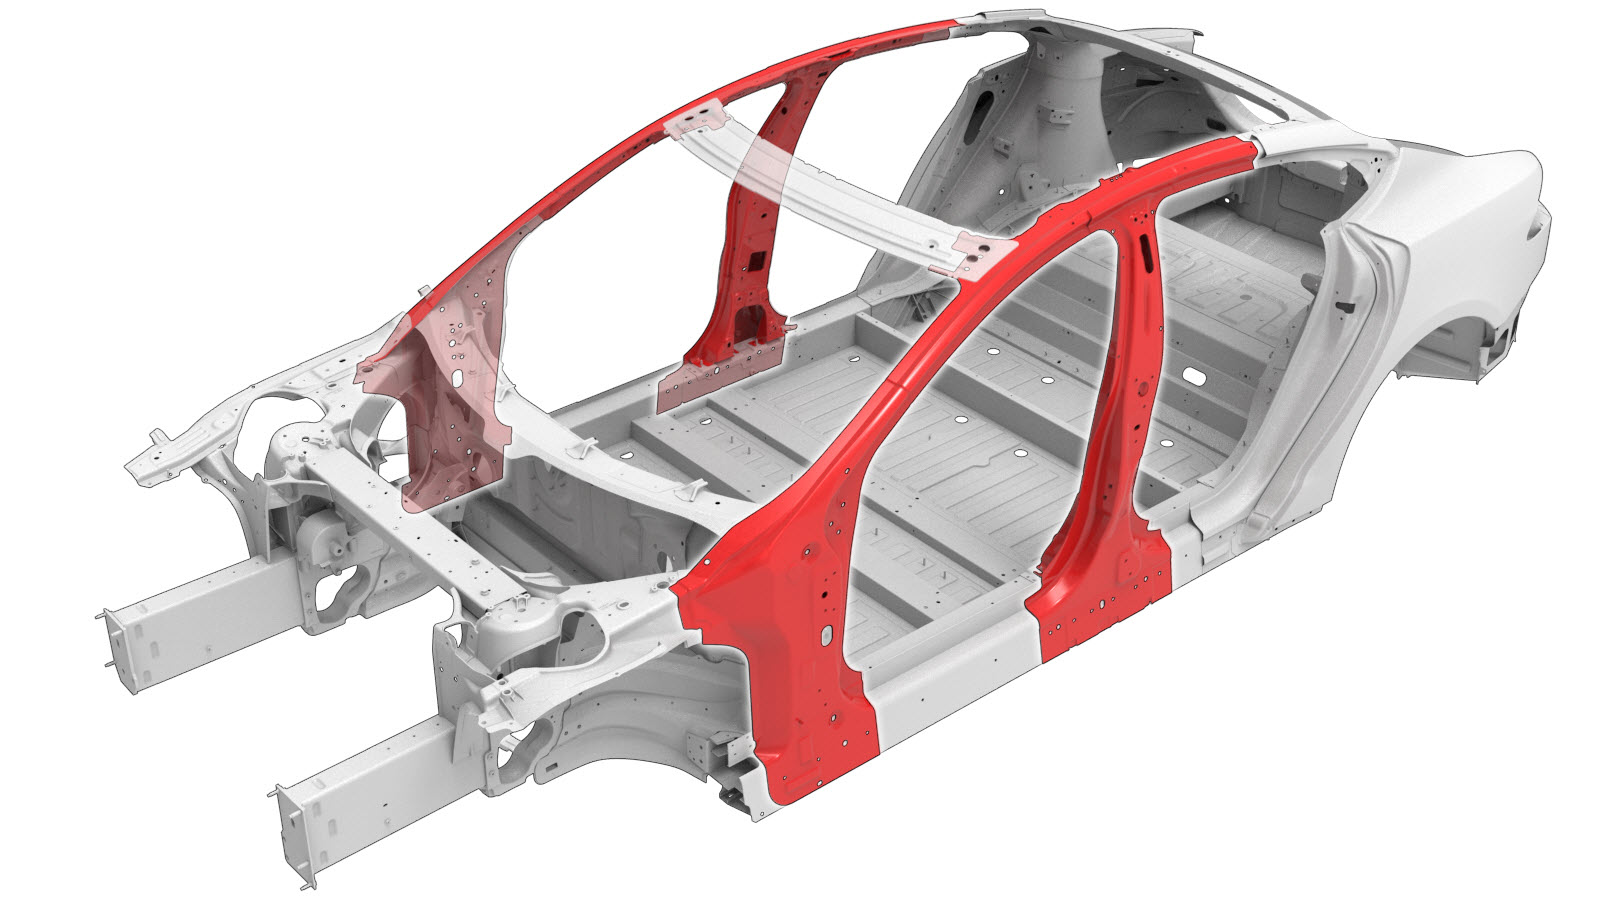
Parts List

Quantity Description Image / Notes
1 ASSY - A / B PILLAR COMP(A 柱和 B 柱完整总成)
10 Structural Rivet, 6.5 mm Medium
8 Flow Form Rivet S58
2 Flow Form Rivet S68
5 SPR,5x6 H4
2 SPR,5x8
2 SPR,5x9
2 Bolt, hex-head , BLT,HFLG,M10X22,[10.9]-MM-11 Tesla 零件号 1012961-00-A。
4 Nut , NUT HF M8 PC10 Tesla 零件号 1046842-00-A。

When ordering parts, refer to the Parts Catalog and enter the VIN of the vehicle being repaired to find the correct parts (and the part numbers) for the vehicle. Alternatively, use the search function in the Parts Catalog to find a specific part for the vehicle.

Repair Procedure

  1. 拆卸前排座位上部总成
  2. 拆卸前排座位外总成
  3. 拆下车身侧外件的必要部分,露出要更换的底层组件。
  4. 拆卸铰链柱总成
  5. Remove the original component.

    or Factory Spot Welds

    or Factory SPRs

    or Factory Structural Rivets

    or Bolts, hex-head

    Nut

    Cut Line
    Warning IconA warning icon, calling your attention to a possibly risky situation
    警告
    在拆下车顶纵梁外件的必要部分以露出下层接头时,切割车顶纵梁外件时切勿损坏车顶纵梁内侧。

    Reference Line/Point

    • A = 160 毫米。

    GMA Weld

  6. 按下方所示切割新的 A/B 柱完整总成,以制作新组件。
    Cut Line
    Warning IconA warning icon, calling your attention to a possibly risky situation
    警告
    切割车顶纵梁外件时,请勿损坏车顶纵梁内件。

    Reference Line/Point

    • B = 163 毫米。
  7. 在车顶行李架外件上安装衬垫板

    or Aluminum Plug Welds

  8. Prepare for installation.
    or Structural Flange Rivets, 6.5 mm
    or Structural Rivets, 6.5 mm Medium
    • C = 34 毫米。
    • D = 30 毫米。

    or Flow Form Rivets, S58

    or Flow Form Rivets, S68

    or SPRs, 5x6 H4
    Informational PurposesAn informational icon, calling your attention
    使用以下 Tesla SPR 模具安装此 SPR:FM 090 2120
    or SPRs, 5x8
    Informational PurposesAn informational icon, calling your attention
    使用以下 Tesla SPR 模具安装此 SPR:FM 090 2120
    or SPRs, 5x9
    Informational PurposesAn informational icon, calling your attention
    使用以下 Tesla SPR 模具安装此 SPR:FM 090 2120

    or Bolts, hex-head

    螺母

    GMA Weld

    or Aluminum Plug Welds

  9. Apply structural adhesive to the mating surfaces on the vehicle and the new component or components.
  10. Install the new component or components.
    将这些螺母和螺栓拧紧至 25 Nm。
  11. Perform GMA welding.
    GMA Weld
    Warning IconA warning icon, calling your attention to a possibly risky situation
    警告
    Failure to follow all welding safety precautions, including the use of personal protective equipment, could result in serious injury or property damage. Only technicians who have completed Tesla’s approved welding training are authorized to weld structural components on Tesla vehicles.
    Warning IconA warning icon, calling your attention to a possibly risky situation
    警告
    To maintain vehicle crash integrity, use only approved welding wire and an approved GMA welder to perform GMA welding on Tesla vehicles. Refer to 已批准的气体保护金属极弧 (GMA) 焊接器和焊丝 for information on approved GMA welders and welding wire.
    Warning IconA warning icon, calling your attention to a possibly risky situation
    警告
    Do not weld on a Tesla vehicle before performing the Vehicle Electrical Isolation Procedure (refer to the vehicle-specific Service Manual for more information on the Vehicle Electrical Isolation Procedure). Welding on a Tesla vehicle with an energized high or low voltage system might damage vehicle components.
    Informational PurposesAn informational icon, calling your attention
    Before GMA welding, a test weld using material of the same gauge and type should be performed to make sure that the welding equipment settings produce a satisfactory joint.
  12. 安装先前为更换组件而从 车身侧外件 拆下的部分。
  13. 安装前排座位外总成
  14. 安装前排座位上部总成
  15. Perform any necessary post-repair operations.