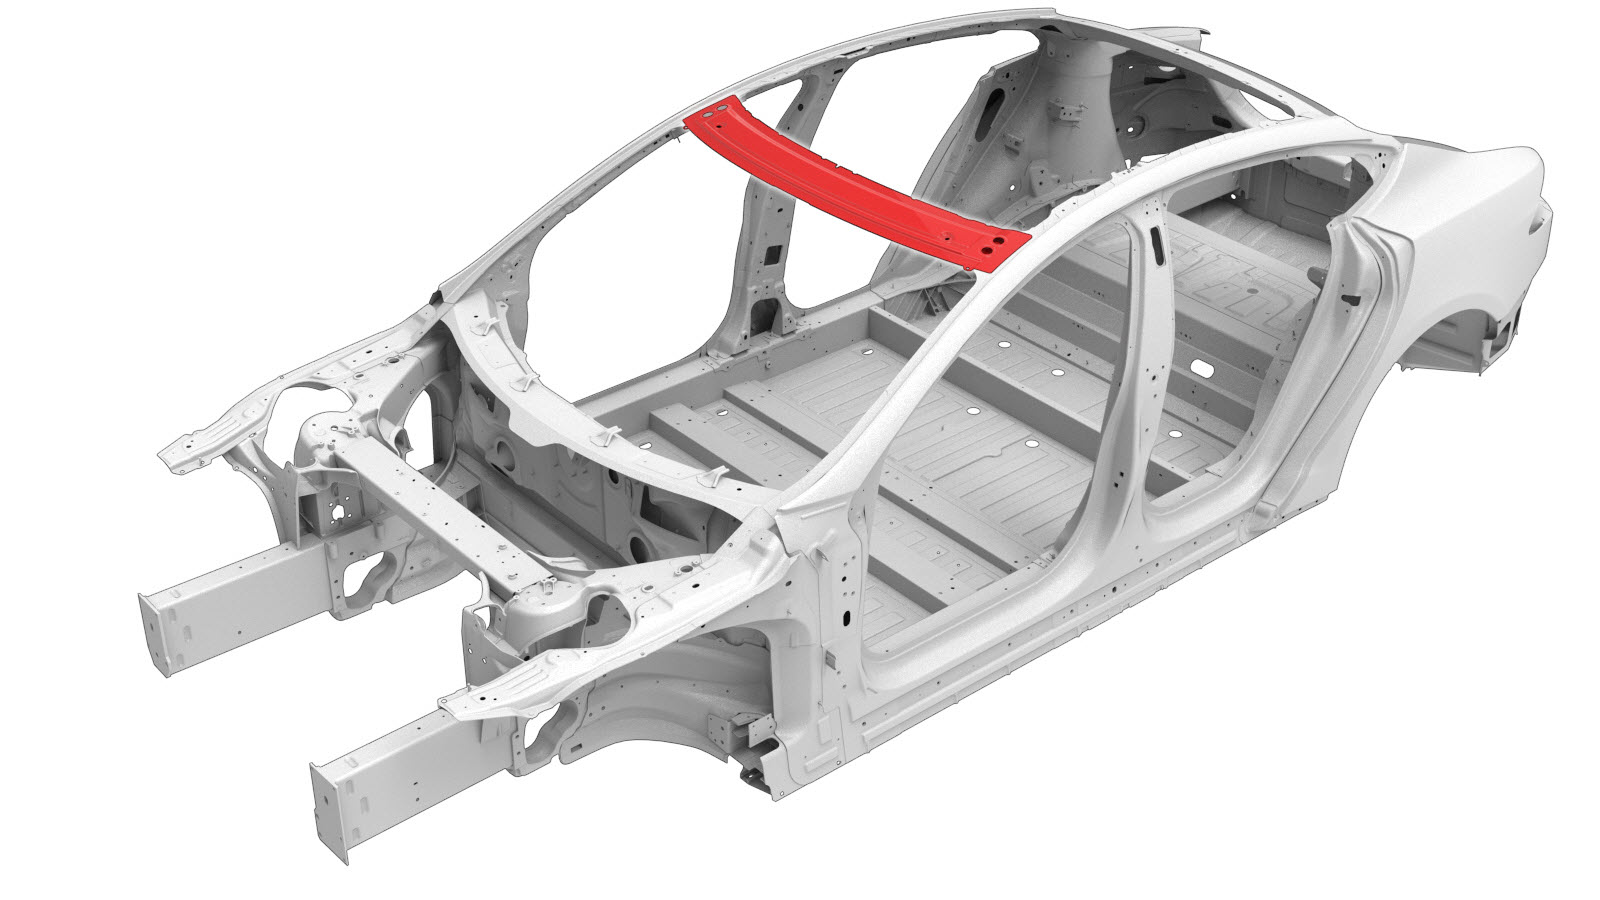
Front Header Assembly (Vehicles Built After October 2, 2016)
 Correction code:
10102704302
NOTE:
Unless explicitly stated in the procedure, the above
correction code includes all Collision Repair work required
to perform this procedure, including the linked Collision
Repair procedures. Do not stack Collision Repair
correction codes unless explicitly told to do
so. Add any associated mechanical procedures
needed to perform this procedure.
Repair Information
The Model S Front Header Assembly may be connected to the vehicle with either 1st Generation or 2nd Generation Header Connector Brackets. Examine the Header Connector Brackets on the vehicle being repaired and click the link below for the appropriate procedure to use for the repair:
|
Vehicles Built Through October 2, 2016 (1st Generation Header Connector Brackets)
|
Vehicles Built On or After October 3, 2016 (2nd Generation Header Connector Brackets)
|
|
If the vehicle being repaired has this type of Front Header Connector, do not continue this procedure; instead, proceed with the Front Header Assembly (Vehicles Built Through October 2, 2016) procedure. |
If the vehicle being repaired has this type of Front Header Connector, proceed with the this procedure. |
- Review all collision repair general practices and safety documentation and wear the appropriate PPE (Personal Protective Equipment) before beginning this procedure.
- This procedure can be completed without using a frame bench.
Parts List
| Quantity | Description | Image / Notes |
|---|---|---|
| 1 | ASY FR HEADER SVC (Front Header Assembly) | |
| 26 | Flow Form Rivet S58 | |
| 2 | Bolt, Panhead Flange , BLT PANFLG M8-1.25x16[9.8]-M-ZnAl | Tesla part number 1008586-00-B. |
When ordering parts, refer to the Parts Catalog and enter the VIN of the vehicle being repaired to find the correct parts (and the part numbers) for the vehicle. Alternatively, use the search function in the Parts Catalog to find a specific part for the vehicle.
Repair Procedure
-
Remove the component that covers the Front Header Assembly:
Depending on the vehicle build date, the component that covers the Front Header Assembly may be any of the following:
- Roof Assembly (refer to procedure)
- Roof Glass (refer to procedure)
- Panoramic Roof Assembly frame (refer to procedure)
-
Remove the original component.
or Factory Spot Welds
-
Prepare for installation.
-
Clamp the new component in
position, and use a tram gauge to make sure that the distance between the
trim holes on the Roof Header is 1198 mm.
- Apply structural adhesive to the mating surfaces on the vehicle and the new component or components.
-
Install the new component or components.
Torque the bolts to 50 Nm.
-
Install the component that was removed to provide access to the Front
Header Assembly:
- Roof Assembly (refer to procedure)
- Roof Glass (refer to procedure)
- Panoramic Roof Assembly frame (refer to procedure)
- Perform any necessary post-repair operations.