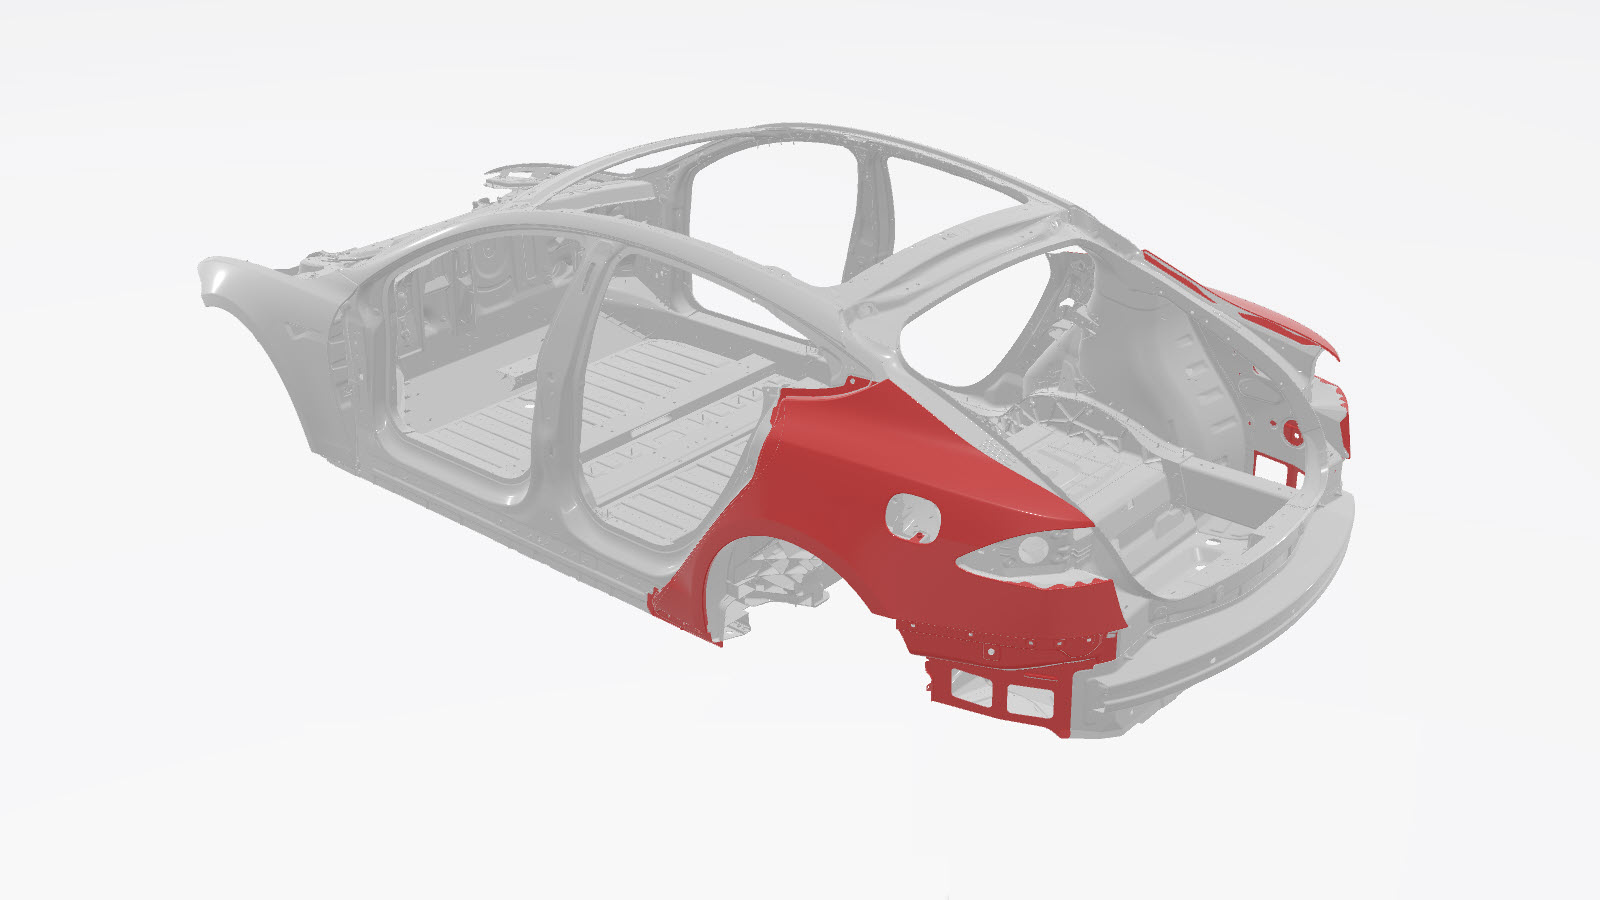
Quarter Outer Skin - China Charge Port Vehicles
 Correction code:
10100135202
10100135302
NOTE:
Unless explicitly stated in the procedure, the above
correction code includes all Collision Repair and Service
repair work required to perform this procedure, including
the linked Collision Repair procedures and linked Service
procedures. Do not stack Collision Repair correction
codes unless explicitly told to do so. Depending
on the damage to the vehicle, additional repairs may be
required.
Correction code:
10100135202
10100135302
NOTE:
Unless explicitly stated in the procedure, the above
correction code includes all Collision Repair and Service
repair work required to perform this procedure, including
the linked Collision Repair procedures and linked Service
procedures. Do not stack Collision Repair correction
codes unless explicitly told to do so. Depending
on the damage to the vehicle, additional repairs may be
required.
Repair Information
- The lower section of the Quarter Outer Skin can be replaced so long as the referenced cut line from the Quarter Outer Complete Section Descriptions portion of this document are used.
- Review all collision repair general practices and safety documentation and wear the appropriate PPE (Personal Protective Equipment) before beginning this procedure.
- This procedure can be completed without using a frame bench.
Parts List
| Quantity | Description | Image / Notes |
|---|---|---|
| 1 | ASSEMBLY - QUARTER OUTER CHINA GB CHARGE PORT (Quarter Outer Skin - China Charge Port Vehicles) | |
| 2 | Instapak (Expanding Foam Pack) | Tesla part number 1046403-00-A. |
| 1 | High Strength Structural Rivet, 6.5 mm | |
| 8 | Structural Bulb Rivet, 6.5 mm | |
| 10 | Rivet, 4.8 mm | |
| 32 | Countersunk Rivet, 4.8 mm Short | |
| 18 | Flow Form Rivet S08 | |
| 3 | Flow Form Rivet S18 | |
| 1 | Flow Form Rivet S28 | |
| 1 | Flow Form Rivet S38 |
When ordering parts, refer to the Parts Catalog and enter the VIN of the vehicle being repaired to find the correct parts (and the part numbers) for the vehicle. Alternatively, use the search function in the Parts Catalog to find a specific part for the vehicle.
Quarter Outer Skin Section Descriptions
| Quarter Outer Skin Sectioning | ||
|---|---|---|
| The Quarter Outer Skin (shown below) is a single component, and can be replaced as a single repair: | ||
|
|
||
|
Alternatively, instead of replacing the complete C-Pillar Reinforcement, the lower portion of the Quarter Outer Skin can be replaced using the cut line described in this document. |
||
|
|
||
| Quarter Outer Skin Sections |
| Quarter Outer Skin Section Descriptions | |
|---|---|
|
Lower Section Cut Line Reference Line/Point
Note
Create a backing plate
from the remaining portion of
the new component, and install it as indicated. GMA Weld or Aluminum Plug Welds |
|
Repair Procedure
- Remove the Door Assembly - Rear - LH (Remove and Install).
- Remove the Bumper Assembly - Rear (Remove and Replace).
- Remove the Seal - Body - Side - Rear - Primary - LH (Remove and Replace).
- Remove the Body Glass - Rear Quarter - LH (Remove and Install).
- Remove the Fascia Assembly - Rear (Remove and Install).
- Remove the MS ASY BRKT,WING LH (see the Service Manual).
- Remove the Air Extractor - Outer - LH (Remove and Replace).
- Remove the Wheel Arch Liner - Rear - LH (Remove and Replace).
- Remove the Molding - Rocker Panel - LH (Remove and Replace).
- Remove the Seal - Liftgate (Remove and Replace).
- Remove the Pad - Lifting - Each (Remove and Replace).
- LH Component only: Remove the Strut - Liftgate (Remove and Replace).
- RH Component only: Remove the Power Strut - Liftgate (Remove and Replace).
- Remove the Taillight Assembly - LH (Remove and Replace).
- LH Component only: Remove the Door Assembly - Charge Port (China) (Remove and Replace).
-
Remove unnecessary components from the service assembly.
-
Separate the rear wheel arch flange.
-
Remove the original component.
NoteIf replacing only a section of the Rear Quarter Outer: Remove only the fasteners in the section being removed.
or Factory Spot Welds
-
Prepare for installation.
NoteA red X indicates a location where a factory-installed fastener is not being replaced. Secure this location using structural adhesive only.
or High Strength Structural Rivets, 6.5 mm
or Structural Bulb Rivets, 6.5 mm
or Countersunk Rivets, 4.8 mm Short
or Rivets, 4.8 mm- A = 5 mm.
- B = 13 mm.
- Apply structural adhesive to the mating surfaces on the vehicle and the new component or components.
- Install the new component or components.
- Fold over the wheel arch flange.
-
If replacing a section of the Quarter
Outer Skin:
Perform GMA welding.
or Aluminum Plug Welds
GMA Weld
WarningFailure to follow all welding safety precautions, including the use of personal protective equipment, could result in serious injury or property damage. Only technicians who have completed Tesla’s approved welding training are authorized to weld structural components on Tesla vehicles.WarningTo maintain vehicle crash integrity, use only approved welding wire and an approved GMA welder to perform GMA welding on Tesla vehicles. Refer to Approved Gas Metal Arc (GMA) Welders and Welding Wire for information on approved GMA welders and welding wire.CAUTIONDo not weld on a Tesla vehicle before performing the Vehicle HV Disablement Procedure (refer to the vehicle-specific Service Manual for more information on the Vehicle HV Disablement Procedure). Welding on a Tesla vehicle with an energized high or low voltage system might damage vehicle components.NoteBefore GMA welding, a test weld using material of the same gauge and type should be performed to make sure that the welding equipment settings produce a satisfactory joint. -
Install Instapaks.
Install an Instapak into the cavity between the Quarter Outer Skin and the C-Pillar Reinforcement.
- Perform any necessary post-repair operations.
- LH Component only: Install the Door Assembly - Charge Port (China) (Remove and Replace).
- Install the Taillight Assembly - LH (Remove and Replace).
- RH Component only: Install the Power Strut - Liftgate (Remove and Replace).
- LH Component only: Install the Strut - Liftgate (Remove and Replace).
- Install the Pad - Lifting - Each (Remove and Replace).
- Install the Seal - Liftgate (Remove and Replace).
- Install the Molding - Rocker Panel - LH (Remove and Replace).
- Install the Wheel Arch Liner - Rear - LH (Remove and Replace).
- Install the Air Extractor - Outer - LH (Remove and Replace).
- Install the MS ASY BRKT,WING LH (see the Service Manual).
- Install the Fascia Assembly - Rear (Remove and Install).
- Install the Body Glass - Rear Quarter - LH (Remove and Install).
- Install the Seal - Body - Side - Rear - Primary - LH (Remove and Replace).
- Install the Bumper Assembly - Rear (Remove and Replace).
- Install the Door Assembly - Rear - LH (Remove and Install).